Ikaruga
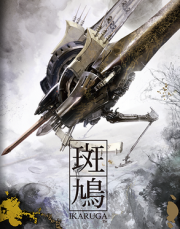
Box art (PS4, Switch)
| Developer: | Treasure Co., Ltd |
|---|---|
| Official site: | treasure-inc.co.jp |
| Music: | Hiroshi Iuchi |
| Program: | Hiroshi Iuchi Atsutomo Nakagawa Katsuyuki Fujita (G.rev) |
| Art: | Yasushi Suzuki |
| Release date: | 20 December 2001 [1] |
| Previous game: | Radiant Silvergun |
Ikaruga (JP: 斑鳩) is a vertical-scrolling shmup developed and published by Treasure in December 2001 for the Sega NAOMI arcade system. During development, the game was referred to as ‘Project RS-2’, owing to its predecessor Radiant Silvergun, and as such it is considered to be its spiritual sequel, even though the two games differ considerably in terms of mechanics and visual style. Ikaruga is famous for its polarity system: enemies and bullets are either black or white, while the player’s ship has the ability to switch between the two colours [2]. When asked about the inspiration for this game mechanic, game director Hiroshi Iuchi spoke of its connection with the defensive system of Sega Saturn’s game Shinrei Jusatsushi Taromaru [3], to which he contributed to some extent.
Ikaruga enjoyed critical and commercial success for the genre’s standards and over the years it has been ported to multiple home consoles (Sega Dreamcast, Nintendo GameCube and Switch, Xbox 360, PlayStation 4) and online platforms (NESiCAxLive and Steam), with varying features and fidelity to the original version.
In general, Ikaruga is considered to be a very methodical shooting game. It discourages an improvised playing style, instead placing emphasis on rigorous routing and execution at any level of play.
For replay videos, visit the Video Index.
Contents
Story
The storyline of Ikaruga is only hinted at in-game and is fleshed out on some of the ported versions (as a bonus feature to be unlocked [4]).
This is the prologue to the game:
   Sometime in the past, a woman esper named Hourai Tenro, ruler of the insular country of Hourai, unhearted a mysterious object from deep within the earth.  Known as the Stone-Like, the object seemed to have a god-like quality and emanated an enormous amount of energy. After fitting a restrictive device to it, she managed to harness its power and proceeded to storm and conquer other nations along with her followers, claiming to be the ‘Chosen Ones’ to unite all the countries in the name of peace. A resistance group known as the ‘Tenkaku’ attempted to fight back, but lost battle after battle until just one member survived, the strong-willed Shinra [Player 1].
   Refusing to back down, Shinra built a makeshift aircraft (‘Shirasagi’) and took off on a lone sortie against Hourai’s forces. He managed to make his way through the enemy troops until he was faced with the ‘Eboshidori’ Butsutekkai, piloted by Hourai’s general Asami. After a fierce battle, Shinra was ultimately defeated and crash landed on a remote village inhabited by exiled people - the Village of the Grosbeak (‘Ikaruga no Sato’). He was recovered from the wreckage and nursed back to health. Unwilling to live with regret, Shinra renewed his pledge to defeat Hourai, which moved the villagers to entrust him with a technological marvel - the only aircraft capable of switching polarity and absorbing bullets, built by former engineering genius Amanai and bearing the village’s name: Ikaruga. Thanks to the unique features of his new ship, Shinra was then able to fight general Asami’s Butsutekkai on equal terms, blocking his foray on the village and driving him away.
   Soon after, Shinra finds a comrade in Kagari [Player 2], a pilot of incredible resistance who originally fought for Hourai but changed side in the pursuit of freedom. A woman with a strong character, Kagari convinced Amanai to upgrade her ship, the Ginkei, to the same capabilities as the Ikaruga. After just a brief training period, the day comes for the two pilots to set off and confront Hourai Tenro’s forces...
Gameplay Overview
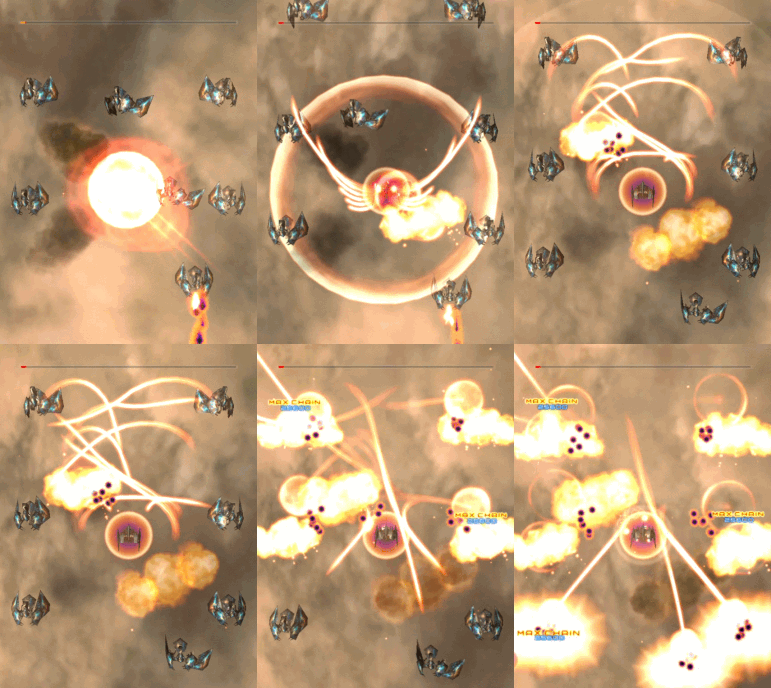
The gameplay of Ikaruga revolves around the black and white polarity system, which entails the following:
- the enemy's bullets are either black or white, with the player’s ship being able to switch between the two polarities: bullets of opposite colour will destroy it, while those of the same colour will be absorbed (charging up an Energy Bar)
- enemies are also black or white, suffering double damage when hit by opposite-polarity fire and releasing revenge bullets of the same colour once destroyed (depending on the game’s difficulty mode)
- enemies killed in sets of three of the same colour make a chain, which yields a varying amount of points up to a maximum value (‘Max Chain’)
In order to advance in the game, one has to get accustomed with switching polarity back and forth according to on-screen bullets, revenge bullets (if any) and, eventually, the polarity of the enemies (in order to deal more damage).
Although the ship has a small hitbox - which is typical of bullet-hell games - Ikaruga isn't generally associated with this sub-genre, often requiring mastery of the polarity system rather than bullet-dodging skills. The game also presents navigational challenges where the player must steer away from enemies and environmental hazards. In some sections, speedkilling specific sets of enemies can trigger 'bonus' ones to spawn, which potentially allows for more chains. There are no power-ups or items, nor a rank system (although losing a life in some sections causes them to get toned down a bit).
Controls
Ikaruga is generally played with a three-button setup: A for firing, B for changing polarity and C for releasing Energy. However, the Arcade version’s setup was designed to be two-button (the third one being optional), with the Energy release to be triggered with A+B.
Single Shot
Tapping the fire button will fire off a single shot. This shot type is used in order to take down specific enemies, which is often needed for chaining. A single shot deals a damage of 2HP to enemies of the same polarity (4HP if opposite) and can hit multiple enemies if they are close together.
Customized control set-ups may be equipped with an auto-fire button, allowing for a continuous single-shot stream which can be useful in some sections, since it has the same power as the double-shot but concentrated on a smaller area.
Double Shot
Holding the fire button down will fire off a double-shot stream. This is the main shot type of the game. Like for single shots, a full double-shot deals a damage of 2HP to enemies of the same polarity (4HP if opposite) and can hit multiple enemies if close together. The double-shot is made up of two independent projectiles: each can deal a damage of 1HP or 2HP to different enemies (based on polarity). In fact, when a double-shot hits a 2HP enemy of opposite polarity, only one projectile disappears (as opposed to both for an enemy of the same polarity), with the other carrying on forward - this is the reason why clusters of popcorn enemies are destroyed more quickly when shooting with the opposite polarity. Since popcorn enemies have a minimum of 2HP, it follows that a halved double-shot is not enough to take down an undamaged enemy of the same polarity. This can be relevant when shifting to the side, since the double-shot skew tends to disperse the firepower (see here for an example).
While firing with the double-shot, the front area of the ship can itself damage close-by enemies irrespective of the actual bullets making a connection (see here for an example). When point-blanking multiple enemies close together, this 'shot field' effect can bear damage that is additional to the double-shot, thus increasing the damage that can be inflicted on a single frame.
Another tidbit worth noting is that moving towards an enemy while it is being hit will speed up the collision of the bullets that are in between the ship and the enemy thus slightly increasing the damage per unit of time for a brief moment (the opposite applies when moving away from the enemy). This can be exploited during Boss fights or when firing to durable enemies.
Energy Release
When the Energy Bar is at least partially charged, pressing the relevant button(s) will trigger the Energy release, which consists of a varying number of homing lasers. The number goes from one to twelve, depending on the status of the Energy Bar (it is made up of twelve blocks, each one representing a laser and taking ten bullets to charge up). One laser inflicts as much damage as five single shots (i.e. 10HP to enemies of the same polarity). While the Energy release is generally efficient in terms of pursuing different targets and/or concentrating more damage on stronger foes, it is not a panic bomb: it does not necessarily wipe out all the enemies and since it does not confer any invulnerability, it can actually result in losing a life if the player changes polarity immediately after and is hit by revenge bullets (if any). It is, instead, a general use weapon which is often very useful as it allows to inflict serious damage to large enemies or Bosses, to take down ordinary enemies which are otherwise out of reach and, at higher levels of play, to rack up chains quickly.
The Energy release behaviour can be summarized as follows:
- the lasers are ejected stacked one on top of the other on each side of the ship (six on the left and six on the right for a full release) and their different placement has some bearing on their behaviour (for example, the upper lasers depart a bit earlier than the others and generally tend to hit their target only after turning around on their path)
- upon releasing, each laser targets an enemy which is on-screen at the given moment (if any). The release generally distributes damage to the various enemies and allots more lasers to stronger ones. If, due to the number and/or durability of the enemies, the release does not have the capacity to wipe them all out, it tends to concentrate more (or all) of the damage on portions of the screen and/or stronger enemies
- assuming on-screen enemies of equal durability, the lasers select their target based essentially on their proximity to the position of the release and the preferred path / screen-time of each laser in the given volley. In general, when releasing with a surrounded ship, the enemies that are immediately below or beside the ship will be taken down first, followed by the ones that are in front and finally those farther below
- if a targeted enemy is taken down or goes off-screen before being hit, its targeting laser will redirect to another enemy (generally, if it was on-screen when the release was executed) or otherwise it will fly off
- the lasers fly at a varying speed: they are slower when turning around and faster when going straight.
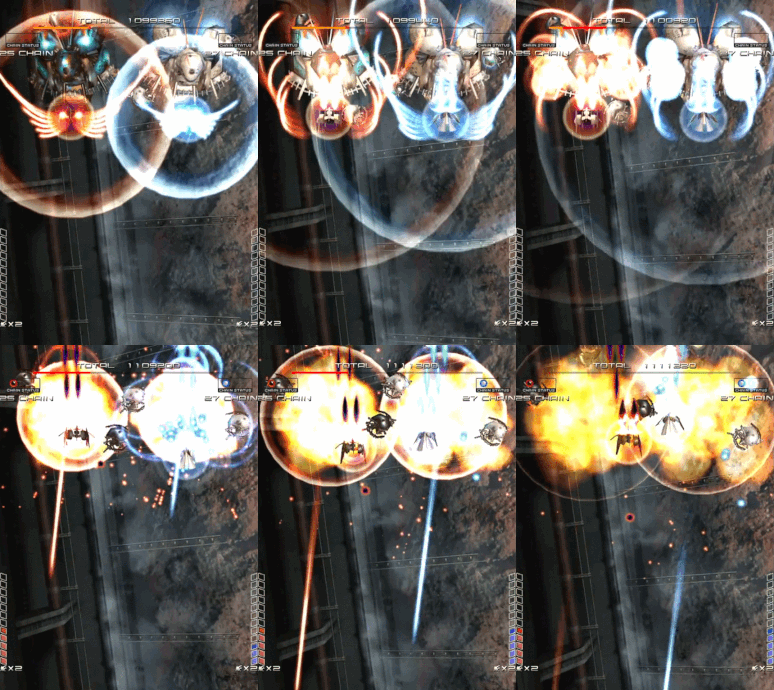
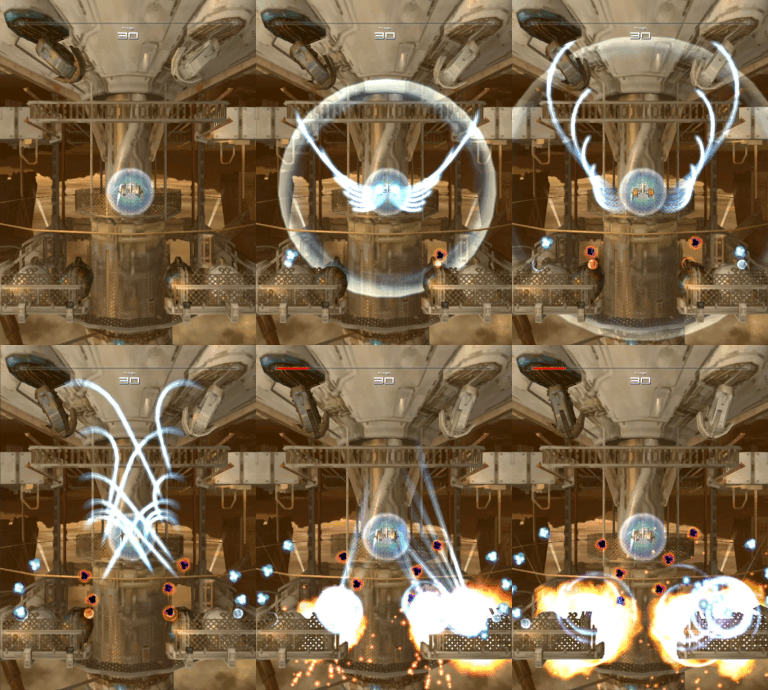
It is important to note that the Energy release has no regard for chain integrity: the lasers' behaviour is independent from the enemies' colour and chain status. On some occasions, the chain can be maintained while releasing on both black and white enemies, but that only comes as a by-product of the general behaviour rules as briefly descripted above. Since they are deterministic rules with no randomness involved, every given release will produce a consistent outcome if the necessary conditions are met. On the other hand, very slight inaccuracies can alter the outcome of the release considerably.

|

|

|
|
| The first example shows the desired outcome of the release (targeting of the black cannon on top and the two black turrets on the bottom), while the other three are ineffective releases due to different positioning. A very small shift to the right (second example) or below (third example) and below to the right (fourth example) all give different outcomes (difference highlighted here) | |||
More details on the Energy release mechanic can be found here (in japanese - provided by E.G.I.).
Game Modes
Difficulty Modes
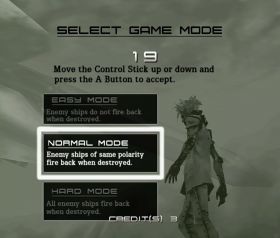
Ikaruga has three difficulty modes. The basic gameplay difference lies in the revenge bullets which are released when enemies are destroyed:
- Easy: enemies never release revenge bullets
- Normal: enemies of the same polarity as the last hit release revenge bullets. The number of revenge bullets depends on the enemy - the larger and more durable it is, the more the bullets it releases
- Hard: enemies always release revenge bullets. Enemies of the same polarity as the last hit release the same number of bullets as on Normal; enemies of the opposite polarity to the last hit release half the number of bullets (which also travel a bit more slowly).
There are also changes to some of the enemies' patterns and attacks, bullet patterns and Boss fights. With respect to Normal mode:
- on Easy, there may be less enemies in some sections (Chapter 3 and 4); enemies may shoot less bullets; bullet patterns may be different (Chapter 2); the Bosses may have less HP (Chapter 4 and 5) and their attacks may pose less of a threat (all Chapters)
- on Hard, enemies may shoot more bullets; the Bosses' attacks may pose more of a threat (all Chapters).
More details about some of these changes are provided in the Enemies and Bosses sections.
As a result of these differences, optimal strategies and scoring potential can change considerably across the various difficulties.
Prototype Mode
Beside the standard Arcade mode, every ported version of Ikaruga also features a ’Prototype’ mode, so called because it represents the game concept as originally designed by the developers [3].
This mode replaces the Energy Bar with an Energy stock, represented by a counter which can go up to 999. The stock is depleted by using the main shots (unlike on Arcade) or releasing Energy. Both of the main shot types take up 2 ammos each and Energy lasers require 10 ammos each (a full release is still twelve lasers i.e. 120 ammos). The initial stock depends on the difficulty (500 on Easy, 300 on Normal, 100 on Hard) and is replenished by absorbing bullets. Each absorbed bullet is worth 3 ammos, while sitting on a laser beam provides 3 ammos per frame. If the reserves are depleted, the ship can only inflict damage by point-blanking the enemies (thanks to the 'shot field' effect).
The implications of these changes vary depending on the difficulty mode:
- on Normal and Hard modes, the presence of revenge bullets easily guarantees large reserves of ammos and the limited Energy stock is not a real constraint. Actually, the opposite is true - since the stock can hold up to eight full releases, it is possible to launch multiple of them one after the other (unlike on Arcade mode, where the Energy Bar maxes out at one). The increased firepower is such that it can make fodder out of Main Bosses (see here for an example), and also allows for easier speedkills of standard enemies and generally more chaining opportunities (an exception being the few sections where optimal chaining strategies require small releases)
- on Easy mode, owing to the lack of revenge bullets, it is instead very frequent to run on low or even no reserves. This requires tailored strategies and a different play style altogether, where the stock must be rationed efficiently and point-blank shooting is often needed.
As a result of these factors, the scoring potential on Prototype mode is higher than on the corresponding difficulty on Arcade mode - considerably so on Normal and Hard, less so on Easy.
Others
Ikaruga can also be played on 2P mode. The two ships differ only visually and of course cannot overlap (otherwise they would be invulnerable to both white and black bullets while on different polarities). Gameplay-wise, there are no differences with respect to 1P mode with the exception of the first two Bosses having more HP. The scoring potential is much higher on 2P mode, due to the increased chaining and bullet eating opportunities on top of the higher Boss time bonus (assigned in full to both players) and Extend bonus which can be accomplished. Some versions allow for cooperative gaming over the internet or have an option for double-play with a single controller (for players who take up the challenge of controlling both ships solo).
It must also be noted that, while not representing a different mode, it is possible to finish the entire game on a single life without ever firing a bullet (on any actual game mode). The pacifist player receives a ‘Dot Eater’ rank on the stage breakdown.
Score system
Scoring in Ikaruga is mostly centered around chaining enemies based on their polarity, but there are a few other scoring elements in the game. They are all presented here, in order of importance:
- Chaining: taking down three enemies of the same polarity in a row makes a chain. Each following chain can be of the same or of opposite colour, and can be added immediately after or minutes away from the previous one: what matters is only that the enemies are killed in sets of three of the same colour. Every destructible enemy that appears in the game has a polarity and can be chained (with the only exception of the parts of which Main Bosses are made). The first chains give a varying amount of points, starting with a value of 100 points, then 200, 400 and so on, doubling each time up to 25600 (ninth chain and over). For every chain worth 25600 points, a robotic voice can be heard uttering either ‘Max Chain’, ‘Excellent’ or ‘Splendid’.
The chain is broken when the player fails to kill enemies in triples of the same colour or dies, and resets at the start of each stage. A max chain break costs a minimum of 204900 points (25600+204800-25500, i.e. chain dropped + 8 missed max chains - first 8 chains), assuming that another chain is restarted immediately after and no further enemy triples are missed out (which is almost never the case).
It follows that, in order to score more points, as many enemies as possible must be chained (which also implies going for quick kills in sections where time-based bonus enemies are spawned) and that the chain should be kept going for the entire stage. There are very few sections where anything other than elementary chaining can be left to improvisation - the game very much requires predetermined strategies to come up with good scores. These can of course be of a varying complexity, but even basic routes tend to give better results than on-the-fly chaining - Boss time bonus: during Boss fights there is a countdown timer (generally starting from 100 seconds) which stops when the Boss is defeated. Each remaining second is worth 10000 points, thus rewarding speedkills. Some Mid-bosses also give a time bonus (but if the Main Boss is not killed afterwards, the mid-boss bonus is lost)
- Extend bonus: Each life that is in stock at the end of the game is worth half a million points. The player’s life stock starts with two lives by default (game is over after dying three times) and extra lives can be gained by scoring (the first one after reaching three million points and the others after every five million, with the standard Extend conditions)
- Bullet eating: absorbing a single bullet gives 100 points, while sitting on a laser beam yields 100 points per frame (the uncommon homing shots fired off by some enemies are worth 500/1000 points). While this is a scoring element that is often neglected, absorbing bullets and lasers to the fullest extent possible can make the difference at high levels of play, once chaining has been mostly optimized
- Damaging enemies: killing or simply damaging enemies gives a small amount of points. Every HP removed is worth 10 points (though such a small increment rarely happens given that single shots and whole double-shots both take off at least 2HP from enemies). This is by far the least important scoring element and the player also has limited to no degree of control over it (since the enemies' HP are fixed, and chaining requires killing as many enemies as possible anyway). Still, it is possible to go after small hit-based score increments on the few idle moments during some Main Boss fights, by firing at supporting pods or protective covers.
Other than by extending the life stock, scoring does not affect the chance of survival/1CC in Ikaruga (as opposed to its ‘spiritual prequel’ Radiant Silvergun, which features upgradable weapons based on score). Still, the chaining mechanism is not simply a complement to the polarity system but very much a defining element of the game, which accounts for its peculiar enemy patterns and behaviours (enemies are often passive or even suicidal, and were also arranged so that it would be extremely difficult to tell what the “correct” path was for scoring [3]).
The player’s scoring performance is graded at the end of each stage, with ranks going from C to S++. Although the scoring potential varies considerably across modes and difficulties, the ranking thresholds are fixed. Except perhaps for the Final Chapter on Arcade Easy, the S++ rank can be achieved on every stage of every mode (in fact, it is often possible to score way higher than what it takes to get S++).
The table below shows, for each stage, the ranking thresholds in millions (C+ and C++ ranks omitted) and, for each difficulty on Arcade and Prototype modes (1P), the known (accomplished) max chains (please note that these two pieces of information are not related in any way and are presented on the same table only for formatting reasons).
Stage |
Ranking Thresholds | Max Chains | |||||||||||||
|---|---|---|---|---|---|---|---|---|---|---|---|---|---|---|---|
| Arcade | Prototype | ||||||||||||||
| B++ | A++ | S++ | Easy | Normal | Hard | Easy | Normal | Hard | |||||||
| Chapter 1 | |||||||||||||||
| Chapter 2 | |||||||||||||||
| Chapter 3 | |||||||||||||||
| Chapter 4 | |||||||||||||||
| Chapter 5 | |||||||||||||||
Stages
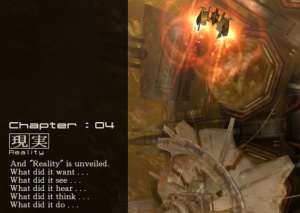
Ikaruga has five stages (actually called Chapters), with a full run through the game taking up about 25 minutes. Every stage features a short cutscene which displays the Chapter’s title and some related text and ends with a Boss fight, but they tend to vary significantly otherwise. To give some examples: Chapter 1 and 2 do not have a Mid-boss, while Chapter 3 has one and Chapter 4 has two; Chapter 3 is riddled with environmental hazards, while they play a minor role in most other stages; the Final Chapter is unique for ending with a Boss rush, then giving place to the Final Boss of the game - the Stone-Like.
The Chapters are presented below with the associated plot elements [4][5]:
| Chapter 1: Ideal After hearing about the unique capabilities of the Ikaruga, Hourai Tenro orders an expeditionary force under general Asami to destroy the aircraft while it is stationing inside its launching carrier, the Sword of Acala, but Shinra and his fellows are ready to fight back. Village elder Kazamori breaks the silence with some lines from an old poem: “I won't give up even if my Ideal isn't fulfilled. My will, just as my regrets, won't ever end. My comrades... it is time" | |
| Chapter 2: Trial The battlefield is the country of Agi, which fell under Hourai’s control after the ‘Buppousou’ Butsutekkai started targeting the civilians, forcing Agi’s leader to surrender and Shinra and his comrades to retreat. Going on a mission that will for sure be a Trial of his abilities, Shinra carries out a surprise attack on the occupation forces and infiltrates the military facility that is being built underground by the enemy troops.. | |
| Chapter 3: Faith After liberating the country of Agi, a war of attrition among the two parts was about to set in. In order to avoid the unfavourable scenario, Shinra pushes for a direct assault by crossing the border to the country of Hourai, but the elders are reluctant: a fortified ravine, considered impenetrable for its environmental hazards, stands in the way. Shinra’s unshakable Faith dispels their hesitations and prompts Amanai to prepare the Ikaruga for departure.. | |
| Chapter 4: Reality Clearing the ravine only revealed the extent of the quest that now lies before Shinra: he has to face the bulk of the Hourai army led by general Kira from his giant ‘Misago’ Butsutekkai. With tactical support from Amanai, Shinra targets the weak spots of the orbiting station one by one and finds his way to victory. Still, the drawn-out battle ends up taking a toll on him, as the Ikaruga interfaces directly with the pilot's body while accelerating the aging process. Shinra must now confront a harsh Reality - his mission might be nearing a point of no return.. | |
| Final Chapter: Metempsychosis Mustering all of his remaining strength, Shinra bursts into the enemy’s headquarters for the final battle. After overcoming the last line of defense, he is confronted by the mighty ‘Tageri’ Butsutekkai, piloted by Hourai Tenro. While the enemy flagship and the Ikaruga engage in a dance of death, Hourai tries to divert her opponent's resolve with words to no avail - Shinra is in the heat of the battle and in the midst of it all he's also hearing the voices of two spirit beings that appeared to him in his dreams. Alas, Shinra emerges victorious only to witness the golden glowing rock of the Stone-like ascending menacingly to the sky.. | |
| Epilogue: The Stone-Like After getting Amanai to deactivate the restraining devices of the Ikaruga, Shinra unleashes all the energy stored onboard, and meets his destiny just a moment before he can behold the Stone-Like explode. As his soul Transmigrates, the two spirit beings of his dreams manifest themselves.. Shinra: "Was that… the right thing to do?" |
Enemies
Most of the enemies and ships in Ikaruga are given names adapted from bird species (the few that do not fly have generic names) [6]. It is not uncommon for enemies in the game to pose only a mild threat (sometimes being just a collision hazard), with the actual challenge represented by chaining them instead.
The enemies are listed below in order of appearance, along with HP and revenge bullet information [7]. As a reference, the damage dealt by a single shot is 2-4HP and the one dealt by a full Energy release is 120-240HP (respectively, to enemies of the same and of opposite polarity).
Quick Reference Table
| Enemy name | HP | Revenge Bullets |
|---|---|---|
| Toratsugumi | 2 | 5 |
| Utatsugumi | 2 | 5 |
| Isuka | 2 | 5 |
| Renjaku | 10 | 7 |
| Misosazai | 20 | 10 |
| Toki | 20 | 20 |
| Torafuzuku | 120 | 50 |
| Ajisashi Main Body | 120 | 50 |
| Ajisashi Turret | 10 | 5 |
| Chougenbou | 240 | 150 |
| Chapter 2: Box | 20 | 10 |
| Chapter 2: Toratsugumi Generator | 8 | 10 |
| Chapter 2: Barricade | 8 | 5 |
| Chapter 3: Wall Cannon | 10 | 5 |
| Shigi Rotating Bits | 240 | 25 |
| Shigi Body (single half) | 400 | 25 |
| Chapter 4: 1st Midboss Cannon | 20 | 10 |
| Chapter 4: Rail Turret | 8 | 5 |
| Chapter 4: 2nd Midboss Multi-way Cannon | 120 | 50 |
| Chapter 4: 2nd Midboss Turret | 60 | 15 |
Enemies First Encountered in Chapter 1
| Utatsugumi 歌鶇(ウタツグミ), Song Thrush | |||
|
|||
|
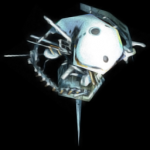
Shaped like (half of) a yin-and-yang symbol, these enemies appear in abundance in all stages. | |||
| Toratsugumi 虎鶇(トラツグミ), Scaly Thrush | |||

|
|||
|
Very small enemies that often appear in large groups. | |||
| Renjaku 連雀(レンジャク), Waxwing | |||

|
|||
|
Small enemies that often travel in sweeping dives down the screen. | |||
| Torafuzuku 虎斑木菟(トラフズク), Long-Eared Owl | |||

|
|||
|
Large and durable foes, Torafuzuku can either be stationary or move horizontally at a slow pace. | |||
| Ajisashi 鯵刺(アジサシ), Common Tern | |||
| Body | |||
|
|||
|
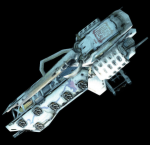
The Ajisashi are slow and large ships that move in linear patterns around the screen. | |||
| Turrets | |||
|
Each Turret counts as a separate enemy for chaining purposes. | |||
Enemies First Encountered in Chapter 2
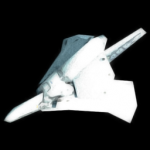
| Isuka 交喙(イスカ), Red Crossbill | |||
|
|||
|
Small enemy fighter craft. | |||
| Misosazai 鷦鷯(ミソサザイ), Eurasian Wren | |||

|
|||
|
'Satellite' type enemies that are found in fixed locations and do not move or rotate. | |||
| Boxes 箱 / ブロック | |||
|
Also referred to as crates, these enemies either stay fixed in place or slide along an axis. | |||
| Generators ジェネレーター | |||
|
These enemies are placed in pairs on the left and right side of the screen, one facing the other. | |||
| Barricades バリケード | |||
|
Barriers that block the way found in a single section of Chapter 2. | |||
Enemies First Encountered in Chapter 3
| Wall Cannons 前砲台 | |||
|
These enemies only appear once toward the end of the first section of Chapter 3. | |||
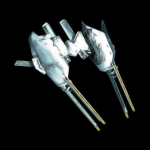
| Toki 朱鷺(トキ), Crested Ibis | |||
|
|||
|
Twin-tined midsize ships with moderate durability. | |||
| Shigi 鷸(シギ), Sandpiper | |||
| Body Half | |||
 
|
|||
|
Shigi is the Mid-boss of Chapter 3, made up of two Body Halves and four Rotating Bits of different polarity that can be chained. Both the beams swirling around with the rotating parts and the stream of alternating black and white bullets fired by the main body get more and more dangerous as other Bits and Halves are destroyed (also based on difficulty). | |||
| Rotating Bits | |||
|
Rotate around the main Body of Shigi while firing a continuous beam of the same colour. | |||
Enemies First Encountered in Chapter 4 *
| Rail Turrets レール砲台 | |||
|
These enemies only appear once toward the end of the third section of Chapter 4. | |||
Enemies First Encountered in Chapter 5
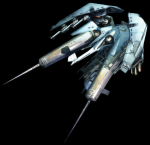
| Chougenbou 長元坊(チョウゲンボウ), Common Kestrel | |||
|
|||
|
Massive and highly durable enemies that move horizontally and fire a barrage of white bullets. | |||
* Enemies that are encountered as Chapter 4 Mid-bosses are described in the Boss section
** As noted among the version differences, in the Xbox 360 version of the game the Chougenbou have larger collision boxes,
which prevents optimal absorption and ultimately reduces the scoring potential of the Chapter
Bosses
Introduced by a warning sign at the end of each stage, the Main Bosses of Ikaruga are also named after bird species and are generically known as ‘Butsutekkai’ (仏鉄塊), which roughly translates to ‘iron Buddha’. The bosses are manned by enemy officials and generally pose multiple threats with their various attacks. They are often made of several parts to be destroyed or hit. These do not provide chains, with the exception of the few existing Mid-bosses - basically the two encountered on Chapter 4, which are the only ones that are embedded on the body of the Main Boss (Shigi is a unique, independent Mid-boss and the first two Bosses of the Final Chapter generally are not considered to be Mid-bosses, nor provide chains).
Down below is a table showing the Bosses' HP (which can vary with the game modes) [7], followed by a profile for each one with some basics. The Max Time Bonus numbers are based on the known best times accomplished on 1P Arcade mode (contingent on a specified Energy Bar status when entering the fight - if unspecified, the given time can be accomplished with an empty Bar). Unless otherwise noted in the description, the time limit for the Boss fights is 100 seconds.
Boss name |
1 Player |
2 Players | |||
|---|---|---|---|---|---|
Easy |
Normal-Hard |
Easy |
Normal-Hard | ||
Eboshidori |
1st form |
250 |
250 |
250 |
250 |
2nd form |
400 |
400 |
400 |
400 | |
3rd form |
1200 |
1200 |
1800 |
1800 | |
Bits |
240 |
240 |
240 |
240 | |
Buppousou |
Single weakspot |
600 |
600 |
900 |
900 |
Uzura |
Single segment |
120 |
120 |
120 |
120 |
Misago |
Gate |
80 |
80 |
80 |
80 |
Core |
600 |
800 |
600 |
800 | |
Tageri |
1st form (single head) |
400 |
600 |
400 |
600 |
2nd form (single head) |
600 |
800 |
600 |
800 | |
3rd form |
4000 |
6000 |
4000 |
6000 | |
| Chapter 1 Boss | |||
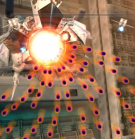
烏帽子鳥(エボシドリ), Turaco | |||
   | |||
|
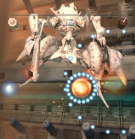
An old enemy of Shinra (its damaged helmet being due to their previous battles), Eboshidori attacks in three phases and is supported by two pods, each one shooting loosely aimed bullets of one polarity (with increasing intensity based on difficulty mode). While the pods can be destroyed, they are generally ignored in order to concentrate the damage on the Boss (still, they can be targeted - in order to gain a handful of extra points - whenever the Boss can't be damaged). | |||
| Chapter 2 Boss | |||
仏法僧(ブッポウソウ), Oriental dollarbird | |||
   | |||
(w/ full Energy Bar on Normal/Hard and approx. one-quarter Bar on Easy): | |||
|
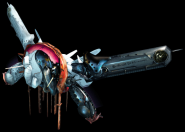
Buppousou has two weak spots protected by covers which cannot be destroyed but only opened up to a point. The left cover, which protects the white weak point, reacts to white shots; the opposite goes for the right one. Once a cover has been lowered it is possible to damage the corresponding weak point, but attention must always be paid to the cover since it will close up again (with increasing speed based on difficulty). The Boss shoots white bullets from the left side and black bullets from the right side and attacks in three ways: the first one consists of two streams of loosely aimed bullets (with increasing intensity based on difficulty) while the others are, in sequence, a few sets of expanding spirals of bullets and then thick barrages, which are great for quickly charging up the Energy Bar. | |||
| Chapter 3 Boss | |||
鶉(ウズラ), Japanese quail | |||
   | |||
|
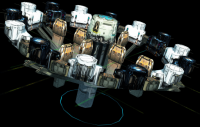
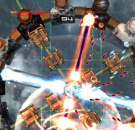
Uzura consists of 14 turrets (7 white and 7 black) arranged on a wheel around a core and 8 blocks forming a cross. The ring of turrets and the inner blocks rotate in different directions (which change mid-fight). The battle takes place inside this structure, with the turrets shooting bullets toward the center and the wheel rotating quicker and quicker (also based on difficulty) the more the turrets that are being destroyed (if the battle is drawn out, the rotation slows down again). After a certain number of turrets are disposed of (8 of different polarities or 7 of the same polarity), four laser beams are shot from the center, which can of course be absorbed to release Energy. The Boss is defeated when all the turrets have been taken down. | |||
| Chapter 4 Boss | |||
鶚(ミサゴ), Osprey | |||
     | |||
(2nd Midboss w/ half-full Energy Bar on Normal/Hard and full Bar on Easy - Main Boss w/ full Bar on Normal/Hard): | |||
|
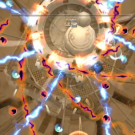
This battle appears to be against the upper core of the giant orbiting station, but the enemies to be defeated are actually the 12 cannons (6 black and 6 white, chainable) that are spawned on the rotating core and shoot slow disc-shaped bullets. The cannons start shooting about two seconds in, with the main threat represented by the black and white beams that swirl around, respectively, clockwise and counter-clockwise. The time limit for the fight is 45 seconds, but it is possible to end it in just about five seconds (the actual time required can vary slightly since, while the cannons arrangement is fixed, their place relative to the core is random). The optimal strategy involves starting from the top right side of the screen as white and shifting to the left while destroying the black cannons (switching polarity if needed), then releasing the Energy to kill all white ones together (since on Easy the core rotates more slowly, getting 41s requires releasing before having disposed of all the blacks). There are six enemies to take care of: two cannons of different polarity shooting radial bullets on top and four turrets (two white and two black) that fire arches of bullets on the bottom; all can be chained. The time limit for the fight is 30 seconds, but it is possible to destroy everything in 2-3 seconds, especially if some Energy is available when entering the fight. In order to do so, there are two main strategies: either releasing (as black or white depending on the available Energy) on the two black turrets in the center below and then absorbing the black cannon on the left, finishing it by means of a small black release and absorbing the revenge bullets to release again as black on the whites, or (but only if a full bar is available) releasing as white to take down the two black turrets and the black cannon, then absorbing the white cannon on the right and timely releasing as black (this is the optimal strat on Easy). The two methods require precise timing and positioning (see the 'release outcome GIFs' in the Energy release subsection for an example), but even sub-optimal strategies should dispose of this Boss very quickly - the one thing that should be avoided is getting trapped in the middle of the screen by the cannons' fire. The Main Boss is the lower core of Misago, which, along with the outer walls, is modelled after Rafflesia flowers. This fight takes place into a constricted space between the core and the walls, which hosts several dangerous little beams (each one of a single polarity on Easy, and alternating polarities on Normal and Hard). The walls and the core itself rotate: the latter starts counter-clockwise, but changes direction at the 75-second mark (when it also starts shooting six streams of bullets) and again later on. The weak point is the inner core in the center (of white polarity), which can be accessed by three entries, each one protected by four covers of alternating colour (once lowered, they stay in place). On Normal and Hard mode, after about ten seconds since all four covers of an entry have been lowered, the core shoots a big white beam, which pushes the ship back towards the external small beams. This is not the case on Easy, where the Boss also has less HP. The key to deal with this Boss quickly (especially on Normal and Hard) is to focus on opening up an entry before the rotation prevents from hitting the covers, triggering the Boss to shoot the white beam early on. Usually the resulting Energy is released as white as it is absorbed, but moving away from the beam for a moment and switching to black isn't exceedingly difficult (attention must always be paid to the external beams). By only releasing as white, the fight can end with about 75 remaining seconds (up to 80s if releasing as opposite colour). On Easy, an optimal execution requires absorbing the small beams as much as possible when the Boss can't be damaged by the main shot. | |||
| Final Chapter Boss | |||
田鳧(タゲリ), Northern lapwing | |||
     | |||
(1st Form w/ full Energy Bar on Normal/Hard and approx. half-Bar on Easy - 2nd Form w/ full Bar on all modes): | |||
|
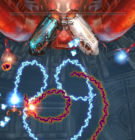
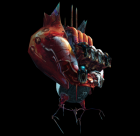
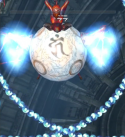
Generally known as ‘the grid’, due to the shape formed by the intersecting white and black bullets fired by the ‘hands’ on the sides. The time limit for the fight is 80 seconds. In order to destroy the 4 heads on top (2 black and 2 white), it is necessary to move across the grid by aptly changing polarity and dodging the random bullets shot by the main body (with increasing intensity based on difficulty). The heads themselves also fire homing shots at fixed intervals. There isn’t a specific order in which to take down the heads that gives an optimal result, but frequently shifting fire from one head to another should be avoided. It is recommended to get to the battle with as much Energy as possible to release right away, and also to finish off with a full or near-full Bar to be used in the following battle. On Hard, it is possible (based on random bullets absorption) to end the battle one second earlier than Normal, due to the larger amount of bullets thrown at the player (and the resulting quicker charging of the Energy Bar). On Easy the heads have less HP, thus the sensibly higher max time bonus. Generally known as ‘the snakes’, the time limit is again 80 seconds. This time the heads to be destroyed are two (but they are more durable) and the main threat are two indestructible hooks that go after the ship and leave a trail behind (one white, the other black). The trails stay on-screen for about 6-7 seconds (unless absorbed first) and each hook goes off-screen every 9-10 seconds to be immediately replaced by another. There are still ‘hands’ on the sides, which shoot somewhat-random bullets (with increasing intensity based on difficulty) starting from about 8 seconds in. There are well-established strats for this Boss but, due to the high responsiveness of the hooks to the position of the ship and the lack of reference points, a consistently optimal execution might be difficult. In general, beside getting to the fight with a full Bar to release on a head right away, it is recommended to absorb the trails as much as possible and to concentrate the damage on one head before switching to the other (so as not to waste time shifting from side to side). Since the 'white' hook is spawned significantly later than the 'black' one, the white head is usually targeted first (because as black it will receive twice the damage, and in the meanwhile it will be possible to absorb the one trail available). When both hooks are out and in pursuit of the ship, the most basic strategy for survival involves moving in circles around the screen. When a head is destroyed, all the hooks and trails disappear. On Easy the heads have less HP, thus the sensibly higher max time bonus. The final form is what generally is referred to with just ‘Tageri’. This Boss is by far the most durable of the game and it is the only one capable of switching polarity. Also, it has to be dealt with differently than the others in order to maximize scoring. The time limit is still 80 seconds. After greeting the player with two arches of white bullets, Tageri starts releasing volleys of twelve homing lasers with a frequency of about one per second, which have alternating polarities. This attack cannot be dodged, therefore the player has to switch polarity in tune with the lasers. The ‘hands’ are still there on the sides, shooting random bullets. At around the 60-second mark, Tageri starts shooting a curtain of bullets coming in waves of alternating polarity. These are synchronized to be of the same polarity as the homing lasers when they both reach the ship, allowing the player to navigate through them while keeping on switching polarity to absorb the lasers. The combined points from absorbing the lasers and the bullets exceed 10000 per second, which makes it worth to milk the Boss to the last second instead of going for a speedkill. This is especially the case on Hard, where at around the 50-second mark the frequency of the lasers increases dramatically to about a volley per half a second, making for an extremely intense fight - there is next to no margin for error in terms of both timing and movement. On Normal and Easy, it might be possible to further optimize scoring by staying on the top part of the screen and absorbing the bullet waves almost entirely while shifting left and right, but note that this is extremely difficult and no one has managed it yet for the entire duration of the fight. If the Boss is milked until the last possible moment, it is very important to avoid timing out, since that would cause the loss of the Boss time bonus accumulated on the two previous Boss fights. In any case, and differently from all the other Bosses, Tageri will explode at the end (for plot reasons). | |||
Version differences
| Version | Physical | Tate option | Prototype mode | Practice mode (1) | Online features | Bonus features (2) | Energy Bar Layout | Chain Count | Translations | Port fidelity | Misc |
|---|---|---|---|---|---|---|---|---|---|---|---|
| NAOMI (2001) |
Yes, JP only | Yes, no yoko | No | No, Trial mode only (first two stages w/ unlimited lives) | No | No | Horizontal only | No | - | - | Very pronounced slowdowns in some sections |
| Dreamcast (2002) [8] |
Yes, JP only | Yes | Yes | Yes, stage select | No | Yes (3) | Both (based on yoko/tate) | Yes (on VMU) | - | Highest | Only port w/ slowdowns (more faithful on tate) |
| GameCube (2003) |
Yes, JP-US-EU | Yes | Yes | Yes, stage and section select (Conquest mode) | Dedicated website w/ leaderboards (no longer supported) | Yes | Both (based on yoko/tate) | Yes (press Z button) | No (4) | JP-US: High (9) EU: Low (50Hz, interlaced only, Ch1 boss inaccuracy (5)) |
Demo videos and slow motion practice on Conquest mode |
| Xbox 360 (2008) |
No | Yes | Yes | Yes, stage select | Yes (leaderboards, replay download, 2P co-op) | No | Both (user choice) | Yes | Yes (partial) | Lowest (several inaccuracies (6)) | Analog support. HD graphics and achievements * |
| NESiCAxLive (2013) |
No | Yes | Yes | Yes, stage select | ?? | ?? | ?? | Yes | - | High (7) | Short camera movement on Ch1 and Final Boss fights * |
| Steam (2014) [9] |
No | Yes | Yes | Yes, stage select (8) | Yes (leaderboards, replay download) | Yes | Both (user choice) | Yes | Yes (partial) | High (9) | Double-play option, additional settings * |
| PS4, Switch (2018) |
Yes, JP-US (2020) | Yes | Yes | Yes, stage select (8) | Yes (leaderboards, replay download) | Yes | Both (user choice) | Yes | Yes (partial) | High (9) | Ports of the Steam version |
   1. If featured, generally has to be unlocked on a per stage, per difficulty basis (the requirement is getting to the given stage without using continues)
   2. If present, generally have to be unlocked by fulfilling certain scoring or time requirements. They essentially consist in galleries and soundtracks.
      The relative game menu label can vary (for example, it is ‘Appendix’ on the DC and Steam versions and ‘Extras’ on the GC version)
   3. Also include four wallpapers and a ‘Prologue’ text file which further expands on the game's backstory (in japanese) [4]
      (can be accessed by inserting the gd-rom into a computer disc drive)
   4. The GameCube version completely omitted almost all of the text from the in-game stage transitions and Extras menus rather than translate it.
      The Extras images with character and story information were simply left blank (and this change has been carried over to newer ports).
      However, for later ports after the GameCube release the story text during gameplay and stage transitions was fully translated (with mixed results) [5]
   5. On the last phase of the Boss, the Energy release targets the supporting pods instead of the Boss, which makes the optimal strategy non-viable
   6. Known main differences are: the Chapter 2 Boss can be damaged before covers are closed, the Rotating Bits of Shigi spin the opposite way,
      Chapter 3 bonus enemies' pattern is altered making them much easier to chain, the Chougenbou (massive enemies found on the Final Chapter)
      cannot be approached up close thus precluding optimal absorption and scoring
   7. Based on the few gameplay videos available. According to the japanese Wikipedia article on the game, after the latest patches the NESiCA version
      can be described as a "Steam version playable on a NESiCA system"
   8. Stone-Like (Final Boss) not playable on Practice mode. No restart option on this mode (or any other mode)
   9. There are a few minor gameplay differences with respect to the Arcade version, all of them mostly inconsequential. According to recent findings yet to
      be properly documented, the GameCube version appears to have very slight discrepancies in the final section of Chapter 3 (regarding enemy spawning and
      duration of the last, so-called 'bunretsu' section)

   * Feature(s) shared by later versions. Related differences:
   The game's resolution is up to 720p on the Xbox 360, up to 1080p on Switch and up to 4K on Steam and PS4 Pro
   There are 12 achievements on the Xbox 360 and 25 achievements on the Steam, PS4 and Switch versions
   The Steam version has additional ‘Quality’ settings (AA, texture filtering, pixel lighting). This video shows the settings in common
Trivia
Ikaruga contains several buddhist references. Some were pointed out in the above sections - the other ones are listed below:
- ‘Ikaruga’ (斑鳩町) is also the name of a town in the prefecture of Nara, where Buddhism was first introduced in Japan
- the carrier from where the Ikaruga is launched at the start of the game is called ‘Sword of Acala’, where ‘Acala’ refers to one of the buddhist kings of wisdom;
- the Boss warning that appears at the end of each Chapter bears a passage in Sanskrit written in Siddham script, which represents a spell that grants safety from dangerous situations (the same Siddham characters also appear on the control device fitted on the Stone-Like)
- the name of the Chapter 2 Boss, ‘Buppousou’ (仏法僧), also stands for the Buddha, its teachings, and the monastic order of Buddhism (known as the Three Jewels). This Boss is also notable for having a yin-and-yang symbol carved on its main body
- the Final Chapter of the game is titled ‘Metempsychosis’, which is a greek term referring to the transmigration of the soul, a central buddhist tenet. While all the Chapter’s titles are linked to events related to the game’s story, some have taken them to represent the path towards enlightenment followed by the main character in the game.
The full name of Ikaruga’s Final Boss is ‘Ubusunagami Oukinokai’ (産土神黄輝ノ塊, roughly translated as ‘Golden-Glowing Stone of the Birthplace Deity’). It is clearly the same Final Boss as that of Radiant Silvergun, the ‘Stone-Like object’. In RSG, the Stone-Like is the earth's ‘guardian’, which judges mankind to unfathomable standards: once humanity derails too much from them, it resets the world, wiping out everyone and allowing some human clones to start populating the earth again, in an endless loop. In Ikaruga, the Final Boss does not have any characterization, and while some believe it to have the same role as in its prequel, others think that it is entirely controlled and exploited by humans, in accordance with the game's main theme (which is about the entirely human struggle of reaching a peaceful coexistence through mutual understanding).
An officially licensed demonstration video disc titled ‘Ikaruga Appreciate DVD’ was published by MCS on April 25, 2003, showcasing advanced scoring strategies[10]. The DVD includes one playthrough on each of the three difficulty modes played on the original Naomi version of the game:
- Easy: 32,178,600 played by ISO
- Normal: 35,759,960 played by T³-CYR-WIZ
- Hard: 34,289,970 played by Yusemi SWY
Following the GameCube release of the game, a scoring competition was launched by the publisher (Infogrames, under the Atari label). Known as the ‘Ikaruga Net Ranking’ contest, it ran for about three months, during which players from all over the world could submit scores to a dedicated website. The legitimacy of the scores was ensured by the inclusion of a dedicated ‘Challenge’ mode on the GC version, which assigned a unique 12-digit code to every score achieved (on 1P Normal Arcade and Prototype modes): this code had to be entered on the website for the score to be submitted. The players with the five highest scores on each mode at the end of the contest received an official Atari trophy. After the official website went down, a few dedicated players managed to crack the code and implemented the feature on unofficial scoreboards hosted on the ‘Ikaruga.co.uk’ website, which remained the point of reference for the western community of Ikaruga for several years.
Notes and references
- ↑ Treasure's founder Masato Maegawa Interview (last paragraph). Full production credits can be found on the 'Sega Retro' website
- ↑ It is worth noting that Ikaruga isn't the first ever shmup to implement a polarity system, since it was preceded by the arcade-only title Great Mahou Daisakusen
- ↑ 3.0 3.1 3.2 Game director Hiroshi Iuchi Interview
- ↑ 4.0 4.1 4.2 A transcript in orginal language of the 'Prologue' text file stored in the DC's gd-rom and of the other bonus descriptions can be found here, while an english translation is available in the ‘Extras’ section of PBSaffran’s comprehensive guide to the game
- ↑ 5.0 5.1 An alternative translation for the stage transitions is available on this image, while transcripts can be found here
- ↑ As for the player's ships, ‘ikaruga’ - or generally, just ‘ikaru’ (イカル) - refers to the japanese grosbeak (a flock of which can be seen flying around during the game's end credits), while 'ginkei' (ギンケイ) is a species of pheasant
- ↑ 7.0 7.1 Provided by E.G.I. on Twitter, 26 October 2020
- ↑ Announcement of the Dreamcast version and interview for the release (in japanese)
- ↑ Announcement of the Steam version and interview for the release (in japanese)
- ↑ Find the product page on the publisher's website here. The trailer for the ‘Ikaruga Appreciate DVD’ can be watched here
Article written by XER, MAZ, Softdrink, Plasmo, powerfuran
