Espgaluda II
Title screen
| Developer: | CAVE |
|---|---|
| Music: | Manabu Namiki Mitsuhiro Kaneda |
| Program: | Tsuneki Ikeda Takashi Ichimura Yuji Inoue |
| Art: | Masaki Hirooka Hideki Nomura Toshiyuki Kuroiwa |
| Release date: | Arcade: November 25, 2005 Xbox 360: February 25, 2010 Switch: September 9, 2021 |
| Previous game: | Ibara |
| Next game: | Ibara Kuro: Black Label |
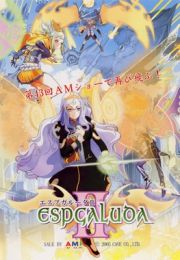
Espgaluda II (エスプガルーダII) is a bullet hell shoot'em up originally released by Cave in the arcades in 2005 as a sequel to Espgaluda. An Xbox 360 release, titled Espgaluda II Black Label, was released in 2010 in Japan.
For replay videos, visit the Video Index.
Contents
- 1 Gameplay Overview
- 2 Arcade mode
- 3 Enemy data
- 4 References
Gameplay Overview
Controls
Upon starting the game on the original arcade release, you can select between two control schemes:
| Button | Type A | Type B |
|---|---|---|
| A | Shot | Shot |
| B | Kakusei | Kakusei |
| C | Guard Barrier | Autofire |
| D | Autofire | Guard Barrier |
- Shot - Repeatedly tap for rapid shot, hold for focus shot (officially named "Rapier")
- Kakusei - Tap to toggle Kakusei mode on or off, amongst others.
- Guard Barrier - Tap to fire your Guard Barrier attack, similar to a bomb in other shmups. Or, hold the button to charge it, then release to fire.
- Autofire - Simulates repeatedly tapping A for rapid shot.
In the home ports, these buttons are all customizable.
User Interface
Playable characters
| Character | Shot type | Damage increase during Kakusei+others | Overall movement speed | Notes | |
|---|---|---|---|---|---|
| Ageha | Narrow | Focus shot | Fast | Rapid shot bends side to side | |
| Tateha | Wide | Rapid shot | Slow | Focus shot during Kakusei+others gets lock-on capability | |
| Asagi | Hybrid | Focus shot | Hybrid | Once powered up, focus shot gets lock-on capability |
Progression
Espgaluda II has a single loop and six stages:
- Mutiny - Fate is with the girl
- Azures - Incarnation of life
- Deserted - A sister, a brother, and...
- Aerial - Sadness bathes in dust
- Hatred - I've waited a long time for this moment
- Galuda - Achieving perfection
Each stage features a midboss around the middle of the stage and a stage boss at the end. The exceptions are that stage 5 does not have a midboss, and stage 6 has two midbosses and two bosses at the end.
Shin Seseri
Instead of a True Last Boss, there is a "true" form of the stage 5 boss, Seseri. She can be fought if you fulfil the following requirements:
- Singleplayer game
- Kakusei Over level must be 3
- No-miss the entire game up to reaching her
Rank
The game does feature rank. You can be in one of two rank states: miss rank, and no-miss rank, depending on whether or not you have died during a stage. It resets every stage. Rank affects how soon stage enemies begin firing bullets after they spawn. In no-miss rank, they begin firing immediately. In miss rank, they wait a moment before firing. Rank does not affect midbosses nor bosses.
Rank is adjustable in the training modes for the Xbox 360 and Switch ports, named "Difficulty" in the training mode options. Please note that the difficulty named "Default" is actually miss rank.
Arcade mode
The default mode. Console ports include "Arcade" mode, a faithful port of the version found in arcades, as well as a version with recreated higher-resolution graphics and a few bugfixes; On Xbox 360 it's named "Xbox 360" and on Switch it's named "Switch".
Default settings:
- Score extends at 15,000,000 and 35,000,000 points
- Spawn with 3 lives
- Rank 2 (Normal)
Resources
Gems (a.k.a. 聖霊石/seirei seki/spirit stones)
Gems are the glowing green items enemies drop when destroyed. Their purpose is to fuel Kakusei, Zesshikai, and contribute a small amount of score.
- Start with 100 in your possession, respawn with 250 after dying
- You can hold a maximum of 500
- Worth 10 points each when collected
- Get gems by destroying enemies when not in Kakusei or any other mode, as well as from finishing a phase of a midboss or boss, and from any destructible parts of a midboss or boss
- They are factored in to the stage result bonus based upon the gross total of how many were collected throughout the course of the stage
- Get an extra gem by collecting it at the top (24 pixels from the top) or bottom (48 pixels from the bottom) of the screen
Enemies drop different size gems. There are four sizes of gem items and each adds different quantities to your possession.
- Small: 1
- Medium: 2
- Large: 3
- Extra large: 4
The size of gems dropped varies with how many gems were already in your possession, what shot type was used to destroy them.
| Number of gems in your possession | Size of gem an enemy drops when destroyed with rapid shot (shrinking over time) | Size of gem an enemy drops when destroyed with focus shot |
|---|---|---|
| 0-250 | XL → L → M → S | M |
| 250-399 | L → M → S | Alternating between S & M |
| 400-500 | M → S | S |
Gem items dropped by enemies that were destroyed with rapid shot can spawn at the maximum size, but then shrink over time. Destroying enemies with focus shot drops gems that do not shrink over time, but they are smaller.
| Size | Time taken to shrink |
|---|---|
| XL→L | 8 frames |
| L→M | 8 frames |
| M→S | 12 frames |
However, this can be preventing by collecting gems by flying near them instead of letting them fall toward you. When a gem is within a certain distance of the player character it receives a green glowing effect and stops shrinking. The distance at which this happens is as follows:
| Size | Distance from player character at which gem stops shrinking |
|---|---|
| XL | 48 pixels |
| L | 64 pixels |
| M | 96 pixels |
Gold (a.k.a. 金塊/kinkai)
Gold's main purpose is for scoring. Picking up gold gives you points. It also fuels Zesshikai and is needed to enter Zesshikai Over. Gold drops from enemies under certain conditions.
- Get gold by destroying enemies in:
- Kakusei, overmode, and zesshikai over
- Normal mode when you have 500 gems
- Each gold you collect increases the amount you possess by 1
- Hold up to a maximum of 1000
- Start off with zero
- On death the amount of gold you had is halved, rounded down
- Gold depletes over time during boss battles
The amount points given by collecting gold varies with how many were already in your possession.
- Every 100 gold collected, the value of new incoming gold increases and the sprite changes.
- There are eleven tiers of gold, from 0-99, 100-199, 200-299,...900-999, and one for 1000.
| Qty held & sprite | 0-99 | 100-199 | 200-299 | 300-399 | 400-499 | 500-599 | 600-699 | 700-799 | 800-899 | 900-999 | 1000 |
|---|---|---|---|---|---|---|---|---|---|---|---|
| Point value of new gold acquired | 100 | 150 | 200 | 300 | 350 | 400 | 600 | 650 | 700 | 900 | 1000 |
The 600-699 gold tier has two sprites because one is in the Arcade release and the other is in the Console mode in the home ports.
| Gold loss during boss battles | ||
|---|---|---|
| During normal mode | During kakusei+others | |
| Stage 1 | 1 gold every 15 frames | 1 gold every 8 frames |
| Stage 2 | 1 gold every 19 frames | 1 gold every 12 frames |
| Stage 3 | 1 gold every 23 frames | 1 gold every 16 frames |
| Stage 4 | 1 gold every 27 frames | 1 gold every 20 frames |
| Stage 5 | 1 gold every 31 frames | 1 gold every 24 frames |
| Stage 6 | 1 gold every 35 frames | 1 gold every 28 frames |
Energy, and the Guard Barrier
In place of conventional bombs Espgaluda II features the Guard Barrier. When deployed it deals massive damage, temporarily clears the screen of bullets, and provides a short window of invincibility. Where the Guard Barrier differs from a conventional shmup bomb is that it uses Energy, a continuous resource, instead of discrete bomb items, and that it can be held and charged up before firing. There is an Energy Meter and using the Guard Barrier consumes some percentage of this meter.
- The Guard Barrier Attack is a massive linear shot straight up, comprised of several damaging beams. More beams appear the longer the Guard Barrier is charged.
- It has to be aimed; there is no lock-on or homing function.
- After the Guard Barrier has been deployed, there is a short period of time in which enemies don't fire.
- While charging the Guard Barrier, you deal slight aura damage to enemies, particularly noticeable against zako.
- While charging the Guard Barrier, you are invincible, and enemy bullets are deleted on contact with the shield that appears around your character.
- You spawn with a full energy meter.
- Internally, the game counts energy as individual units and not as a percentage. A full meter is 4000 units.
The most basic attack, deployed with one tap of the Guard Barrier button, consumes 25% of the energy meter. Maximum damage is reached at charging enough to consume 40% of the meter. You can keep charging past this, but you will not deal any extra damage. The damage, duration, and area of effect increases in proportion to how long it is charged for. However, the relationship is not linear; two 25% attacks do not deal as much damage as one 50% attack. The specifics of charging the attack are as follows:
| Time held charging | % of energy meter consumed | Number of beams fired | Duration of attack | Width of area of effect |
|---|---|---|---|---|
| 1 to 83 frames | 25%-29% | 2 | 0.7sec | 49px |
| 84 frames (1.4sec) to 188 frames | 30%-34% | 3 | 1.2sec | 84px |
| 189 frames (3.2sec) to 293 frames | 35%-39% | 4 | 1.7sec | 84px |
| 294 frames (4.9sec) and up | 40% and up | 5 | 2.2sec | 160px |
Autobombing is possible during Kakusei and the other modes, consuming different percentages of the energy meter. Details will follow in their respective sections. However it should be noted that regardless of what energy percentage is consumed, the damage, duration, and width of an autobomb will always be that of the basic attack.
Whilst a basic bomb costs 25%, and autobombing costs 50% or 100% depending on the mode, they will still work even if you have less remaining energy than these amounts. There's no way to enter an "energy debt" or some such.
Additionally, if you charge the attack enough to completely drain your meter, the attack will automatically fire once it reaches 0%.
The autobomb feature of Kakusei and the other modes does not activate instantaneously. When voluntarily entering any of these modes (i.e. you hear a sound effect and see the transition animation), it takes 12 frames for autoboming to become possible. You are otherwise vulnerable during those 12 frames. In cases where you do not see the transition animation (that is, changing modes without returning to "normal mode" between), this window of vulnerability does not apply.
Energy item
Replenish the energy meter by picking up energy items.
- They replenish 50% of the meter.
- There are three of them in the game, located right before the bosses of stage 3, 5, and 6.
- They're worth 500 points, but if you already had a full meter they're worth 100,000 points.
Powerups
Pick up powerup items to increase the damage output of your character. You need 6 to be fully powered up. Locations:
- Stage 1, Area 1
- Stage 1, right before the boss
- Stage 2, Area 1
- Stage 2, right before the boss
- Stage 3, Area 2
- Stage 4, right after the midboss (now you're fully powered up)
- Stage 5, just before the Descent section
- Stage 6, Area 1
- Stage 6, Area 3, just before the Asagi Clone Zone section
Powerups are worth 500 points, and if you were already fully powered up they're worth 10,000 points. There is also a Max Power item which appears when you game over and can only be picked up if you continue.
Hidden extend
There is only one hidden extend in the game, located in stage 3. To get it you have to meet the following requirements:
- Once Sabnac (the stage 3 midboss) spawns, do not bomb, nor even autobomb. You mustn't bomb at all, even during the stage after Sabnac is defeated.
- Destroy all the destructible parts of Sabnac during phase 1 of the fight.
- While in Zesshikai, shoot a specific part of the background environment right before the stage boss to uncover it.
Gameplay states
At any given time you can be in one of five gameplay states or modes. They cause different changes to the gameplay, including enemy behaviour, bullet behaviour, and scoring function. The core gameplay loop of Espgaluda II's Arcade mode is knowing what these five states are and how they interrelate.
| Summary of gameplay states | |||||
|---|---|---|---|---|---|
| Normal mode | Kakusei | Zesshikai | Overmode | Zesshikai Over | |
| How do you activate it? | Default mode | Have gems. Press kakusei button. | Have gems and gold. Hold kakusei button. | Have zero gems. Press kakusei button. Or, be in Kakusei and let gems run out. | Have zero gems & some amount of gold. Hold kakusei button. Or, be in Zesshikai and let gems run out. |
| What does it consume? | Gold over time during a boss, otherwise nothing else | Gems over time, gems for destroying enemies, gems when exiting mode, gold over time during a boss | Gems & gold over time, gems if you kill enemies other than zako, gems when exiting mode, gold over time during a boss | Gold over time during a boss, otherwise nothing else | Gold over time during a boss, otherwise nothing else |
| What do you get? | Gems when destroying enemies, gold when you have 500 gems then destroy enemies | Gold when destroying enemies, score mutliplier up to x100 | Score multiplier up to x500 | Gold when destroying enemies, score over time | More gold when destroying enemies, double score over time |
| Stage scroll speed | Normal | Slow | Slow | Normal | Normal |
| What happens to the enemies? | Normal movement speed, normal blue bullets | Slow movement speed, slow purple bullets, enemies fire more bullets | Slow movement speed, slow purple bullets, enemies fire more bullets, revenge bullets generated when enemies are destroyed, bosses fire double bullets | Normal movement speed, fast red bullets | Normal movement speed, faster red bullets, bosses fire double bullets |
| What happens when you bomb? | Default behaviour | Autobomb costs 50% energy | Immediately exit and go back to Kakusei, autobomb costs 100% energy | Autobomb costs 50% energy | Immediately exit and go back to Overmode, autobomb costs 100% energy |
| What happens to you? | Default behaviour | Ability to cancel enemy bullets, deal more damage | Ability to cancel enemy bullets, deal more damage | Deal more damage | Deal more damage |
Normal Mode
The default state.
- Enemies move at a normal speed
- Enemy bullets behave normally and are coloured blue
- Stage scroll speed is normal
- Earn gems by destroying enemies
- Earn gold by destroying enemies when you have 500 gems
- Lose gold over time during bosses
- No autobomb available
Kakusei (a.k.a. 覚聖死界/kakusei shikai)
The basic "slowdown" mode. Essentially functions the same as it did in Espgaluda 1.
- Enter by tapping the Kakusei button once. Leave by tapping it again.
- Enemy bullets slow down and turn purple
- Slow stage scroll speed, slow enemy movement speed
- Enemies fire more bullets
- You deal more damage (see Damage Increase in Characters section)
- Gems deplete over time
- A red circular gauge appears around your character, displaying how many gems remain in your possession.
- Exiting Kakusei depletes 30-35 gems
- Autobombing is possible, consuming 50% of the energy meter.
- When you destroy an enemy:
- Gems deplete
- The bullets the enemy fired are canceled
- Each canceled bullet becomes gold
- When you run out of gems you automatically enter Overmode.
Scoring basics
- Throughout the duration of being in Kakusei, a multiplier is applied to every bullet you cancel.
- The multiplier is accumulative. The multiplier will increment by x1 for each bullet canceled.
- The maximum is x100.
- Each bullet canceled is worth 40 points.
Addendum
| Gem loss per enemy destruction | ||||
|---|---|---|---|---|
| Zako | Normal enemy | Midboss & boss phases, their destructible parts | ||
| Ageha/Tateha | Asagi | Ageha/Tateha/Asagi | ||
| Stage 1 | 5 | 10 | 25 | 25 |
| Stage 2 | 5 | 10 | 27 | 29 |
| Stage 3 | 6 | 11 | 29 | 33 |
| Stage 4 | 6 | 11 | 31 | 37 |
| Stage 5 | 7 | 12 | 33 | 41 |
| Stage 6 | 7 | 12 | 35 | 45 |
| Gem loss over time | ||
|---|---|---|
| During the stage | During midboss or boss | |
| Ageha | 1 gem every 6 frames | 1 gem every 3 frames |
| Tateha | 1 gem every 6 frames | 1 gem every 3 frames |
| Asagi | 1 gem every 6 frames | 1 gem every 2 frames |
Zesshikai (a.k.a. 覚聖絶死界/kakusei zesshikai)
Zesshikai's main purpose is for scoring. On the surface it's similar to Kakusei in that they're both modes with slow purple bullets, but Zesshikai's main difference is that enemies generate revenge bullets and you can score much, much higher with it.
- Activate by holding the Kakusei button. Leave by tapping the button again.
- The screen flashes inverted colours and a unique sound effect plays.
- Enemy bullets slow down and turn purple
- Slow stage scroll speed, slow enemy movement speed
- Enemies generate revenge bullets when they are destroyed.
- You deal more damage (see Damage Increase in Characters section).
- Gems and gold deplete over time.
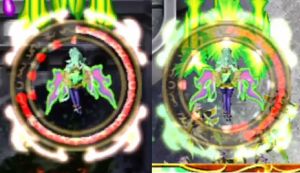
- A circular red gauge appears around your character. This displays how many gems remain in your possession.
- Exiting Zesshikai depletes 30-35 gems.
- Autobombing is possible, consuming the entire energy meter.
- If you bomb or autobomb, you are kicked out of Zesshikai and immediately enter Kakusei.
Zesshikai Level
When in Zesshikai, four white graphics and a white gauge appear around your character. The white gauge is inlaid inside the red gem gauge so you can see both at once. The white gauge measures time, 256 frames, and once fully elapsed it signifies that you have reached maximum "Zesshikai Level". When this happens:
- The screen flashes inverted colours again
- Revenge bullets move faster
- The four white graphics turn green
- SRB multiplier now increments like normal bullets+ARB. Details in Zesshikai Scoring section below.
- The Zesshikai Level resets every time you exit Zesshikai.
Revenge bullets
Revenge bullets are generated when enemies are destroyed during Zesshikai. There are two types of revenge bullets, and they appear according to what type of enemy was destroyed. Revenge bullets never spawn in the immediate vicinity of the player. For the purposes of this explanation, assume "normal bullets" refers to any non-revenge bullet; i.e. standard, ordinary bullets.
Types of revenge bullets
- Spiral revenge bullets (abbreviated to SRB from now on)
- These spawn at the location of the enemy when it was destroyed.
- They appear in a spiral formation which rotates and expands.
- They are not aimed at you.
- Aimed revenge bullets (abbreviated to ARB from now on)
- Other bullets become these. Details follow in the Enemy Destruction section below.
- They are aimed at you.
Revenge bullet generation conditions
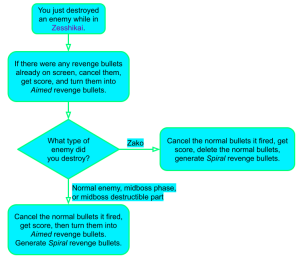
When you destroy any enemy, except bosses:
- Revenge bullets of some type are generated. That is to say, destroying enemies in Zesshikai always generates revenge bullets of some type; there's no way to prevent it other than by exiting Zesshikai.
- All revenge bullets that were already on-screen are canceled and become ARB.
When you destroy a non-zako enemy, including a midboss phase or destructible part:
- SRB are generated.
- The "normal" bullets they fired are canceled and become ARB.
- Gems deplete
When you destroy zako:
- SRB are generated.
- The "normal" bullets they fired are canceled, but do not become ARB.
- Gems do not deplete.
These rules make it possible to continually chain bullet cancels as long as you keep destroying enemies, provided neither gems nor gold run out.
Zesshikai Scoring
Zesshikai is key to scoring well. Bullets are worth more points and the multiplier can go even higher than Kakusei.
- Each "normal" bullet is worth 50 points, unlike Kakusei's 40 points.
- Each revenge bullet is worth 2 points.
Throughout the duration of being in Zesshikai, a multiplier is applied to every bullet you cancel.
- The multiplier is accumulative. The multiplier will increment by x1 for each bullet canceled. There is one exception, outlined below.
- The maximum is x500, unlike kakusei’s x100.
When you cancel:

- Normal bullets & Aimed revenge bullets (ARB)
- The multiplier on these increments sequentially, e.g. x1, x2, x3, x4 etc, and are counted alongside all other normal bullets and ARB.
- Spiral revenge bullets (SRB)
- One multiplier is applied to all SRB that spawned together. All of them could be x10, x15, etc, and not incremented sequentially. They’re basically counted within their own little group. You’ll see a bunch of x9 x9 x9 x9 x9 x9 and not x1 x2 x3 x4 x5 etc. This is the exception mentioned before.
- If your Zesshikai Level has reached level 1, then SRB are counted alongside normal bullets and ARB in incrementing the multiplier. Instead of each bullet within a cluster of SRB getting one multiplier each (x9 x9 x9 x9 etc) you will see x1 x2 x3 x4 x5 etc. This means you can raise your overall multiplier much higher and much faster.
During midbosses and bosses
During bosses:
- Revenge bullets are not generated
- You can still get the multiplier up to x500
- Gold depletes over time at the "normal boss gold depletion rate" and not the "zesshikai gold depletion" rate
- Bosses fire double bullets
During midbosses:
- Revenge bullets are generated, from destroying their destructible parts or finishing a phase and cancelling all their normal bullets into ARB.
- If a midboss has a pre-programmed bullet cancel feature on death, such as the second midboss of stage 6, no revenge bullets will be generated.
Exiting Zesshikai
When exiting Zesshikai, all leftover revenge bullets remain on screen. Their speed can change, seemingly affected by the timing of when you exit Zesshikai, but it is unclear what the specifics are. Re-entering Kakusei after exiting Zesshikai will cause all of these revenge bullets to greatly speed up. It is possible to easily cancel these bullets in Kakusei by destroying one enemy, but please note that you do not get gold for doing this.
Running out of resources in Zesshikai, and which resource, has different effects:
- Run out of gems but not gold = exit Zesshikai automatically, enter Zesshikai Over
- Run out of gold but not gems = exit Zesshikai automatically, enter Kakusei
- Run out of both = exit Zesshikai automatically, enter Overmode
Additionally, as mentioned before, bombing of any type during Zesshikai will kick you out immediately and put you in Kakusei automatically.
Addendum
| Gem loss per enemy destruction | |||
|---|---|---|---|
| Zako | Normal enemy | Boss & midboss phase, their destructible parts | |
| Stage 1 | 0 | 6 | 12 |
| Stage 2 | 0 | 6 | 14 |
| Stage 3 | 0 | 7 | 16 |
| Stage 4 | 0 | 7 | 18 |
| Stage 5 | 0 | 8 | 20 |
| Stage 6 | 0 | 8 | 22 |
| Gem loss over time | ||
|---|---|---|
| During the stage | During midboss or boss | |
| Ageha | 1 gem every 3 frames | 1 gem every 2 frames |
| Tateha | 1 gem every 3 frames | 1 gem every 2 frames |
| Asagi | 1 gem every 2 frames | 1 gem every 2 frames |
| Gold loss over time (during the stage) (same values for all 3 characters) | ||
|---|---|---|
| 0-499 gold held | 500-1000 gold held | |
| Stage 1 & 2 | 1 gold every 2 frames | 1 gold every frame |
| Stage 3 & 4 | 1 gold every 3 frames | 1 gold every 2 frames |
| Stage 5 & 6 | 1 gold every 4 frames | 1 gold every 3 frames |
Overmode (a.k.a. 赤走行/akasōkō)
In Overmode all the bullets turn red and speed up. Its main purpose is for getting gold quickly.
- Activate by pressing the Kakusei button when you have zero gems, or, be in Kakusei and run out of gems. Leave by tapping the button again.
- Enemy bullets speed up and turn red
- Normal stage scroll speed, normal enemy movement speed
- You deal more damage (see Damage Increase in Characters section).
- Get gold for every kill (once a requirement has been met, see below).
- Passively accrue score just by being in Overmode (except during bosses)
- Autobombing is possible, consuming 50% of the energy meter.
Kakusei Over level
When in Overmode, a blue gauge appears around your character. This represents your Kakusei Over level. Every time this gauge elapses, taking 250 frames, your Kakusei Over level increases by 1. It starts at zero and the maximum is 3. Unlike Espgaluda 1, the highest level you have reached persists after death. It is also possible to increase your Kakusei Over level whilst in Zesshikai Over.
With one completed level:
- You get gold for every kill. That is to say, you cannot get gold unless your Kakusei Over level is at least 1.
With each consective level:
- Enemy bullets get faster during Overmode.
- Get more gems from destroying enemies during normal mode.
With maximum Kakusei Over level:
- Get slightly more gold for every kill during Overmode.
| Kakusei Over level enemy destruction gem bonus | |||
|---|---|---|---|
| Zako | Normal enemy | Midboss/Boss phase & destructible parts | |
| Kakusei Over level 0 | 0 | 0 | 0 |
| Kakusei Over level 1 | 0 | 0 | 0 |
| Kakusei Over level 2 | 0 | 1 | 1 |
| Kakusei Over level 3 | 1 | 1 | 1 |
| Overmode passive score accrual per frame | ||||||
|---|---|---|---|---|---|---|
| Stage 1 | Stage 2 | Stage 3 | Stage 4 | Stage 5 | Stage 6 | |
| Kakusei Over level 0 | 20 | 50 | 80 | 110 | 140 | 170 |
| Kakusei Over level 1 | 50 | 80 | 110 | 140 | 170 | 200 |
| Kakusei Over level 2 | 80 | 110 | 140 | 170 | 200 | 230 |
| Kakusei Over level 3 | 110 | 140 | 170 | 200 | 230 | 260 |
Zesshikai Over (a.k.a. 絶走行/zessōkō)
Like Overmode, except even more lucrative: get even more score and gold, but the bullets are even faster and with a harsher autobomb penalty.
- Activate by holding the Kakusei button when you have zero gems but some amount of gold. Or, be in Zesshikai and let gems run out but not gold.
- You need to have gold to be able to enter the mode, but it doesn't actually consume gold.
- Leave by pressing the Kakusei button again.
- Enemy bullets speed up (even faster than Overmode) and turn red.
- Normal stage scroll speed, normal enemy movement speed
- You deal more damage (see Damage Increase in Characters section).
- Get gold for every kill, more than Overmode.
- Passively accrue score just by being in Zesshikai Over (except during bosses), double the amount of Overmode.
- Kakusei Over level effects also apply to Zesshikai Over. It is also possible to increase your Kakusei Over level while in Zesshikai Over.
- Bosses fire double bullets.
- Autobombing is possible, consuming the entire energy meter.
- If you bomb or autobomb, you are kicked out of Zesshikai Over and immediately enter Overmode.
It is unclear what the exact rules are that determine how much extra gold you get during Zesshikai Over. However, here are the results of a test conducted by destroying zako in Stage 5 with Ageha:
| How much gold given from destroying one zako enemy in Stage 5 | ||
|---|---|---|
| Overmode | Zesshikai Over | |
| Kakusei Over level 0 | 0 | 0 |
| Kakusei Over level 1 | 1 | 2 |
| Kakusei Over level 2 | 1 | 2 |
| Kakusei Over level 3 | 2 | 6 |
It is clear that once Kakusei Over level 3 has been achieved, the gold bonus is substantial.
Scoring Basics
How to get score
- Destroy enemies - each enemy has a base point value.
- Cancel bullets - cancelling bullets in Kakusei or Zesshikai turns them into points and applies a multiplier per bullet.
- Get gold - gold gives points for each one you collect.
- Passively accrue score - get score just by being in Overmode or Zesshikai Over.
Stage result bonus
At the end of each stage a bonus is calculated based upon how many gems and gold you collected throughout the course of the stage. It is the gross total, not net total. If you collect 500 gems but then Kakusei 499 of them away and finish the stage with 1 gem left, your gross total is still 500.
The formula is as follows:
Stage bonus = (S*100)+(K*V)
Where S = gross total of gems acquired throughout the stage, K = gross total of gold acquired throughout the stage, and V = point value of gold you finished the stage with (refer to Gold section for the point value).
If you die during the stage, the gross total of gems and gold accrued is reset to zero. From there on the tally will start up again.
Clear bonus
Defeating the final boss also awards a point bonus based upon resources you finished with.
- Remaining lives = 20 million points each
- Life containers = 10 million points each
- Energy meter remaining = 4000 points per unit (the game counts energy internally as individual units and not as a percentage; the maximum is 4000 units)
The life containers are the gold boxes that house the green flames that represent your lives.
While the above items are definite, it seems that the stage 6 bonus is included in some way too. Minamo's Espgaluda 2 page states that the stage 6 bonus is simply doubled, but attempts to verify this have led to inconsistent results.
Black Label
Arrange
Omake
Espgaluda II 'Omake Mode' as a Shmup training tool
In the home ports of Espgaluda II*, clearing the main game (including Novice Mode, and credit feeding is OK) unlocks "Omake Mode" which translates to "Bonus Mode".
On the face of it, Omake Mode is a fun and easy mode of the game to mess around with for a short time.
However when approached correctly this mode provides an unparalleled Shmup training tool for players of any experience.
Using a few simple strategies, players are able to practice and observe all of the patterns from Espgaluda II- acknowledged to be some of the most difficult of any Cave games- at the slower speed of 'Kakusei'.
(*home ports are on Xbox 360 and Nintendo Switch as at Feb 2022)
Basics of Omake Mode for Training
The player character is surrounded by an invisible circle within which any bullets will turn red. Let's refer to this as the 'Red Zone'. Any bullets in the Red Zone will be cancelled into Items (green gems and/or gold) when ANY enemy is destroyed. It does not matter which enemy shot the bullets. Any enemy destroyed will have all of the on-screen bullets that it fired cancelled into Items, regardless of whether they are in the Red Zone around the player.
The Kakusei gem count has a maximum value of 500. When entering Kakusei mode, all bullets within the Red Zone will be cancelled into Items. When exiting Kakusei mode MANUALLY (ie with gem count above zero) all bullets within the Red Zone will be cancelled into Items.
Defeating any section of a boss life bar while NOT in Kakusei will cancel the on-screen bullets into GEMS.
There is no bomb button in Omake mode. Instead, any time the player is hit by a bullet, the Guard Barrier will be activated, and will continue to be 'held down' until the player hits the Kakusei button which ends it, or until the barrier gauge runs out. At that point the normal 'beam attack' of the Guard Barrier is fired. While the player character is surrounded by the Guard Barrier, any bullets within the small visible circle of the Guard Barrier are cancelled into Items, starting with Gems and proceeding to Gold when Gems reach 500. When the Gold counter reaches 1000, the Guard Barrier Gauge will be refilled by around 40%. If the gold counter reaches 1000 while the Guard Barrier Gauge is full, the player character will be surrounded by a special frame and all items collected will have 1000 added to their point value.
Kakusei Training in Omake
Because of the frequency with which bullets are cancelled into Items in Omake Mode, the Gem counter will easily and quickly reach the maximum of 500 during the stage. Because of the length of time that 500 Gems will let the player remain in Kakusei, 500 is more than enough to last through the attacks of any larger enemy, and enough to last through most single sections of any Boss life bar.
The player is therefore invited to proceed through the most difficult attacks in the game in full Kakusei mode, to practice and observe the patterns in slow motion.
There are 3 simple methods that enable the player to extend the amount of time they spend in Kakusei, allowing them to see out almost the entirety of any Boss encounter in full slow motion.
- 1) Shifting out of Kakusei in order to finish off any Boss life bar section will immediately refill the Gem gauge to 500, due to the amount of bullets cancelled plus some from the Boss sprite. Obviously this is not without risk as the bullets will speed up, but done carefully it should be relatively safe.
- 2) During any given pattern while in Kakusei, if the player feels that they are about to be hit and expend Guard Barrier Gauge, they can manually cancel out of Kakusei and quickly back in. This will cancel all bullets in the Red Zone twice, and provide a safety buffer without expending Guard Barrier Gauge. Doing this does accelerate the rate that the Gem count falls, but done sparingly it should not make a huge difference.
- 3) When Gems have run out, the player can deliberately hit a bullet to activate the Guard Barrier and then charge through enemy bullets while invincible so that they are cancelled back to Gems. Done during a particularly dense pattern, and especially at point-blank above a Boss sprite, this will refill the Gems almost instantly. The player then has a choice of whether to cancel out of Guard Barrier and continue in Kakusei, or expend Guard Barrier to pump up the large Item Counter at the top of the screen which is important for scoring in Omake Mode.
Scoring in Omake
Scoring in Omake has some value in use as a training mode, as it will help to reach the Extends which in turn provide more Guard Barrier Gauge.
Scoring is very simple: The value of the large Item Counter at the top of the screen will be added to every item picked up WHILE GEMS ARE AT 500. In other words, it acts as an incentive not to go into Kakusei where possible.
As the counter is re-set every stage, it makes sense to use the Guard Barrier on some large enemies early in the stage, to cancel their dense attacks into Item value. The player can then proceed with Gems at 500 and collect the Item Counter point value for every item received.
Enemy data
Score, gold, and gems values are for Arcade mode.
| Stage 1 | ||||||
| Image | Name | English translation | Type | Points | Gems | Gold |
|---|---|---|---|---|---|---|
| 汎用戦闘機ズー | General-purpose fighter Zu | Air: Zako | 480 | 1 | 0 | |
| ソーマ輝羽兵 | Soma shine winged soldier | Air: Zako | 530 | 1 | 0 | |
| 運搬艇グリフィン | Carrier ship Griffin | Air: Normal | 860 | 2 | 1 | |
| 小型機甲艇ザッハーク | Small armored craft Zahhak | Air: Normal | Gun: 230 Main body: 2,260 |
Gun: 2 Main body: 2 |
Gun: 1 Main body: 1 | |
| 小型戦車ガルラ | Small tank Gurla | Ground: Zako | Gun: 400 Base: 160 |
Gun: 0 Base: 1 |
Gun: 0 Base: 0 | |
| 中型戦車ドヴェルグ | Medium tank Dvergr | Ground: Zako | Gun: 420 Base: 240 |
Gun: 0 Base: 1 |
Gun: 0 Base: 0 | |
| ソーマ兵 | Soma soldier | Ground: Zako | 260 | 1 | 0 | |
| 汎用砲台ブエル | General-purpose turret Buer | Ground: Zako | Gun: 210 Base: 580 |
Gun: 1 Base: 1 |
Gun: 0 Base: 1 | |
| 大型侵略砲台ガンダルヴァ | Large invasion turret Gandharva | Ground: Normal | 5,820 | 7 | 6 | |
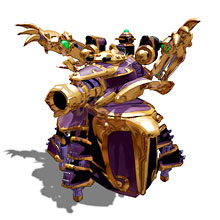
| 重飛行甲冑シームルグ | Heavy flying armor Simurgh | Midboss | Main body: 50,000 Arm: 5,000 |
Main body: 11 Arm: 10 |
Main body: 11 Arm: 10 | |
| ツバメ | Tsubame | Boss | First form: 100,000 Second form: 500,000 |
First form: 21 Second form: 20 |
First form: 41 Second form: 40 | |
| Stage 2 | ||||||
| Image | Name | English translation | Type | Points | Gems | Gold |
|---|---|---|---|---|---|---|
| 汎用戦闘機ズー | General-purpose fighter Zu | Air: Zako | 480 | 1 | 0 | |
| 中型機甲艇フォルネウス | Medium-size armored ship Forneus | Air: Normal |
6,530 | 2 | 1 | |
| 運搬艇グリフィン | Carrier ship Griffin | Air: Normal | 860 |
2 | 1 | |
| 大型機甲艇ベヒモス | Large armored vehicle Behemoth | Air: Normal | 12,510 | 4 | 3 | |
| 単装砲台 | Single-barrelled gun battery | Ground: Normal | 870 | 1 | 1 | |
| ニ連装砲台 | Double-barrelled gun battery | Ground: Normal | 1,710 | 2 | 1 | |
| 六連回転砲台 | Six-barrelled revolving gun battery | Ground: Normal | 15,860 | 6 | 5 | |
| クレーン | Crane | Ground: Normal |
1,830 | 2 | 1 | |
| 単装砲台 (縦の輸送艦の砲台) |
Single-barrelled gun battery (Vertical transport battery) |
Ground: Normal | 870 | 1 | 0 | |
| 小型戦車ガルラ | Small tank Gurla | Ground: Zako | Gun: 400 Base: 160 |
Gun: 0 Base: 1 |
Gun: 0 Base: 0 | |
| 中型戦車ドヴェルグ | Medium tank Dvergr | Ground: Zako | Gun: 420 Base: 240 |
Gun: 0 Base: 1 |
Gun: 0 Base: 0 | |
| 小船舶マカラ | Small vessel Makara | Ground: Zako | Gun: 250 Base: 530 |
Gun: 0 Base: 1 |
Gun: 0 Base: 0 | |
| ソーマ兵 | Soma soldier | Ground: Zako | 260 | 1 | 0 | |
| 万能潜水艦ネレイドー | Universal submarine Nereids | Ground: Normal | 4,230 | 2 | 1 | |
| 重戦車ニーズヘッグ | Heavy tank Nidhoggr | Ground: Normal | Gun: 1,630 Base: 4,760 |
Gun: 2 Base: 3 |
Gun: 1 Base: 2 | |
| マダラ | Madara | Midboss | First form: 60,000 Second form: 100,000 |
First form: 16 Second form: 26 |
First form: 15 Second form: 25 | |
| 生体兵器ヨルムンガンド | Biological weapon Jormungandr | Boss | First form: 100,000 Second form: 200,000 Third form: 600,000 Head: 300,000 |
First form: 26 Second form: 26 Third form: 46 Head: 0 |
First form: 25 Second form: 25 Third form: 45 Head: 0 | |
| Stage 3 | ||||||
| Image | Name | English translation | Type | Points | Gems | Gold |
|---|---|---|---|---|---|---|
| 汎用戦闘機ズー | General-purpose fighter Zu | Air: Zako | 480 | 1 | 0 | |
| 運搬艇グリフィン | Carrier ship Griffin | Air: Normal | 860 | 2 | 1 | |
| 汎用戦闘機ストラス | General-purpose fighter Stolas | Air: Zako | 740 | 1 | 0 | |
| 中型機甲艇ウロボロス | Medium-size armored ship Ouroboros | Air: Normal | 24680 | 3 | 2 | |
| 大型機甲艇リンドブルム | Large armored ship Lindworm | Air: Normal | First form: 22,350 Second form: 37,940 |
First form: 3 Second form: 5 |
First form: 2 Second form: 4 | |
| 小型戦車ガルラ | Small tank Gurla | Ground: Zako | Gun: 400 Base:160 |
Gun: 0 Base: 1 |
Gun: 0 Base: 0 | |
| 中型戦車ドヴェルグ | Medium tank Dvergr | Ground: Zako | Gun: 420 Base: 240 |
Gun: 0 Base: 1 |
Gun: 0 Base: 0 | |
| ソーマ兵 | Soma solider | Ground: Zako | 260 | 1 | 0 | |
| 汎用砲台ブエル | General-purpose turret Buer | Ground: Zako | Gun: 210 Base: 580 |
Gun: 1 Base: 1 |
Gun: 0 Base: 1 | |
| 多脚戦車シェロブ | Multi-legged tank Shelob | Ground: Normal | 6,910 | 3 | 2 | |
| 重固定砲台エンプーサ | Heavy fixed gun battery Empusa | Ground: Normal | 4,980 | 3 | 2 | |
| 重固定砲台アスタロト | Heavy fixed gun battery Astaroth | Ground: Normal | 19,560 | 4 | 3 | |
| 武装エレベーターサブナク | Armed Elevator Sabnac | Midboss | First form: 100,000 Second form: 200,000 Leg turret: 10,000 Auxiliary engine: 20,000 Rear anti-aircraft gun: 30,000 Deck gun: 0 |
First form: 21 Second form: 31 Leg turret: 0 Auxiliary engine: 0 Rear anti-aircraft gun: 0 Deck gun: 0 |
First form: 20 Second form: 30 Leg turret: 0 Auxiliary engine: 0 Rear anti-aircraft gun: 0 Deck gun: 0 | |
| ジャノメ | Janome | Boss | First form: 200,000 Second form: 300,000 Third form: 700,000 |
First form: 31 Second form: 31 Third form: 51 |
First form: 30 Second form: 30 Third form: 50 | |
| Stage 4 | ||||||
| Image | Name | English translation | Type | Points | Gems | Gold |
|---|---|---|---|---|---|---|
| 汎用戦闘機ズー | General-purpose fighter Zu | Air: Zako | 480 | 1 | 0 | |
| 運搬艇グリフィン | Carrier ship Griffin | Air: Normal | 860 | 2 | 1 | |
| 汎用戦闘機ハルパス | General-purpose fighter Halphas | Air: Zako | 810 | 1 | 0 | |
| 中型機甲艇ブラフマー | Medium-size armored ship Brahma | Air: Normal | 21,930 | 3 | 2 | |
| 小型戦車ガルラ | Small tank Gurla | Ground: Zako | Gun: 400 Base: 160 |
Gun: 0 Base: 1 |
Gun: 0 Base: 0 | |
| 中型戦車ドヴェルグ | Medium tank Dvergr | Ground: Zako | Gun: 420 Base: 240 |
Gun: 0 Base: 1 |
Gun: 0 Base: 0 | |
| ソーマ兵 | Soma solider | Ground: Zako | 260 | 1 | 0 | |
| 汎用砲台ブエル | General-purpose turret Buer | Ground: Zako | Gun: 210 Base: 580 |
Gun: 1 Base: 1 |
Gun: 0 Base: 1 | |
| ニ連装砲台 | Double-barrelled gun battery | Ground: Normal | 1,710 | 2 | 1 | |
| 重戦車ヴァースキ | Heavy tank Vasuki | Ground: Normal | Gun: 6,330 Base: 14,560 |
Gun: 2 Base: 2 |
Gun: 1 Base: 1 | |
| 重飛行甲冑アンドレアルフース | Heavy flying armor Andrealphus | Midboss | First form: 200,000 Second form: 300,000 Arm: 100,000 |
First form: 26 Second form: 36 Arm: 0 |
First form: 25 Second form: 35 Arm: 0 | |
| マダラ専用合身甲冑アスモデウス | Madara's exclusive combined body armor Asmodeus | Boss | First form: 300,000 Second form: 400,000 Third form: 500,000 Fourth form: 600,000 Fifth form: 800,000 Triple machine gun Gaap: 400,000 Warhead launcher Werewolf: 1,000,000 Ancient machine gun Belphegor: 2,000,000 |
First form: 36 Second form: 36 Third form: 36 Fourth form: 36 Fifth form: 56 Triple machine gun Gaap: 0 Warhead launcher Werewolf: 0 Ancient machine gun Belphegor: 0 |
First form: 35 Second form: 35 Third form: 35 Fourth form: 35 Fifth form: 55 Triple machine gun Gaap: 0 Warhead launcher Werewolf: 0 Ancient machine gun Belphegor: 0 | |
| Stage 5 | ||||||
| Image | Name | English translation | Type | Points | Gems | Gold |
|---|---|---|---|---|---|---|
| 汎用戦闘機ズー | General-purpose fighter Zu | Air: Zako |
480 | 1 | 0 | |
| 運搬艇グリフィン | Carrier ship Griffin | Air: Normal | 860 | 2 | 1 | |
| シンラ式中型機甲艇アーリマン | Shinra-type medium-sized armored ship Ahriman | Air: Normal | 35,330 | 2 | 1 | |
| 兵士用飛空ポッド・エアリアル | Flying Solider Pod ~ Aerial | Air: Zako | 3,130 | 1 | 0 | |
| シンラ式大型機甲艇ティアマット | Shinra-type large armored ship Tiamat | Air: Normal | 91,935 | 3 | 2 | |
| シンラ式大型機甲艇サイクロプス | Shinra-type large armored ship Cyclops | Air: Normal | 141,930 | 3 | 2 | |
| 小型戦車ガルラ | Small tank Gurla | Ground: Zako | Gun: 400 Base: 160 |
Gun: 0 Base: 1 |
Gun: 0 Base: 0 | |
| 中型戦車ドヴェルグ | Medium tank Dvergr | Ground: Zako | Gun: 420 Base: 240 |
Gun: 0 Base: 1 |
Gun: 0 Base: 0 | |
| ソーマ兵 | Soma solider | Ground: Zako | 260 | 1 | 0 | |
| 汎用砲台ブエル | General-purpose turret Buer | Ground: Zako | Gun: 210 Base: 580 |
Gun: 1 Base: 1 |
Gun: 0 Base: 1 | |
| シンラ式大型戦車ファフニール | Shinra-type large tank Fafnir | Ground: Zako | Gun: 26,330 Base: 54,560 |
Gun: 1 Base: 1 |
Gun: 1 Base: 1 | |
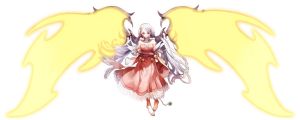
| セセリ | Seseri | Boss | First form: 300,000 Second form: 500,000 Third form: 900,000 Soul lance: 0 |
First form: 41 Second form: 41 Third form: 61 Soul lance: 0 |
First form: 40 Second form: 40 Third form: 60 Soul lance: 0 | |
| 憎悪に満ちたセセリ | Seseri Filled With Hatred (a.k.a. Shin Seseri) | True Boss | First form: 2,000,000 Second form: 4,000,000 Third form: 6,000,000 Soul lance: 0 |
First form: 41 Second form: 41 Third form: 61 Soul lance: 0 |
First form: 40 Second form: 40 Third form: 60 Soul lance: 0 | |
| Stage 6 | ||||||
| Image | Name | English translation | Type | Points | Gems | Gold |
|---|---|---|---|---|---|---|
| 汎用戦闘機ズー | General-purpose fighter Zu | Air: Zako | 480 | 1 | 0 | |
| 運搬艇グリフィン | Carrier ship Griffin | Air: Normal | 860 | 2 | 1 | |
| 警備ユニット・アンドラス | Security unit Andras | Air: Normal | 9,210 | 2 | 1 | |
| 大型機甲艇ヴィシュヌ | Large armored ship Vishnu | Air: Normal | First form: 22,350 Second form: 76,420 |
First form: 4 Second form: 6 |
First form: 3 Second form: 5 | |
| 小型戦車ガルラ | Small tank Gurla | Ground: Zako | Gun: 400 Base: 160 |
Gun: 0 Base: 1 |
Gun: 0 Base: 0 | |
| 中型戦車ドヴェルグ | Medium tank Dvergr | Ground: Zako | Gun: 420 Base: 240 |
Gun: 0 Base: 1 |
Gun: 0 Base: 0 | |
| ソーマ兵 | Soma soldier | Ground: Zako | 260 | 1 | 0 | |
| 汎用砲台ブエル | General-purpose turret Buer | Ground: Zako |
Gun: 210 Base: 580 |
Gun: 1 Base: 1 |
Gun: 0 Base: 1 | |
| 霊力供給カプセル・アルキュオーネ | Spiritual supply capsule Alcyone | Ground: Normal | 7,880 | 11 | 10 | |
| 霊力融合装置メタトロン | Spiritual fusion device Metatron | Ground: Normal | 10,000 | 6 | 5 | |
| 移動砲台ケルビム | Mobile turret Cherubim | Ground: Zako | 12,300 | 1 | 1 | |
| アサギクローン | Asagi clone | Ground: Zako | 870 | 1 | 0 | |
| 重飛行甲冑シームルグ改 | Heavy flying armor Simurgh (Modified) | Midboss 1 | Main body: 500,000 Arm: 200,000 |
Main body: 18 Arm: 66 |
Main body: 17 Arm: 65 | |
| 重飛行甲冑アンドレアルフース改 | Heavy flying armor Andrealphus (Modified) | Midboss 2 | First form: 500,000 Second form: 700,000 Arm: 300,000 |
First form: 36 Second form: 46 Arm: 0 |
First form: 35 Second form: 45 Arm: 0 | |
| 生体維持装置ガッデスガルーダ | Biological maintenance device Goddess Galuda | Boss 1 |
First form: 500,000 Second form: 1,000,000 Photon Holy Cannon: 0 |
First form: 46 Second form: 66 Photon Holy Cannon: 0 |
First form: 45 Second form: 65 Photon Holy Cannon: 0 | |
| 真ガルーダ・クジャク | True Galuda Kujaku | Boss 2 | First form: 2,000,0000 Second form: 3,000,000 Third form: 5,000,000 Seraphim rod: 0 Divine cannon ray of light Eden: 0 |
First form: 46 Second form: 46 Third form: 66 Seraphim rod: 0 Divine cannon ray of light Eden: 0 |
First form: 45 Second form: 45 Third form: 65 Seraphim rod: 0 Divine cannon ray of light Eden: 0 | |
References
- Primary info from johnny.
- All sprites & enemy data taken from CAVE's official Espgaluda 2 site.
- Arcade mode specifics adapted from the tutorial on the Switch and Xbox 360 ports, wikiwiki, Minamo's Espgaluda 2 page, Hacker's Guide to Espgaluda 2, and the system11 forum thread.
