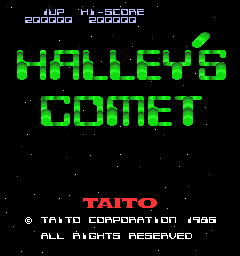
Halley's Comet
Flyer
| Developer: | Taito |
|---|---|
| Music: | Hisayoshi Ogura |
| Program: | Fukio Mitsuji |
| Release date: | January 1986 |
| Previous game: | Darius |
| Next game: | Kiki KaiKai (Knight Boy) |
For replay videos, visit the Video Index.
Contents
Gameplay Overview
Halley's Comet, made in 1986 by Taito, features you defending various planets from attacking invaders. It's one of the rare games where you have to actively destroy enemies or else you're penalized for letting them escape, with a gameover potentially resulting if you let too many past. It's currently available as part of Hamster's Arcade Archives for the PS4 as well as Nintendo Switch. The game is single player only, and there do not appear to be there are no continues available. Deaths result in a checkpoint-style respawn with you back to your base power and speed levels.
Halley's Comet takes about about 45 minutes to an hour per loop depending on how many times you die or "reset" miniboss/comet entrance fights by using bombs to milk the spawning enemies for points. Clearing both loops will generally get you enough points to counterstop the game; depending on how well you've scored up to that point you'll trigger the counterstop somewhere between halfway through the final level of loop 2, or shortly into loop 3's first level.
It's not clear where difficulty maxes out but brief testing suggests difficulty might cap in loop 2. By the point you reach loop 3 you've counterstopped the game, and you're just playing to see how far you can get from that point onward.
Default dip settings for the game are Normal difficulty, 3 lives, and extend setting of 200,000 , 800,000, and every 600,000 after.
Each level is broken up into three numbered Areas, where you try to protect the planet from getting attacked by swarms of enemies trying to get past you. Each Area has swarms of basic enemies that keep spawning in a fixed pattern of enemy types (randomly selecting from preset flight patterns each time a wave of enemies spawn), as well as asteroids to shoot for powerups, and unique large enemies that give a score bonus for shooting them all down. Each Area ends with a boss; the early Area has 1 or 2 large enemies that shoot dark blue orbs at you, the middle Area's boss is the comet entrance where you have to shoot 4 turrets that pop up at random locations to advance, and the Area within the comet ends with a boss that has a large set of turrets that pop up as basic enemies keep spawning. Shoot all the turrets to end the level.
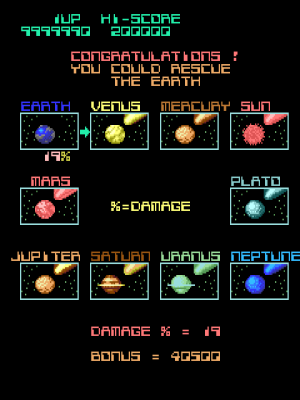
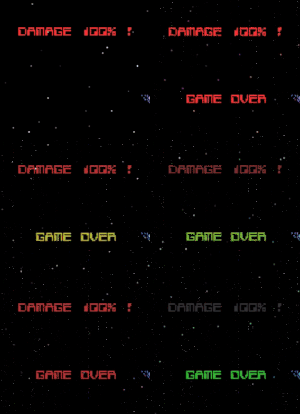
Each enemy that manages to escape by flying offscreen deals 1% damage to the planet, and if the current planet you're trying to rescue hits 100% damage, it's an immediate game over. Some enemies like the multisegmented worm-like enemies deal 1% per segment that gets past you, so damage can add up very quickly if you die in the middle of the stage, leaving you at low shot power and unable to safely deal with all the enemies until you power up again. There also does not appear to be any way to reduce the amount of damage a planet has accumulated; when you loop the game, the damage values stay at what they were in Loop 1 and do not reset back to 0, so if you died a lot on a particular level in Loop 1 and the planet racked up a lot of damage, you're at higher risk of an immediate game over from the planet getting destroyed in subsequent loops!
If you're fortunate enough to beat a level while keeping the planet at 0% damage you get a special bonus: an extra life! The end of level bonus is linear, and is equal to 50000 - (500 x planet damage%). Note that finishing a level with 0% damage is not so much a matter of skill as it is luck; there's several enemy waves that can almost instantly send an enemy off the left or right side of the screen and easily damage the planet you're trying to protect. As a general rule, if you're doing well and haven't died in a level, 10% damage or lower is a realistic amount to aim for.
Levels are also on a time limit. If the comet is able to get low enough, it'll instantly hit the planet, and result in an immediate game over. The gameover point is when the tip of the comet is about 1/4 of the way into the planet's sprite. However, from a practical standpoint the time limit is generally never a threat in normal gameplay. The game is super generous with how much time you have to clear the level, and the only way to run out of time is to deliberately waste time by resetting fights, such as bombing a comet entrance repeatedly so as to milk points from more enemy waves. You can milk the comet entrance safely with 2 or 3 bombs and still have tons of time to spare. Dying only costs a bit of time depending on where you die; if you die in the middle of a level on basic enemies or inside the comet it'll actually skip the enemy waves you were fighting, but dying on one of the three Area bosses will reset the fight and let the comet move down slightly.
Basically, you shouldn't ever worry about the time limit, but keep in mind it can kill you if you try for aggressive milking shenanigans using your bombs to warp into hyperspace and reset the comet entrance fights.
Controls
Button 1: Shoot (holding it shoots slowly, tap it rapidly to shoot much faster)
The game has a slow built-in autofire rate. 10 hz autofire on Button 1 is a good speed to use which works well when you're at low power as well as high power. Without autofire, the game requires a lot of button tapping due to its length. At max shot power you can actually get away with holding the button down and not having autofire. It's just barely fast enough to be decent, but not particularly good, either.
Note that the recent ports in the Hamster Arcade Archives only allow for 15 hz, 20 hz, or 30 hz speeds. 20 and 30 hz are unnecessarily fast and leave too wide of a gap between your shots without really adding much benefit (the minibosses in each level don't seem to die much faster at 30 hz), so 15 hz there is the recommended setting, even if it's slightly on the fast side to give an optimal balance of coverage.
Button 2: Bomb (when you have a helper ship attached, sacrifices the helper ship in exchange for using a bomb)
Bombs can only be used when you pick up helper ships, whether with the individual icons or the green G item that instantly gives you a full formation of 6. Using a bomb sacrifices one helper ship to instantly clear the screen of enemies and also send you into hyperspace, skipping ahead in the level to get closer to the comet. If you're fighting a miniboss, or you're at the entrance of the comet, bombing simply cancels the bullets and warps you into hyperspace backwards, essentially resetting the fight and letting you try again. This allows you to milk some extra points, particularly at the comet entrances.
When you bomb inside of the comets, you don't activate hyperspace. You simply kill all bullets and enemies onscreen. Note that it will not reset the comet boss fight when you use a bomb, but bombs also don't damage the boss's turrets.
When you collect a bomb item it takes a second for it to actually spawn, and during this brief period you can't use it to bomb. If you hide at the bottom of the screen, 4 of your bombs will be hidden off-screen and can't be hit by any enemies, but being off-screen also pauses their spawning animation.
If one of your helper ships close to you his hit, the ships behind it in the formation will detach and fly upwards where you can attempt to collect them. If one of the two ships that's exposed when you're at the bottom of the screen is hit, any ships behind them that are off-screen immediately vanish.
Button 2 does not require or benefit from the use of autofire.
Powerups
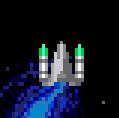
Your ship starts out at extremely low power. You fire a single laser per shot, and move with very low speed. Dying causes you to lose all powerups, so dying at a tough spot makes for an extremely difficult recovery process (Jupiter or Mars in particular are rough and lead to chaindeaths). If you die in the middle of a stage, you'll have to let some enemies past you as you focus on getting powerups again. The key powerups you need when recovering are the spreadshot and the speed up items. Make sure not to miss those!
Powerups appear as you shoot asteroids, or as you shoot the boxes that appear in comets. Powerups always seem to spawn in a fixed order, so you can predict what powerups will spawn next aside from the three special powerups. When you reveal a special powerup the one you get is randomly selected. The powerups appear roughly in this order:
Twin Laser: Adds a pair of lasers to your ship, allowing you to fire three tightly packed beams per shot. Each beam is its own hitbox, making this powerup immediately useful for punching through swarms. It takes like 4 or 5 of these to max out this upgrade, which makes it longer and wider, thus easier to hit with.
Bomb: Adds a helper ship to the side of your ship. They add slightly to your firepower by shooting small shots every now and then, and provide a slight bit of defense by blocking a shot for you (which causes the helper to be destroyed). Pressing Button 2 sacrifices them in order to fire off a bomb (see Controls above for details), which is what really makes them helpful as it's your only means of escape if you're about to get hit. You can carry up to 6 of the helper ships as bombs.
Sometimes when you bomb during a level outside the comet, enemies will spawn during the hyperspace animation. You are totally invulnerable though and can't be hit by them, but they can fly past you and damage the planet (the screen gets wiped when hyperspace ends).
Middle Laser: Powers up your main laser to be longer and slightly wider. Twin Laser is more important, but this is still useful to collect whenever you can safely do so. Takes 4 or 5 of these to max out this upgrade.
Spreadshot: Extremely useful, adds spreadfire to your shots. The spreadfire is quite strong in this game, capable of killing basic enemies in one hit. It's also decently powerful on enemies that take more hits. Collecting more of these doesn't make it any stronger, but upgrades the size of the projectiles, making them cover much more of the screen. When you're at max shot power you have a ton of spread in Halley's Comet. Takes 4 or 5 of these to max out.
Speed Up: You can collect up to 3 of these, at which point your speed's at the maximum. Your ship has a bit of startup acceleration when moving before it travels at full speed, and speed upgrades appear to boost both your maximum speed as well as reduce how long it takes to accelerate to max speed. It's recommended that you stick with 2 Speed Up items to give yourself a good balance of speed and tight dodging control, but you can definitely make the max of 3 Speed Up items work. It's not like a Gradius game where collecting too many Speed Ups can make you way too fast to realistically control. Because you're extremely slow at default ship speed, picking up one of these as soon as you can is a high priority. Also note that for some reason these never appear to spawn inside of the comet.
Note that even at max speed, you can still control your speed. As with many other shmups, holding down and tapping left or right to move at a diagonal along the bottom of the screen moves you slower than just going left or right. This can help for tight tap dodges.
The following three items are special items. Whenever one spawns, the game seems to randomly pick one to give you:
Max Power: Immediately gives you every single weapon powerup in the game and fully upgrades all of them. It doesn't do anything special if you're already fully upgraded, but if you died recently or if you're early on in the game, suddenly getting maxed out Twin Laser, Middle Laser, and Spreadshot is incredibly helpful.
Group: This immediately gives your ship a full formation of 6 helper ships to use as bombs or just to have as extra firepower. Pretty handy! Along with the Max Power item, this is one of the two more commonly dropped special items.
[image to be added]
Pow: A dark blue circular P icon that immediately destroys all enemies and bullets onscreen, same as if you used a bomb. It only seems to appear inside the comets. Note that the larger turrets that spray rainbow fire don't appear to get destroyed by these!
Barrier: This powerup is extremely rare. It's entirely possible to get through both loops without ever seeing one, and only on very rare occasions has it been seen spawning early in Loop 1. This rainbow coloured powerup gives your ship a frontal barrier that has no time limit. It can absorb nearly every shot type in the game including some of the bigger, weirder looking attacks fired at you, and can eat about 20 hits or so (!!!) before disappearing. The remaining hit count appears to be retained between levels and doesn't recover or recharge except presumably by grabbing another Barrier item if you're lucky enough to see two in a single playthrough.
The Barrier only covers your front, so you're still vulnerable to diagonal attacks that hit your sides, but if you pick one up consider yourself extremely lucky as it makes life a lot easier due to the sheer number of hits it can soak up.
Also note that that it's only ever been seen spawning in the last part of the level, when you're inside the comet.
Rank
The game doesn't appear to have a noticeable rank system, if any. Difficulty is more or less strictly tied to what level you're currently on.
Loops
The game starts at the Earth, flies you to the inner planets and the Sun, then slingshots you to Pluto and back through the inner planets. In other words, the stage order is: Earth, Venus, Mercury, the Sun, Pluto, Neptune, Uranus, Saturn, Jupiter, Mars -> loop back to Earth. The game appears to loop infinitely, and difficulty seems to max out at loop 2 (needs additional testing/confirmation).
Earth is Area 1 to 3, Venus is Area 4 to 6, Mercury is 7 to 9, and so on. Loop 2 starts at Area 31 and goes up to Area 60. Note that Loop 3 is unusual; it reuses Loop 2 numbering so Loop 3 Earth shows as Area 31 again on the scoreboard. If you're playing far enough that you're at Loop 3 or higher, it's probably best just to refer to your progress as "Loop #, [Planet], [Beginning/Middle/Comet]"
Scoring
Scoring mostly consists of surviving well. There's a ton of extends/1UPs in this game you can get from scoring, and you can hold well over 10 lives stocked (once you have more than 9 lives it displays 10 as A, 11 as B, 12 as C, and so on). You should counterstop the game at 10 million (9,999,90) by the last level of Loop 2. You can score more early on by collecting powerups (which give 1000 each), and by making sure to kill as many enemies as possible. Most enemies give 500 points per kill or so, and special waves of enemies give 10000 to 40000 for killing them all without bombing them (or without killing the pod that instantly destroys the wave, there's a couple waves where a pod appears that serves as a weakpoint and hitting it will destroy the wave without giving the score bonus, the first example is found at Venus).
You can also use bombs outside the entrance of a comet to reset the fight, or destroy all the turrets except one at the boss inside a comet, then milk enemies for additional points. Just be careful not to accidentally get killed in the process, and don't dawdle for too long because the level does technically have a time limit, even if it's an extremely generous one!
Version Differences
There were a few revisions of the game that were released. While there don't appear to be any significant gameplay adjustments, the older revisions of the game have exploitable scoring glitches that allow you to get way more points than intended per level, or even counterstop the game at the end of the first level (thanks to Lethe and Pearl for the info). Use a bomb right as the last panel of the comet boss is destroyed to break the level transition and get a massive amount of points as the game glitches out. Or, do this bomb glitch and get hit by an enemy that spawns as the level is about to end, and you can immediately counterstop the game by glitching out the game. Video explanation by Pearl here. Note that these bugs do not appear to be in the newer Japanese revisions or in Halley's Comet '87. They are also fixed by default in Hamster's Arcade Archives releases, albeit there's a menu option to disable this bugfix if you want to try and trigger it.
Hamster's Arcade Archives releases appear to be arcade perfect ports. They also have improved sound quality over currently available emulation, which appears to be missing some of the deep bass noises that are sometimes played such as when using a bomb to enter hyperspace. Highly recommended ports.
There's also a version known called "Halley's Comet '87" which has a modified title screen, but it's not clear what gameplay differences there are, if any.
The game had sequel called "Halley Wars" for both Famicom and Game Gear. These versions are quite different from each other as well as the original arcade game.
Secrets
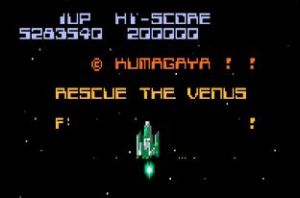
Moving up to the top of the screen over the text that appears at the beginning of each level ("RESCUE THE [planet name] FROM THE COMETS !") causes the message "DO NOT ERASE !" to appear in angry red letters. From level 2 (Venus) onward, if you then hold button 1 down while you're there, the message will change to reveal various developer names.
Walkthrough
Each area features unique predetermined miniboss spawns, and slight variations on the order and aggressiveness of the non-stop waves of enemies that keep spawning. More specific details to be added in the future.
Earth (Area 1-3 / 31-33)
Easy. First priority is to get powered up, particularly with Spreadshot and Speed Up. If you're in loop 2 and accidentally get killed, it's fortunately not too hard to recover here.
Venus (Area 4-6 / 34-36)
[to do]
Mercury (Area 7-9 / 37-39)
[to do]
The Sun (Area 10-12 / 40-42)
[to do]
Pluto (Area 13-15 / 43-45)
Amusingly misspelled "Plato" on the level screen, Pluto is the first area where the early area bosses come in pairs as opposed to singly.
Neptune (Area 16-18 / 46-48)
[to do]
Uranus (Area 19-21 / 49-51)
[to do]
Saturn (Area 22-24 / 52-54)
[to do]
Jupiter (Area 25-27 / 55-57)
The enemies that line up in a pair of columns you met at Venus show up again inside the comet, except they're far more aggressive about shooting this time, and there's no weak spot you can hit to destroy them all. Consider bombing them for safety.
Mars (Area 28-30 / 58-60)
Mars is uniquely nasty for having enemies spawn at a much faster rate, to the extent that you will often have multiple enemy waves overlapping at once. It's because of this that dying here can lead to an immediate game over as a result of being unable to recover. The enemies can potentially kill you over and over, sapping all your lives.
The turrets at comet entrance fire very dense lines of shots and don't stay up for long, so you'll have to be quick about dealing with them.
There's a giant mech that appears early once you enter the comet. It's a unique enemy found nowhere else that fires rocket punches at you, and soaks up damage like a sponge. Killing it with your lasers is very dangerous as it takes a massive beating before going down, and gives negligible points for the effort. It is highly recommended that you bring a bomb into the comet so that you can bomb it to death as soon as it appears on-screen, which will destroy it instantly without any fuss or risk.
Loop 2 changes:
Loop 2 is functionally the same as Loop 1, except that the basic enemies that keep spawning move MUCH faster, changing how far down their waves move prior to firing. Otherwise the bullets they fire move at the same speeds, bosses have the same health, you just have to adjust your dodges to match the new trajectories enemies take due to their increased movement speed. Recovery is much tougher if you die as the very fast enemies are difficult to hit with at low shot power.
Loop 3 and onward appear to be identical to Loop 2.
References & Contributors
BKR: YOU COULD RESCUE THE WIKI ENTRY! >w>
