Difference between revisions of "DonPachi/Enemy list"
< DonPachi
Jump to navigation
Jump to search
| Line 609: | Line 609: | ||
|locales = Stage 3 | |locales = Stage 3 | ||
|content = Towards the end of the stage there's a tricky part with these enemies coming from behind. Try to seal their twin bullets and eliminate them as soon as possible. | |content = Towards the end of the stage there's a tricky part with these enemies coming from behind. Try to seal their twin bullets and eliminate them as soon as possible. | ||
| + | }} | ||
| + | |||
| + | {{DPEnemyTable | ||
| + | |side=left | ||
| + | |image = DP-s3-purpleplane.png | ||
| + | |imagepx = 150px | ||
| + | |health = Medium | ||
| + | |score = 3,100 | ||
| + | |dangerlevel = Medium | ||
| + | |item = - | ||
| + | |locales = Stage 3 | ||
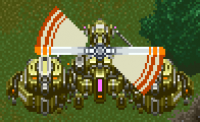
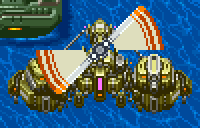
| + | |content = These enemies shoot a wide 7-way pattern and are quite resilient. Don't underestimate! | ||
| + | }} | ||
| + | |||
| + | {{DPEnemyTable | ||
| + | |side=left | ||
| + | |image = DP-s3-htank.png | ||
| + | |imagepx = 200px | ||
| + | |health = High | ||
| + | |score = 4,500 | ||
| + | |dangerlevel = High | ||
| + | |item = - | ||
| + | |locales = Stage 3 | ||
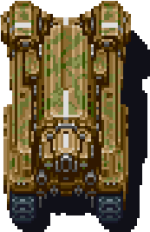
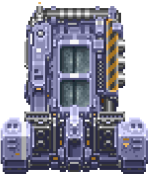
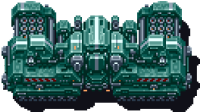
| + | |content = So to say the midboss of stage 3. Due to the high HP, you will barely be able to destroy it before it traps you with the nasty spread bullets from its back turrets. Thankfully, these can be sealed by pointblanking. This only leaves the line of bullets from the center to worry about. | ||
| + | }} | ||
| + | |||
| + | {{DPEnemyTable | ||
| + | |side=left | ||
| + | |image = DP-s3-box.png | ||
| + | |imagepx = 100px | ||
| + | |health = Low | ||
| + | |score = 340 | ||
| + | |dangerlevel = - | ||
| + | |item = - | ||
| + | |locales = Stage 3 | ||
| + | |content = A wooden crate. Move on. | ||
| + | }} | ||
| + | |||
| + | {{DPEnemyTable | ||
| + | |side=left | ||
| + | |image = DP-s3-cargroup.png | ||
| + | |imagepx = 150px | ||
| + | |health = Very Low | ||
| + | |score = 130 | ||
| + | |dangerlevel = - | ||
| + | |item = Star Item | ||
| + | |locales = Stage 3 | ||
| + | |content = The blue, red, and purple cars throughout the stage don't carry Bee Medals and are therefore less important. | ||
| + | }} | ||
| + | |||
| + | {{DPEnemyTable | ||
| + | |side=left | ||
| + | |image = DP-s3-forklift.png | ||
| + | |imagepx = 150px | ||
| + | |health = Low | ||
| + | |score = 800 | ||
| + | |dangerlevel = - | ||
| + | |item = Star Item | ||
| + | |locales = Stage 3 | ||
| + | |content = Scenery object. Worth a bit more than the small cars. | ||
| + | }} | ||
| + | |||
| + | {{DPEnemyTable | ||
| + | |side=left | ||
| + | |image = DP-s3-hturret.png | ||
| + | |imagepx = 150px | ||
| + | |health = Medium | ||
| + | |score = 3,300 | ||
| + | |dangerlevel = Medium | ||
| + | |item = - | ||
| + | |locales = Stage 3 | ||
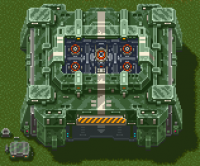
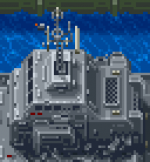
| + | |content = This big turret building can quickly become an issue if you don't take it out quickly. Difficult to include in bigger chains but worth it. | ||
| + | }} | ||
| + | |||
| + | {{DPEnemyTable | ||
| + | |side=left | ||
| + | |image = DP-s3-greenshipbridge.png | ||
| + | |imagepx = 150px | ||
| + | |health = Medium | ||
| + | |score = 820 | ||
| + | |dangerlevel = - | ||
| + | |item = Bee Medal | ||
| + | |locales = Stage 3 | ||
| + | |content = Scenery object holding a Bee Medal. | ||
| + | }} | ||
| + | |||
| + | {{DPEnemyTable | ||
| + | |side=left | ||
| + | |image = DP-s3-container3.png | ||
| + | |imagepx = 100px | ||
| + | |health = Low | ||
| + | |score = 520 | ||
| + | |dangerlevel = - | ||
| + | |item = Star Item | ||
| + | |locales = Stage 3 | ||
| + | |content = A container holding a Star Item. No danger. | ||
| + | }} | ||
| + | |||
| + | {{DPEnemyTable | ||
| + | |side=left | ||
| + | |image = DP-s3-mtruck.png | ||
| + | |imagepx = 125px | ||
| + | |health = Low | ||
| + | |score = tank: 2,000 <br>truck: 2,000 | ||
| + | |dangerlevel = - | ||
| + | |item = Star Item x2 | ||
| + | |locales = Stage 3 | ||
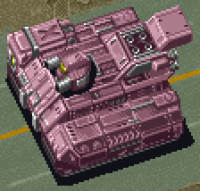
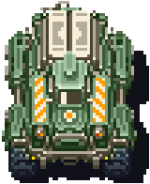
| + | |content = Scenery object but very important for chaining due to the unusually high score value. | ||
| + | }} | ||
| + | |||
| + | {{DPEnemyTable | ||
| + | |side=left | ||
| + | |image = DP-s3-roof.png | ||
| + | |imagepx = 100px | ||
| + | |health = Low | ||
| + | |score = 190 | ||
| + | |dangerlevel = - | ||
| + | |item = - | ||
| + | |locales = Stage 3 | ||
| + | |content = Low scoring scenery object. | ||
| + | }} | ||
| + | |||
| + | {{DPEnemyTable | ||
| + | |side=left | ||
| + | |image = DP-s3-bombcarrier.png | ||
| + | |imagepx = 200px | ||
| + | |health = Low | ||
| + | |score = 1,200 | ||
| + | |dangerlevel = Low | ||
| + | |item = Bomb | ||
| + | |locales = Stage 2, 3, 4, 5 | ||
| + | |content = The item carrier has a comparatively high score value making it worthwhile to include early on in chains. | ||
}} | }} | ||
Revision as of 19:11, 26 September 2020
Contents
Enemy list
Stage 1
| Enemy | Health | Score | Danger level | Item drop | Appears in... |
|---|---|---|---|---|---|
 |
Very Low | 130 | Low | - | Stage 1, 2, 3, 4 |
| Harmless popcorn helicopter that dies in one hit. | |||||
| Enemy | Health | Score | Danger level | Item drop | Appears in... |
|---|---|---|---|---|---|
 |
Low | 190 | Low | - | Stage 1 |
| A harmless turret shooting bullets occasionally when the bushes open up. | |||||
| Enemy | Health | Score | Danger level | Item drop | Appears in... |
|---|---|---|---|---|---|
 |
Low | 600 | Low | - | Stage 1, 4, 5 |
| Another simple turret that you shouldn't worry about too much. | |||||
| Enemy | Health | Score | Danger level | Item drop | Appears in... |
|---|---|---|---|---|---|
 |
Low | 150 | - | - | Stage 1 |
| It's just a house. No danger. | |||||
| Enemy | Health | Score | Danger level | Item drop | Appears in... |
|---|---|---|---|---|---|
 |
Low | 1,120 | - | Star Item x4 | Stage 1 |
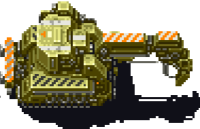
| Another scenery object. No danger level but leaves behind four Star Items. | |||||
Stage 1 Boss
| Enemy | Health | Score | Danger level | Item drop | Appears in... |
|---|---|---|---|---|---|
 |
Very Low | 110 | - | Bee Medal | Stage 1, 3 |
| Shoot this small car for a Bee Medal. | |||||
| Enemy | Health | Score | Danger level | Item drop | Appears in... |
|---|---|---|---|---|---|
 |
Medium | 1,500 | Medium | - | Stage 1 |
| Turret at the back of stage 1 boss that shoots a very wide 7-way spread when opening. | |||||
Stage 2
| Enemy | Health | Score | Danger level | Item drop | Appears in... |
|---|---|---|---|---|---|
 |
Very Low | 330 | Low | - | Stage 2 |
| Popcorn enemy that shows up in various formations but rarely becomes a threat. | |||||
| Enemy | Health | Score | Danger level | Item drop | Appears in... |
|---|---|---|---|---|---|
 |
Low | 800 | Low | Star Item | Stage 2 |
| A simple turret. Not a big deal. | |||||
| Enemy | Health | Score | Danger level | Item drop | Appears in... |
|---|---|---|---|---|---|
 |
Low | 800 | Low | Star Item | Stage 2 |
| A slightly less dangerous turret. May only cause trouble in groups with other turrets. | |||||
| Enemy | Health | Score | Danger level | Item drop | Appears in... |
|---|---|---|---|---|---|
 |
Low | 100 | Low | - | Stage 2, 4 |
| Another small fry. Shoot it down and focus on other things. | |||||
| Enemy | Health | Score | Danger level | Item drop | Appears in... |
|---|---|---|---|---|---|
 |
Low | 1,200 | Low | Bomb | Stage 2, 3, 4, 5 |
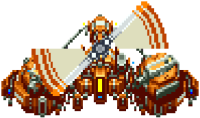
| The item carrier has a comparatively high score value making it worthwhile to include early on in chains. | |||||
Stage 2 Boss
Stage 3
| Enemy | Health | Score | Danger level | Item drop | Appears in... |
|---|---|---|---|---|---|
 |
Very Low | 130 | Low | - | Stage 1, 2, 3, 4 |
| Harmless popcorn helicopter that dies in one hit. | |||||
| Enemy | Health | Score | Danger level | Item drop | Appears in... |
|---|---|---|---|---|---|
 |
Medium | 220 | Low | - | Stage 3 |
| Attacks with a twin shot that can occasionally snipe the player due to weird angles. | |||||
| Enemy | Health | Score | Danger level | Item drop | Appears in... |
|---|---|---|---|---|---|
 |
Low | 800 | Low | - | Stage 2, 3, 4, 5 |
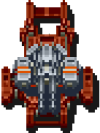
| A small turret that only becomes an issue when the screen is filled with other enemies. | |||||
| Enemy | Health | Score | Danger level | Item drop | Appears in... |
|---|---|---|---|---|---|
 |
Medium | 500 | Low | - | Stage 3 |
| The front turret of the big carrier ships. | |||||
| Enemy | Health | Score | Danger level | Item drop | Appears in... |
|---|---|---|---|---|---|
 |
Medium | 500 | Medium | - | Stage 3 |
| The side turret of the big carrier ships is much more dangerous shooting a tricky 5-way pattern. | |||||
| Enemy | Health | Score | Danger level | Item drop | Appears in... |
|---|---|---|---|---|---|
 |
Medium | 500 | - | Bee Medal | Stage 3 |
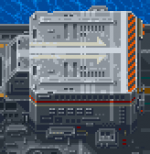
| Scenery object. This crate holds a Bee Medal. | |||||
| Enemy | Health | Score | Danger level | Item drop | Appears in... |
|---|---|---|---|---|---|
 |
Low | 280 | - | - | Stage 3 |
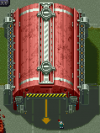
| Scenery object. Two small tanks will appear from underneath. | |||||
| Enemy | Health | Score | Danger level | Item drop | Appears in... |
|---|---|---|---|---|---|
 |
Low | 520 | - | Star Item | Stage 3 |
| A container holding a Star Item. No danger. | |||||
| Enemy | Health | Score | Danger level | Item drop | Appears in... |
|---|---|---|---|---|---|
 |
Very Low | 110 | - | Bee Medal | Stage 1, 3 |
| Shoot this small car for a Bee Medal. | |||||
| Enemy | Health | Score | Danger level | Item drop | Appears in... |
|---|---|---|---|---|---|
 |
Very Low | 130 | - | Star Item | Stage 3 |
| Scenery object. | |||||
| Enemy | Health | Score | Danger level | Item drop | Appears in... |
|---|---|---|---|---|---|
 |
Low | 1,900 | - | - | Stage 3 |
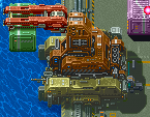
| High score value scenery object. | |||||
| Enemy | Health | Score | Danger level | Item drop | Appears in... |
|---|---|---|---|---|---|
 |
Low | 630 | - | Star Item | Stage 3 |
| The purple container gives slightly more points than the other ones. | |||||
| Enemy | Health | Score | Danger level | Item drop | Appears in... |
|---|---|---|---|---|---|
 |
Medium | 210 | Low | - | Stage 3 |
| Shoots a twin shot attack in very inflexible angles. | |||||
| Enemy | Health | Score | Danger level | Item drop | Appears in... |
|---|---|---|---|---|---|
 |
Low | 110 | - | - | Stage 3 |
| Negligible scenery object. | |||||
| Enemy | Health | Score | Danger level | Item drop | Appears in... |
|---|---|---|---|---|---|
 |
Medium | 3,100 | Medium | - | Stage 3 |
| These enemies shoot a wide 7-way pattern and are quite resilient. Don't underestimate! | |||||
| Enemy | Health | Score | Danger level | Item drop | Appears in... |
|---|---|---|---|---|---|
 |
Low | 340 | - | - | Stage 3 |
| A wooden crate. Move on. | |||||
| Enemy | Health | Score | Danger level | Item drop | Appears in... |
|---|---|---|---|---|---|
| Very Low | 130 | - | Star Item | Stage 3 | |
| The blue, red, and purple cars throughout the stage don't carry Bee Medals and are therefore less important. | |||||
| Enemy | Health | Score | Danger level | Item drop | Appears in... |
|---|---|---|---|---|---|
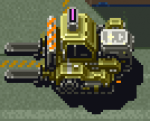 |
Low | 800 | - | Star Item | Stage 3 |
| Scenery object. Worth a bit more than the small cars. | |||||
| Enemy | Health | Score | Danger level | Item drop | Appears in... |
|---|---|---|---|---|---|
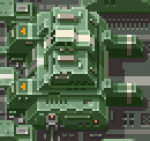 |
Medium | 820 | - | Bee Medal | Stage 3 |
| Scenery object holding a Bee Medal. | |||||
| Enemy | Health | Score | Danger level | Item drop | Appears in... |
|---|---|---|---|---|---|
 |
Low | 520 | - | Star Item | Stage 3 |
| A container holding a Star Item. No danger. | |||||
| Enemy | Health | Score | Danger level | Item drop | Appears in... |
|---|---|---|---|---|---|
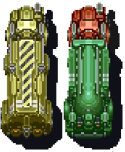 |
Low | tank: 2,000 truck: 2,000 |
- | Star Item x2 | Stage 3 |
| Scenery object but very important for chaining due to the unusually high score value. | |||||
| Enemy | Health | Score | Danger level | Item drop | Appears in... |
|---|---|---|---|---|---|
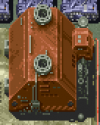 |
Low | 190 | - | - | Stage 3 |
| Low scoring scenery object. | |||||
| Enemy | Health | Score | Danger level | Item drop | Appears in... |
|---|---|---|---|---|---|
 |
Low | 1,200 | Low | Bomb | Stage 2, 3, 4, 5 |
| The item carrier has a comparatively high score value making it worthwhile to include early on in chains. | |||||
Stage 3 Boss
Stage 4
Stage 4 Boss
Stage 5
Stage 5 Boss
References & Contributors
- Most of the image files are taken from an unreleased guide on Donpachi bearing the title "De Taisabachi à Inbachi: Guide complet des shoot them ups de la compagnie Cave, (1) Donpachi, Le dernier des Toaplan" from the French user "Yami" posted on Discord on November 18th, 2018.
