Difference between revisions of "Dragon Blaze/Strategy"
Jump to navigation
Jump to search
m |
|||
| Line 1: | Line 1: | ||
==Coinhead Locations== | ==Coinhead Locations== | ||
| − | ===Air Stage=== | + | ===Maimana (Air Stage)=== |
{| class="wikitable" | {| class="wikitable" | ||
| [[File:Dragonblaze_coinhead1.png|125px|thumb]] || style="width: 500pt;" | Early on in the stage, after the flying bats, a set of 4 archers will spawn. The upper left archer hides the coinhead. | | [[File:Dragonblaze_coinhead1.png|125px|thumb]] || style="width: 500pt;" | Early on in the stage, after the flying bats, a set of 4 archers will spawn. The upper left archer hides the coinhead. | ||
|} | |} | ||
| − | ===Sea Stage=== | + | ===Alger (Sea Stage)=== |
{| class="wikitable" | {| class="wikitable" | ||
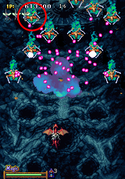
| [[File:Dragonblaze_coinhead2.png|125px|thumb]] || style="width: 500pt;" | After the waves of cuttlefish, a series of green enemies will swim from the top of the screen. The far right enemy is the target. | | [[File:Dragonblaze_coinhead2.png|125px|thumb]] || style="width: 500pt;" | After the waves of cuttlefish, a series of green enemies will swim from the top of the screen. The far right enemy is the target. | ||
|} | |} | ||
| − | ===Desert Stage=== | + | ===Haradh (Desert Stage)=== |
{| class="wikitable" | {| class="wikitable" | ||
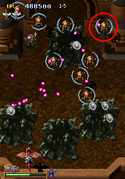
| [[File:Dragonblaze_coinhead3.png|125px|thumb]] || style="width: 500pt;" | After the two large vehicles, several rows of skulls will arc across the screen. Among them will be a single enemy, flying directly downwards. This is your target. | | [[File:Dragonblaze_coinhead3.png|125px|thumb]] || style="width: 500pt;" | After the two large vehicles, several rows of skulls will arc across the screen. Among them will be a single enemy, flying directly downwards. This is your target. | ||
|} | |} | ||
| − | ===Jungle Stage=== | + | ===Ghaba (Jungle Stage)=== |
{| class="wikitable" | {| class="wikitable" | ||
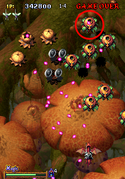
| [[File:Dragonblaze_coinhead4.png|125px|thumb]] || style="width: 500pt;" | Early in the stage, there will be a stray flower enemy, hiding behind a row of 3 other enemies. Kill it with your Dragon Shot to reveal the coinhead. | | [[File:Dragonblaze_coinhead4.png|125px|thumb]] || style="width: 500pt;" | Early in the stage, there will be a stray flower enemy, hiding behind a row of 3 other enemies. Kill it with your Dragon Shot to reveal the coinhead. | ||
Revision as of 22:28, 9 July 2020
Contents
Coinhead Locations
Maimana (Air Stage)
| Early on in the stage, after the flying bats, a set of 4 archers will spawn. The upper left archer hides the coinhead. |
Alger (Sea Stage)
| After the waves of cuttlefish, a series of green enemies will swim from the top of the screen. The far right enemy is the target. |
Haradh (Desert Stage)
| After the two large vehicles, several rows of skulls will arc across the screen. Among them will be a single enemy, flying directly downwards. This is your target. |
Ghaba (Jungle Stage)
| Early in the stage, there will be a stray flower enemy, hiding behind a row of 3 other enemies. Kill it with your Dragon Shot to reveal the coinhead. |
Stage 5
| After the 4 armoured turtles, several skull enemies will fill the screen. In particular, a column of 5 skulls will spawn in the top right, and fly in an arc towards the left of the screen. The second of the five enemies hides the coinhead. |
Stage 6
| After the skull & bones midboss, several rows of skeletons will rush directly downwards. This particular enemy on the left is the one you're after. |
Stage 7
| The 3-headed midboss contains two coinheads. Simply destroy defeat the boss with a Dragon Shot to reveal both. |


