Difference between revisions of "User:M.Knight/sandbox"
m |
|||
| Line 1: | Line 1: | ||
| + | |||
| + | [[File:CField logo2.png|center]] | ||
| + | |||
{{GameInfobox | {{GameInfobox | ||
| − | |bordercolor = | + | |bordercolor = #AD352C |
| − | |title = | + | |title = Chaos Field |
| − | |background = # | + | |background = #6BA0AC |
| − | |image = | + | |image = CField Title (Arcade).png |
|width = 324px; | |width = 324px; | ||
| − | |imagecaption = | + | |imagecaption = Arcade ver. title screen |
| − | |imagescalepx = | + | |imagescalepx = 240px |
| − | |developer = Milestone | + | |developer = Milestone Inc. |
| + | | | ||
| + | |publisher = Able Corporation | ||
| + | | | ||
| + | |director = Manabu Matsumoto | ||
| + | | | ||
| + | |producer = Hiroshi Kimura | ||
| + | | | ||
| + | |music = Kō Hayashi </br> Daisuke Nagata | ||
| | | | ||
| − | | | + | |programmer = Jirō Hamaya </br> Manabu Matsumoto </br> Takahiro Kawachi |
| | | | ||
| − | | | + | |art = Ryohei Murakami |
| | | | ||
| − | | | + | |platform = Arcade (SEGA NAOMI) </br> SEGA Dreamcast </br> Nintendo Gamecube (as EXPANDED) </br> PlayStation 2 (as New Order) |
| + | | | ||
| + | |releasedate = Arcade (NAOMI) : May 25, 2004 </br> Dreamcast : December 16, 2004 </br> Gamecube : February 24, 2005 (JP), December 20, 2005 (US) </br> PlayStation 2 : December 21, 2005 | ||
| − | |previousgame = [[ | + | |previousgame = n/a |
| − | + | |nextgame = [[Radirgy|Radirgy]] | |
}} | }} | ||
| − | + | '''Chaos Field''' (カオスフィールド) is a 2004 vertical-scrolling shoot-em-up arcade game developed by MileStone Inc. and published by Able Corporation. It was the first game developed by Milestone. The game was only released in Japan, but eventually got released in the west with it's Nintendo Gamecube port called ''Chaos Field Extended''. One day after the western release, a PlayStation 2 version, called ''Chaos Field New Order'', was released in Japan. Chaos Field is also included in Milestone's shoot-em-up collections for Wii (''Ultimate Shooting Collection'' and ''Milestone Shooting Collection 2''). | |
| + | |||
| + | The game consists entirely of boss battles, featuring five stages with three bosses each. The player can choose to play as one of three characters, each with their own ship that has a unique primary weapon. The player also can flip the environment at will between two parallel dimensions. | ||
| − | |||
__TOC__ | __TOC__ | ||
| − | == Gameplay | + | == Gameplay == |
| − | + | Chaos Field is a vertically-scrolling shoot-em-up game consisting of 5 stages (called "Phases" in-game). The gameplay is a boss-rush style, where in each Phases, the player will fight against 3 bosses consecutively. The player can choose between one of three playable characters; each character with their own ship that have their own unique primary weapons and features. The game uses a HP system ("Shield" in-game) and the game can be set to have the player to have a minimum amount of 2 and maximum amount of 5 Shields per credit. The player only have one life per credit, however, and letting the "Shield" meter drops to zero will let the player to enter their name if they got a high score in the ranking list, then they will be taken either to the Continue screen (if the player still got at least one credit left, otherwise will be a game over). Selecting to continue lets the player to choose another character to play as or not. However, their score will reset to zero. | |
| − | ---- | ||
| − | |||
| − | |||
| − | |||
| − | |||
| − | |||
| − | |||
=== Controls === | === Controls === | ||
---- | ---- | ||
| − | * '''A (Hold):''' | + | * '''A (Hold):''' Shot |
| − | * '''B ( | + | * '''B (Tap 1, 2, or 3 times):''' Sword |
| − | * '''C :''' | + | ** Tapping several times in quick succession will unleash a sword combo |
| − | * ''' | + | * '''C:''' Switch between Order and Chaos Field |
| + | * '''A + B (Simultaneous tap):''' Wing-Layer (deploys a protective barrier) | ||
| + | * '''B + C (Simultaneous tap):''' Lock-On (locks and fires homing beams onto the enemies) | ||
| + | |||
| + | Note : | ||
| − | + | * The game's ports allow players to map dedicated buttons for the Wing Layer and Lock-On. However, the simultaneous tap inputs have not been removed nor can they be toggled off. It is thus still possible to (accidentally) use either of these weapons by pressing their two buttons at once. | |
=== Interface === | === Interface === | ||
---- | ---- | ||
| − | [[File: | + | [[File:Chaos Field - Interface 2.png|700px]] |
| − | * | + | * 1 : Shield indicator (Player's lives), character name and portrait. |
| + | * 2 : Meta gauge, used for some of the weapons. | ||
| + | ** Each unit allows one use of the weapons that need it. If a unit is red, it is partially filled but can not be used yet. | ||
| + | * 3 : Player's score | ||
| + | * 4 : Current field. Appears in blue for Order Field, and in red for Chaos Field | ||
| + | * 5 : Amount of hits on the current combo. (Only shows up when a combo is active) | ||
| + | * 6 : Timer gauge for the current combo. (Only shows up when a combo is active) | ||
| + | * 7 : For a destroyed part or boss, a display of its base value, multiplier applied, and final value. (Only shows up temporarily after any part or boss destruction) | ||
| + | * 8 : Boss timer, displayed in seconds. When the timer is below 20 seconds, the ms will also be shown. | ||
| + | * 9 : Boss' HP bar | ||
| − | + | === Weapons === | |
| + | ---- | ||
| − | * | + | * '''Shot''' : |
| − | * | + | * '''Sword''' : |
| − | * | + | * '''Wing Layer''' : |
| − | * | + | * '''Lock-on Laser''' : |
| − | * | + | * '''Field Switch''' : |
| − | |||
| − | |||
| − | === | + | === Field differences === |
| − | |||
| − | |||
| − | + | === Characters === | |
| − | + | Please refer to Chaos_Field/Characters | |
| − | |||
| − | |||
| − | |||
| − | |||
| − | === | + | ==== Primary ==== |
---- | ---- | ||
| + | While in the Order Field, the power and characteristics of primary weapons is normal, but in the Chaos Field, their power will increase and will change their characteristics, from subtle to notable changes. | ||
| − | + | {| class="wikitable" | |
| + | |- | ||
| + | ! Ship !! In Order Field !! In Chaos Field !! Description | ||
| + | |- | ||
| + | | Mixed Blue || [[File:MB Primary1.png|250px|center]] || [[File:MB Primary2.png|250px|center]] || Fires 4 blue lasers; two outer 'ball' beams goes in a spread pattern while the inner two beams goes in a straight pattern forward. In the Chaos Field, the lasers grew in size slightly and the spread range is extended. | ||
| + | |- | ||
| + | | Flawed Red || [[File:FR Primary1.png|300px|center]] || [[File:FR Primary2.png|300px|center]] || Fires 6 continuous stream of red lasers which locks on to the enemy once one comes contact with them. In Chaos Field, the lasers grew in size and no longer locks on to the enemies, but instead, fires in a straight fixed pattern that follows the player and penetrates, damaging anything that goes through it. | ||
| + | |- | ||
| + | | Fake Yellow || [[File:FY Primary1.png|250px|center]] || [[File:FY Primary2.png|250px|center]] || Fires a short range, yellow lightning bolt which leaves electric sparks on its track and advances forward, damaging any enemies that hits it. In Chaos Field, the bolt grew in size slightly and able to release more sparks at once. | ||
| + | |} | ||
| − | + | ==== Secondary ==== | |
| + | ---- | ||
| + | TBA | ||
| − | + | ===== Wing-Layer ===== | |
| − | + | ---- | |
| − | + | TBA | |
| − | |||
| − | + | ===== Lock-On laser ===== | |
| − | |||
| − | |||
| − | |||
| − | |||
---- | ---- | ||
| + | TBA | ||
| − | |||
| − | |||
| − | + | === Items === | |
| − | |||
| − | |||
| − | |||
| − | |||
| − | |||
| − | |||
| − | |||
| − | |||
| − | |||
| − | === | ||
---- | ---- | ||
| − | |||
| − | {| class="wikitable" style="background-color:# | + | {| class="wikitable" style="background-color:#F5F9FA;" |
| − | |- style="background-color:# | + | |- style="background-color:#9BC5CD;" |
| − | | style="width:10%;" | <big> | + | | style="width:10%;" | <big>Item</big> |
| − | | style="width: | + | | style="width:90%;" |<big>Description</big> |
|- | |- | ||
| − | | [[File: | + | | [[File:Chaos Field - Meta Stock item.png]] |
| − | | <b> | + | | <b>Meta Stock item</b> : Item that is generated when destroying boss parts or taking a hit. In Original mode, it will also spawn when a popcorn enemy is killed. The Meta stock item will replenish part of the Meta gauge, which is used in order to fire the Wing Layer and the Lock-On Laser. Each individual block of the Meta gauge needs 10 Meta Stock items to be filled. In other words, a single Wing Layer or Lock-On Laser use requires 10 Meta Stock items. |
|- | |- | ||
| − | | [[File: | + | | [[File:Chaos Field - Point item.png]] |
| − | | <b> | + | | <b>Point item</b> : Alternate item that spawns in place of the Meta Stock item if the player's Meta gauge is actually full when the items are spawned. These golden items are worth 5.000 points each and will not replenish the Meta gauge even if said gauge gets emptied in between the item spawn and the item collection. |
|- | |- | ||
| − | | [[File:Radirgy - | + | | [[File:Radirgy - Milestone logo.png|64px]] |
| − | | <b> | + | | <b>Milestone logo</b> : Special logo that can be triggered on 1-2 and 3-1 and replenishes one life point when picked up. In order to make the logo appear, the boss has to be killed while in Order Field before the timer goes below 55 seconds (for 1-2) or 64 seconds (for 3-1). Switching to Chaos Field beforehand to inflict additional damage is fine and will not prevent the logo spawn as long as the killing blow occurs in Order Field. |
| + | [ VIDEO SHOWCASE : https://www.youtube.com/watch?v=Ew8iTmBNnrI & https://www.youtube.com/watch?v=bbB951BT7GM ] | ||
| − | + | One thing to note on 3-1 is that the boss will be moving towards the left edge of the screen when the timer is close to the threshold. As a result, a last second kill will actually spawn the logo a bit too far away from the area the ship can move in, and the logo will be impossible to collect. When the logo gets despawned, the collection SFX will still play, but no life point will be restored. | |
| + | |||
| + | [ VIDEO SHOWCASE : https://www.youtube.com/watch?v=onqZmuqAldI ] | ||
|} | |} | ||
| − | + | === Scoring === | |
| + | ---- | ||
| + | |||
| − | |||
| − | + | == Story == | |
| − | |||
| − | + | [Taken from the US GC manual] | |
| − | + | The "Chaos Field", a warped and chaotic dimension. | |
| − | + | There humankind was exposed to the threat of annihilation through the invasion of the mysterious "Abo". Humankind resisted them, and a costly battle ensued for many years, a battle with no clear victor. | |
| − | + | Over time, the battle spread out beyond the Chaos Field to engulf another time-space dimension called the "Order Field". | |
| − | + | In order to put a stop to this multi dimensional war, three pilots have been chosen for an assault... | |
| − | == | + | == Video References == |
| − | + | ||
| + | Please refer to https://shmups.wiki/library/Chaos_Field/Video_Index | ||
| − | |||
| − | + | Characters page | |
| − | |||
| − | |||
| − | |||
| − | |||
| − | |||
| − | |||
| − | |||
| − | |||
| − | |||
| − | |||
| − | |||
| − | |||
| − | |||
| − | |||
| − | |||
| − | |||
| − | |||
| − | |||
| − | |||
| − | |||
| − | |||
| − | |||
| − | |||
| − | |||
| − | |||
| − | |||
| − | |||
| − | |||
| − | |||
| − | |||
| − | |||
| − | |||
| − | |||
| − | + | __TOC__ | |
| − | + | Note : The character profiles and ship descriptions have been taken from the official US localization | |
| − | + | <h3> <span style="display:none;">Hal</span></h3> | |
| − | {| class="wikitable" style="background-color:# | + | {| class="wikitable" style="background-color : #E8EAF3" |
| − | |||
| − | |||
| − | |||
| − | |||
|- | |- | ||
| − | + | ! colspan="3"style="background-color : #7C85BE ; color : white; text-align :left" | <big>Hal</big> | |
| − | | < | ||
| − | |||
|- | |- | ||
| − | | [[File: | + | | rowspan="2" | [[File:Hal.png|center]] |
| − | | | + | | colspan="2" | Since he was born, Hal has been training at the research institute to do battle with the Abo. A young boy of 15, he is quiet and expressionless, and will get down and dirty in battle if he's ordered to. However, he's slowly begun to realize that he's involved in a life or death struggle, one that he might not survive. |
| − | |||
|- | |- | ||
| − | | [[File: | + | | [[File:MixedBlue.png|center]] |
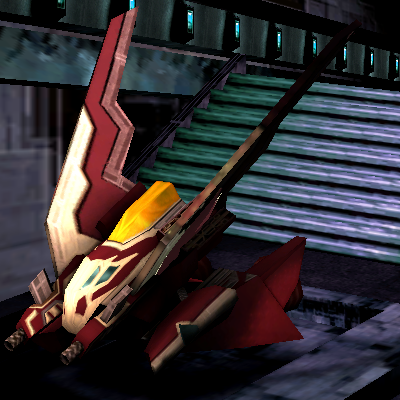
| − | | | + | | '''Mixed Blue''' : A standard fighter that is improved and tuned based on the data of past combats. It has well-balanced maneuverability and striking power. |
| − | |||
|- | |- | ||
| − | | | + | | style="background-color : #B4B9DA ; color : white" | '''<big>Shot</big>''' |
| − | | < | + | | |
| − | | | + | | |
|- | |- | ||
| − | | | + | | style="background-color : #B4B9DA ; color : white" | '''<big>Sword</big>''' |
| − | | < | + | | colspan="2" | |
| − | | | ||
|- | |- | ||
| − | | | + | | style="background-color : #B4B9DA ; color : white" | '''<big>Wing Layer</big>''' |
| − | | < | + | | |
| − | | | + | | |
|- | |- | ||
| − | | | + | | style="background-color : #B4B9DA ; color : white" | '''<big>Lock-On Laser</big>''' |
| − | + | | | |
| − | + | | | |
| − | |||
| − | |||
| − | | < | ||
| − | |||
| − | |||
| − | |||
| − | | | ||
| − | | | ||
|} | |} | ||
| + | <h3> <span style="display:none;">Ifumi</span></h3> | ||
| − | + | {| class="wikitable" style="background-color : #F5E5E5 " | |
| − | + | |- | |
| − | {| class="wikitable" style="background-color:# | + | ! colspan="3"style="background-color : #BF5353 ; color : white; text-align :left" | <big>Ifumi</big> |
| − | |- style="background-color:# | ||
| − | |||
| − | |||
|- | |- | ||
| − | | [[File: | + | | rowspan="2" | [[File:Ifumi.png|center]] |
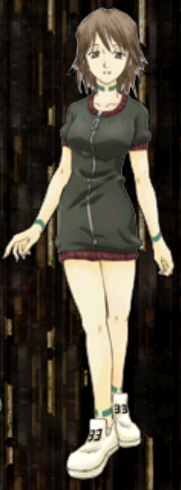
| − | | | + | | colspan="2" | 19 years old---she's a kind-hearted girl who has taken on the role of looking after Hal, ever since he was very young. As would be expected, she too has received combat training, and with excellent results. She is bright and cheerful with everyone and does not despair when times are tough. |
| − | |||
| − | |||
| − | |||
| − | |||
| − | |||
| − | |||
|- | |- | ||
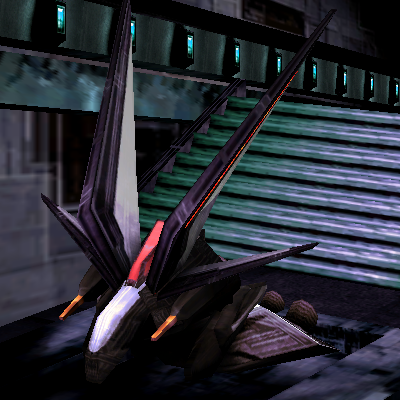
| − | | [[File: | + | | [[File:FlawedRed.png|center]] |
| − | | | + | | '''Flawed Red''' : The newest and most advanced fighter that is designed based on the present standard fighter with emphasis placed on further reinforcement of maneuverability. |
| − | |||
| − | |||
| − | |||
| − | |||
| − | |||
| − | |||
| − | |||
| − | |||
| − | |||
| − | |||
| − | |||
| − | |||
| − | |||
| − | |||
| − | |||
| − | |||
| − | |||
| − | |||
| − | |||
| − | |||
| − | |||
| − | |||
| − | |||
| − | |||
| − | |||
| − | |||
| − | |||
| − | |||
|- | |- | ||
| − | | | + | | style="background-color : #DFA9A9 ; color : white" | '''<big>Shot</big>''' |
| − | | | + | | |
| | | | ||
|- | |- | ||
| − | | | + | | style="background-color : #DFA9A9 ; color : white" | '''<big>Sword</big>''' |
| − | | | + | | colspan="2" | |
| − | | | ||
|- | |- | ||
| − | | | + | | style="background-color : #DFA9A9 ; color : white" | '''<big>Wing Layer</big>''' |
| − | | | + | | |
| − | | | + | | |
|- | |- | ||
| − | | | + | | style="background-color : #DFA9A9 ; color : white" | '''<big>Lock-On Laser</big>''' |
| − | + | | | |
| − | + | | | |
| − | |- | ||
| − | | | ||
| − | | | ||
| − | |||
|} | |} | ||
| − | |||
| − | + | <h3> <span style="display:none;">Jinn</span></h3> | |
| − | == | + | {| class="wikitable" style="background-color : #F0F4DB " |
| − | + | |- | |
| − | + | ! colspan="3"style="background-color : #BBCF54 ; color : white; text-align :left" | <big>Jinn</big> | |
| − | |||
| − | |||
| − | |||
| − | |||
| − | |||
| − | |||
| − | == | ||
| − | |||
| − | |||
| − | |||
| − | |||
| − | |||
| − | |||
| − | |||
| − | |||
|- | |- | ||
| − | | | + | | rowspan="2" | [[File:Jinn.png|center]] |
| − | | | + | | colspan="2" | He's a mysterious man whose past experience is unknown---it's hard to tell whether he's serious or not. He's said to be 30 years old, but there are some ways in which his thinking is rather childish. |
| − | |||
| − | |||
| − | |||
| − | |||
| − | [ | ||
| − | |||
| − | |||
| − | |||
| − | |||
| − | |||
| − | |||
| − | |||
| − | |||
| − | |||
| − | |||
| − | |||
| − | |||
| − | |||
| − | |||
| − | |||
| − | |||
| − | |||
| − | |||
| − | |||
| − | |||
| − | |||
| − | |||
| − | |||
| − | |||
| − | |||
| − | |||
| − | |||
| − | |||
| − | |||
| − | |||
| − | |||
| − | |||
| − | |||
| − | |||
| − | |||
| − | |||
| − | |||
| − | |||
| − | |||
| − | |||
| − | |||
| − | |||
| − | |||
| − | |||
| − | |||
| − | |||
| − | |||
| − | |||
| − | |||
| − | |||
| − | |||
| − | |||
| − | |||
| − | |||
| − | |||
| − | |||
| − | |||
| − | |||
| − | |||
| − | |||
| − | |||
| − | |||
| − | |||
| − | |||
| − | |||
| − | |||
| − | |||
| − | |||
| − | |||
| − | |||
| − | |||
| − | |||
| − | |||
| − | |||
| − | |||
| − | |||
| − | |||
| − | |||
| − | |||
| − | |||
| − | |||
| − | |||
| − | |||
| − | |||
| − | |||
| − | |||
| − | |||
| − | |||
| − | + | There's also a rumor going on that he was "built" from organic data obtained from captured enemy Abo. | |
| − | |||
| − | |||
| − | |||
| − | |||
|- | |- | ||
| − | + | | [[File:FakeYellow.png|center]] | |
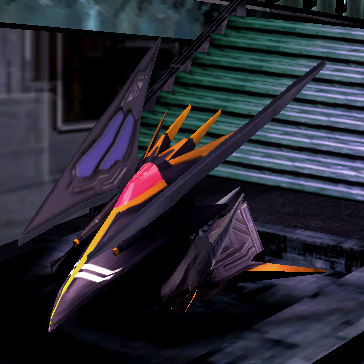
| − | + | | '''Fake Yellow''' : A prototype that was built in the early stages of development. Though its maneuverability is lower then that of the others because of its heavy equipment, its striking performance is higher than that of the present models. | |
| − | |||
| − | |||
| − | |||
| − | |||
| − | |||
|- | |- | ||
| − | | | + | | style="background-color : #CFDD87 ; color : white" | '''<big>Shot</big>''' |
| − | | | + | | |
| − | |||
| − | |||
| − | |||
| − | |||
| − | |||
| − | |||
| − | | | ||
| − | |||
| − | |||
| − | |||
| − | |||
| − | |||
| | | | ||
| − | |||
| − | |||
| − | |||
| − | |||
| − | |||
|- | |- | ||
| − | + | | style="background-color : #CFDD87 ; color : white" | '''<big>Sword</big>''' | |
| − | + | | colspan="2" | | |
| − | |||
| − | |||
| − | |||
| − | |||
| − | |||
|- | |- | ||
| − | | | + | | style="background-color : #CFDD87 ; color : white" | '''<big>Wing Layer</big>''' |
| − | + | | | |
| − | + | | | |
| − | |||
| − | |||
| − | |||
| − | |||
| − | |||
| − | |||
| − | |||
| − | |||
| − | |||
|- | |- | ||
| − | + | | style="background-color : #CFDD87 ; color : white" | '''<big>Lock-On Laser</big>''' | |
| − | + | | | |
| − | + | | | |
| − | |||
| − | |||
| − | |||
| − | |||
| − | |||
| − | |||
| − | |||
| − | |||
| − | |||
| − | |||
| − | | | ||
| − | | | ||
|} | |} | ||
| − | |||
| − | |||
| − | |||
| − | |||
| − | |||
| − | |||
| − | |||
| − | |||
| − | |||
Revision as of 13:50, 3 February 2022
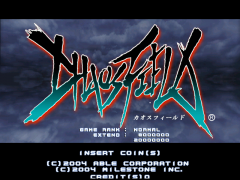
Arcade ver. title screen
| Developer: | Milestone Inc. |
|---|---|
| Publisher: | Able Corporation |
| Director: | Manabu Matsumoto |
| Producer: | Hiroshi Kimura |
| Music: | Kō Hayashi Daisuke Nagata |
| Art: | Ryohei Murakami |
| Release date: | Arcade (NAOMI) : May 25, 2004 Dreamcast : December 16, 2004 Gamecube : February 24, 2005 (JP), December 20, 2005 (US) PlayStation 2 : December 21, 2005 |
| Previous game: | n/a |
| Next game: | Radirgy |
Chaos Field (カオスフィールド) is a 2004 vertical-scrolling shoot-em-up arcade game developed by MileStone Inc. and published by Able Corporation. It was the first game developed by Milestone. The game was only released in Japan, but eventually got released in the west with it's Nintendo Gamecube port called Chaos Field Extended. One day after the western release, a PlayStation 2 version, called Chaos Field New Order, was released in Japan. Chaos Field is also included in Milestone's shoot-em-up collections for Wii (Ultimate Shooting Collection and Milestone Shooting Collection 2).
The game consists entirely of boss battles, featuring five stages with three bosses each. The player can choose to play as one of three characters, each with their own ship that has a unique primary weapon. The player also can flip the environment at will between two parallel dimensions.
Contents
Gameplay
Chaos Field is a vertically-scrolling shoot-em-up game consisting of 5 stages (called "Phases" in-game). The gameplay is a boss-rush style, where in each Phases, the player will fight against 3 bosses consecutively. The player can choose between one of three playable characters; each character with their own ship that have their own unique primary weapons and features. The game uses a HP system ("Shield" in-game) and the game can be set to have the player to have a minimum amount of 2 and maximum amount of 5 Shields per credit. The player only have one life per credit, however, and letting the "Shield" meter drops to zero will let the player to enter their name if they got a high score in the ranking list, then they will be taken either to the Continue screen (if the player still got at least one credit left, otherwise will be a game over). Selecting to continue lets the player to choose another character to play as or not. However, their score will reset to zero.
Controls
- A (Hold): Shot
- B (Tap 1, 2, or 3 times): Sword
- Tapping several times in quick succession will unleash a sword combo
- C: Switch between Order and Chaos Field
- A + B (Simultaneous tap): Wing-Layer (deploys a protective barrier)
- B + C (Simultaneous tap): Lock-On (locks and fires homing beams onto the enemies)
Note :
- The game's ports allow players to map dedicated buttons for the Wing Layer and Lock-On. However, the simultaneous tap inputs have not been removed nor can they be toggled off. It is thus still possible to (accidentally) use either of these weapons by pressing their two buttons at once.
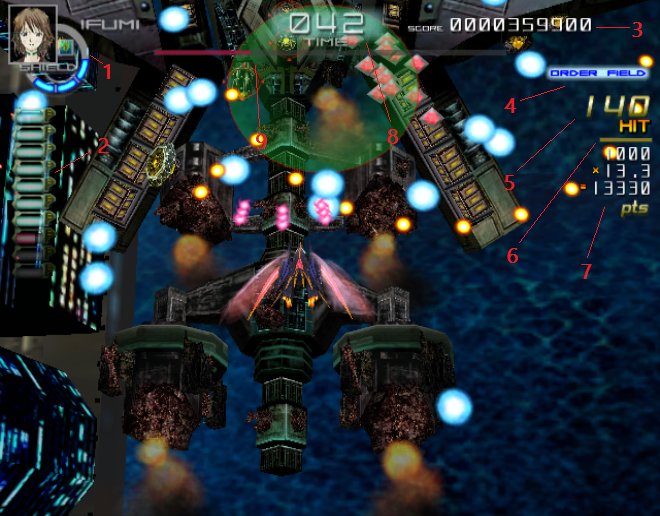
Interface
- 1 : Shield indicator (Player's lives), character name and portrait.
- 2 : Meta gauge, used for some of the weapons.
- Each unit allows one use of the weapons that need it. If a unit is red, it is partially filled but can not be used yet.
- 3 : Player's score
- 4 : Current field. Appears in blue for Order Field, and in red for Chaos Field
- 5 : Amount of hits on the current combo. (Only shows up when a combo is active)
- 6 : Timer gauge for the current combo. (Only shows up when a combo is active)
- 7 : For a destroyed part or boss, a display of its base value, multiplier applied, and final value. (Only shows up temporarily after any part or boss destruction)
- 8 : Boss timer, displayed in seconds. When the timer is below 20 seconds, the ms will also be shown.
- 9 : Boss' HP bar
Weapons
- Shot :
- Sword :
- Wing Layer :
- Lock-on Laser :
- Field Switch :
Field differences
Characters
Please refer to Chaos_Field/Characters
Primary
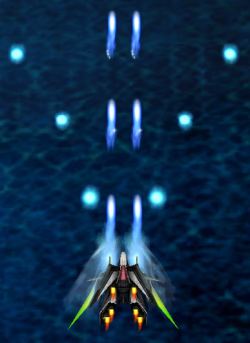
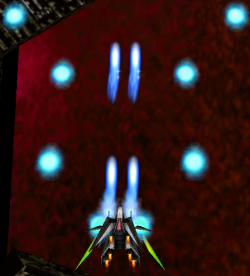
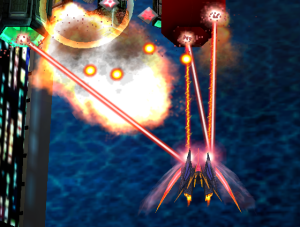
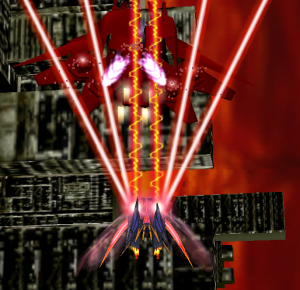
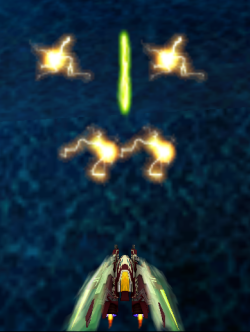
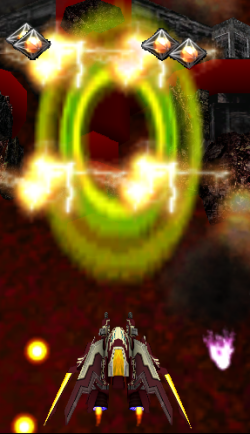
While in the Order Field, the power and characteristics of primary weapons is normal, but in the Chaos Field, their power will increase and will change their characteristics, from subtle to notable changes.
| Ship | In Order Field | In Chaos Field | Description |
|---|---|---|---|
| Mixed Blue | Fires 4 blue lasers; two outer 'ball' beams goes in a spread pattern while the inner two beams goes in a straight pattern forward. In the Chaos Field, the lasers grew in size slightly and the spread range is extended. | ||
| Flawed Red | Fires 6 continuous stream of red lasers which locks on to the enemy once one comes contact with them. In Chaos Field, the lasers grew in size and no longer locks on to the enemies, but instead, fires in a straight fixed pattern that follows the player and penetrates, damaging anything that goes through it. | ||
| Fake Yellow | Fires a short range, yellow lightning bolt which leaves electric sparks on its track and advances forward, damaging any enemies that hits it. In Chaos Field, the bolt grew in size slightly and able to release more sparks at once. |
Secondary
TBA
Wing-Layer
TBA
Lock-On laser
TBA
Items
| Item | Description |

|
Meta Stock item : Item that is generated when destroying boss parts or taking a hit. In Original mode, it will also spawn when a popcorn enemy is killed. The Meta stock item will replenish part of the Meta gauge, which is used in order to fire the Wing Layer and the Lock-On Laser. Each individual block of the Meta gauge needs 10 Meta Stock items to be filled. In other words, a single Wing Layer or Lock-On Laser use requires 10 Meta Stock items. |

|
Point item : Alternate item that spawns in place of the Meta Stock item if the player's Meta gauge is actually full when the items are spawned. These golden items are worth 5.000 points each and will not replenish the Meta gauge even if said gauge gets emptied in between the item spawn and the item collection. |

|
Milestone logo : Special logo that can be triggered on 1-2 and 3-1 and replenishes one life point when picked up. In order to make the logo appear, the boss has to be killed while in Order Field before the timer goes below 55 seconds (for 1-2) or 64 seconds (for 3-1). Switching to Chaos Field beforehand to inflict additional damage is fine and will not prevent the logo spawn as long as the killing blow occurs in Order Field.
[ VIDEO SHOWCASE : https://www.youtube.com/watch?v=Ew8iTmBNnrI & https://www.youtube.com/watch?v=bbB951BT7GM ] One thing to note on 3-1 is that the boss will be moving towards the left edge of the screen when the timer is close to the threshold. As a result, a last second kill will actually spawn the logo a bit too far away from the area the ship can move in, and the logo will be impossible to collect. When the logo gets despawned, the collection SFX will still play, but no life point will be restored. [ VIDEO SHOWCASE : https://www.youtube.com/watch?v=onqZmuqAldI ] |
Scoring
Story
[Taken from the US GC manual]
The "Chaos Field", a warped and chaotic dimension.
There humankind was exposed to the threat of annihilation through the invasion of the mysterious "Abo". Humankind resisted them, and a costly battle ensued for many years, a battle with no clear victor.
Over time, the battle spread out beyond the Chaos Field to engulf another time-space dimension called the "Order Field".
In order to put a stop to this multi dimensional war, three pilots have been chosen for an assault...
Video References
Please refer to https://shmups.wiki/library/Chaos_Field/Video_Index
Characters page
Note : The character profiles and ship descriptions have been taken from the official US localization
| Hal | ||
|---|---|---|
| Since he was born, Hal has been training at the research institute to do battle with the Abo. A young boy of 15, he is quiet and expressionless, and will get down and dirty in battle if he's ordered to. However, he's slowly begun to realize that he's involved in a life or death struggle, one that he might not survive. | ||
| Mixed Blue : A standard fighter that is improved and tuned based on the data of past combats. It has well-balanced maneuverability and striking power. | ||
| Shot | ||
| Sword | ||
| Wing Layer | ||
| Lock-On Laser | ||
| Ifumi | ||
|---|---|---|
| 19 years old---she's a kind-hearted girl who has taken on the role of looking after Hal, ever since he was very young. As would be expected, she too has received combat training, and with excellent results. She is bright and cheerful with everyone and does not despair when times are tough. | ||
| Flawed Red : The newest and most advanced fighter that is designed based on the present standard fighter with emphasis placed on further reinforcement of maneuverability. | ||
| Shot | ||
| Sword | ||
| Wing Layer | ||
| Lock-On Laser | ||
| Jinn | ||
|---|---|---|
| He's a mysterious man whose past experience is unknown---it's hard to tell whether he's serious or not. He's said to be 30 years old, but there are some ways in which his thinking is rather childish.
There's also a rumor going on that he was "built" from organic data obtained from captured enemy Abo. | ||
| Fake Yellow : A prototype that was built in the early stages of development. Though its maneuverability is lower then that of the others because of its heavy equipment, its striking performance is higher than that of the present models. | ||
| Shot | ||
| Sword | ||
| Wing Layer | ||
| Lock-On Laser | ||

