Difference between revisions of "User:M.Knight/sandbox"
m |
|||
| (127 intermediate revisions by the same user not shown) | |||
| Line 1: | Line 1: | ||
{{GameInfobox | {{GameInfobox | ||
| − | |bordercolor = | + | |bordercolor = #AD352C |
| − | |title = | + | |title = Chaos Field |
| − | |background = # | + | |background = #6BA0AC |
| − | |image = | + | |image = CField Title (Arcade).png |
|width = 324px; | |width = 324px; | ||
| − | |imagecaption = | + | |imagecaption = Arcade ver. title screen |
| − | |imagescalepx = | + | |imagescalepx = 240px |
| − | |developer = Milestone | + | |developer = Milestone Inc. |
| | | | ||
| − | |releasedate = 2008 | + | |publisher = Able Corporation |
| + | | | ||
| + | |director = Manabu Matsumoto | ||
| + | | | ||
| + | |producer = Hiroshi Kimura | ||
| + | | | ||
| + | |music = Kō Hayashi </br> Daisuke Nagata | ||
| + | | | ||
| + | |program = Jirō Hamaya </br> Manabu Matsumoto </br> Takahiro Kawachi | ||
| + | | | ||
| + | |art = Ryohei Murakami | ||
| + | | | ||
| + | |releasedate = '''Arcade''' <br> '''JP''' : 25 May 2004 <ref>https://web.archive.org/web/20111103070604fw_/http://www.mile-stone.co.jp/product.html</ref> <br> '''Dreamcast''' <br> '''JP''' : 16 December 2004 <ref>https://web.archive.org/web/20111103070604fw_/http://www.mile-stone.co.jp/product.html</ref> <br> '''GameCube''' <br> '''JP''' : 24 February 2005 <ref>https://web.archive.org/web/20111103070604fw_/http://www.mile-stone.co.jp/product.html</ref> <br> '''US''' : 20 December 2005 <br> '''PS2''' <br> '''JP''': 21 December 2005 <ref>https://web.archive.org/web/20111103070604fw_/http://www.mile-stone.co.jp/product.html</ref> <br> '''Milestone Shooting Collection 1 (Wii)''' <br> '''JP''' : 10 April 2008 <ref>https://web.archive.org/web/20111103070604fw_/http://www.mile-stone.co.jp/product.html</ref><br> '''KO''' : 19 December 2008 <ref>https://www.mobygames.com/game/wii/ultimate-shooting-collection/release-info</ref> <br> '''US''' : 23 January 2009<ref>https://www.nintendolife.com/games/wii/ultimate_shooting_collection</ref> <br> '''Milestone Shooting Collection 2 (Wii)''' <br> '''JP''' : 30 December 2012 <ref> https://web.archive.org/web/20111103070604fw_/http://www.mile-stone.co.jp/product.html</ref> <br> '''Sakura Flamingo Archives (X360) ''' <br> '''JP''': 27, Nov 2014<ref>https://www.mobygames.com/game/sakura-flamingo-archives</ref> | ||
| + | |nextgame = [[Radirgy|Radirgy]] | ||
}} | }} | ||
| − | + | '''Chaos Field''' (カオスフィールド) is a 2004 vertical-scrolling shoot-em-up arcade game developed by MileStone Inc. and published by Able Corporation. It was the first game developed by Milestone. | |
| − | + | The game consists entirely of boss battles, featuring five stages (called "Phases" in-game) with three bosses each. Each of the three player characters is equipped with a variety of weapons they can use to destroy each of the boss parts and perform bullet canceling combos for scoring. Furthermore, the player ships can flip the environment at will between two parallel dimensions named "Fields", including the titular Chaos Field. | |
| − | |||
| − | + | __TOC__ | |
| − | == Basic | + | == Gameplay overview == |
| − | + | === Basic info === | |
| + | ---- | ||
| − | + | * Vertical game, but and regular 4:3 horizontal screen (Configuration also colloquially known as "vertizontal") | |
| + | * 1 player only | ||
| + | * 8-direction movement and 3 buttons. Home ports can feature up to 5 buttons | ||
| + | * Default extends are at 8 and 20 million points and there are two secret 1UPs | ||
| + | * The player's life stock starts at 3, and is capped at 5 | ||
| + | * 5 stages. No loops. A full run lasts around 20 to 25 minutes | ||
| + | * Continuing allows the player to change characters | ||
| − | + | === Controls === | |
| + | ---- | ||
| − | A | + | * '''A (Hold):''' Shot |
| + | * '''B (Tap 1, 2, or 3 times):''' Sword | ||
| + | ** Tapping several times in quick succession will unleash a sword combo | ||
| + | * '''C:''' Switch between Order and Chaos Field | ||
| + | * '''A + B (Simultaneous tap):''' Wing-Layer (deploys a protective barrier) | ||
| + | * '''B + C (Simultaneous tap):''' Lock-On (locks and fires homing beams onto the enemies) | ||
| − | + | Note : | |
| − | |||
| − | ' | + | * The game's ports allow players to map dedicated buttons for the Wing Layer and Lock-On. However, the simultaneous tap inputs have not been removed nor can they be toggled off. It is thus still possible to (accidentally) use either of these weapons by pressing their two buttons at once. |
| − | + | === Interface === | |
| + | ---- | ||
| − | + | [[File:Chaos Field - Interface 2.png|700px]] | |
| − | |||
| − | |||
| − | |||
| − | |||
| − | |||
| + | * 1 : Shield indicator (Player's lives), character name and portrait. | ||
| + | * 2 : Meta gauge, used for some of the weapons. | ||
| + | ** Each unit allows one use of the weapons that need it. If a unit is red, it is partially filled but can not be used yet. | ||
| + | * 3 : Player's score | ||
| + | * 4 : Current field. Appears in blue for Order Field, and in red for Chaos Field | ||
| + | * 5 : Amount of hits on the current combo. (Only shows up when a combo is active) | ||
| + | * 6 : Timer gauge for the current combo. (Only shows up when a combo is active) | ||
| + | * 7 : For a destroyed part or boss, a display of its base value, multiplier applied, and final value. (Only shows up temporarily after any part or boss destruction) | ||
| + | * 8 : Boss timer, displayed in seconds. When the timer is below 20 seconds, the ms will also be shown. | ||
| + | * 9 : Boss' HP bar | ||
| − | + | === Game loop === | |
| + | ---- | ||
| − | + | Chaos Field features 5 stages with 3 bosses in it each, for a grand total of 15 bosses to fight one after the other. Every boss has its own timer and each fight ends when the player empties the boss' life bar or when the timer runs out. | |
| − | + | Every boss is made of one or multiple parts and turrets. Dealing enough damage to said turrets can destroy them and generate energy cubes. In order to defeat a boss, destroying all the parts is not necessary, but successful destruction of specific turrets is worth additional points and can prevent the boss from using some patterns or attacks. | |
| − | |||
| − | |||
| − | + | Some turrets need to be "destroyed" twice before actually being removed. They will generate energy cubes each time they receive enough damage. Some other turrets can be damaged repeatedly for multiple cube spawns over the course of the boss fight. | |
| − | |||
| − | |||
| − | + | === Weapons === | |
| + | ---- | ||
| − | + | {| class="wikitable" style="background-color:#F5F9FA; width:80%" | |
| + | |- style="background-color:#9BC5CD;" | ||
| + | | style="width:10%;" | <big><b>Weapon</b></big> | ||
| + | | style="width:70%;" |<big><b>Description</b></big> | ||
| + | | style="width:20%" | <big><b>Cost and restrictions</b></big> | ||
| + | |- | ||
| + | | style= "text-align:center" | [[File:Chaos Field - Hal - Shot order.png|150px]] '''Shot''' | ||
| + | | The shot is the most basic weapon available, and it allows player crafts to damage enemies ahead of them by continuously holding the shot button. | ||
| + | | None | ||
| + | |- | ||
| + | | style= "text-align:center" | [[File:Chaos Field - Hal - Sword 1.png|150px]] '''Sword''' | ||
| + | | Every ship is equipped with two blades that they can freely swing in front of them. The sword has limited forward range but is able to cancel every non-purple bullet. | ||
| − | + | When tapping the sword button multiple times in a row, the ship can perform a sword combo with up to three hits, with the first swipe coming from the left, then a second one from the right, followed by both swords simultaneously. | |
| − | + | Whenever the sword is active, it takes priority over the shot. Holding shot while tapping the sword button will only fire the shot in between the sword combos. | |
| − | + | All three characters share similar swords, albeit with a different color each. Besides, the cooldown that occurs after performing a sword combo is not the same. Ifumi has the lowest cooldown, Hal is second, and Jinn has the most cooldown. | |
| + | [VIDEO SHOWCASE : https://www.youtube.com/watch?v=qG93wDmNo4s ] | ||
| + | | Unlimited uses, but there is a very short cooldown after a combo | ||
| + | |- | ||
| + | | style= "text-align:center" | [[File:Chaos Field - Hal - Wing Layer order.png|150px]] '''Wing Layer''' | ||
| + | | A defensive module that ships can summon and that will cancel bullets which touch it. Each character has a unique type of Wing Layer with its own shape, behavior, and duration. The Wing layer will also deal tick damage on boss parts it touches. | ||
| − | + | Using the Wing Layer does not grant any invincibility to the player, however they can use the bullet canceling ability to make the playfield safer for them. | |
| − | + | The Wing Layer remains active for a few seconds before disappearing. Switching fields does not cancel a currently active Wing Layer from the previous field, nor does it force it to change into the Wing Layer variant for the new field. It is thus possible to smuggle one Chaos Field Wing Layer variant into Order Field (and vice-versa) by activating the Wing Layer right before switching fields. | |
| + | [VIDEO SHOWCASE : https://www.youtube.com/watch?v=YvW1eagGb-o ] | ||
| − | + | Only one simultaneous instance of the Wing Layer can be active at max. Once a Wing Layer has been activated, the player has to wait until it naturally fades out before being able to fire the Wing Layer again. | |
| − | + | | Requires one block of the meta gauge | |
| + | |- | ||
| + | | style= "text-align:center" | [[File:Chaos Field - Hal - Lock-on Laser.png|150px]] '''Lock-on Laser''' | ||
| + | | When using the lock-on laser, the ship will temporarily deploy a green radar, whose shape and range differs for each character. Any targets located inside this radar will have a lock-on cursor on it, and the ship then fires off homing lasers that attack every single locked-on target. | ||
| − | + | As the homing lasers are not instantaneous, there is a noticeable delay between the moment a target is locked and when it is actually damaged. | |
| − | |||
| − | |||
| − | |||
| − | |||
| − | + | A single lock-on laser use can not lock-on to more than 100 targets at once. | |
| − | + | [VIDEO SHOWCASE : https://www.youtube.com/watch?v=EwQN2NRzcV4] | |
| + | | Requires one block of the meta gauge | ||
|- | |- | ||
| − | || [[File: | + | | style= "text-align:center" | [[File:Chaos Field - Field Switch.png|150px]] '''Field Switch''' |
| − | | | + | | The player crafts have the ability to switch between Order Field and Chaos Field by using the Field switch. Field switching is a manual action and no boss fight will force the player to switch to a specific field as part of an attack or a phase. |
| − | + | When switching fields, the on-screen bullets will be erased and the player will be invincible for a few seconds. (the ship will have a yellow-ish color) The Field Switch is the only player tool that can provide such invincibility. | |
| − | + | After using a Field Switch, the ability will be temporary unavailable, until its cooldown ends. A specific sound cue can be heard whenever the Field Switch is made available again. Besides, a player can tell if the Field Switch is available by looking at the top sides of the ship. A transparent aurora-like effect should cover them if the Field Switch is ready. | |
| − | + | | Unlimited uses, but there is a ~5 second cooldown after every Field Switch | |
| + | |} | ||
| − | + | === Field differences === | |
| + | ---- | ||
| − | + | Throughout the game, the player can switch between two Fields : Order Field and Chaos Field. A new stage will always start in Order Field, but the field will not be reset from a boss to another within the same stage. | |
| − | + | The field switching is one of the main mechanics in the game and jumping from one field to another can change the behavior of player tools and bosses. Here is a list of differences between Order Field and Chaos Field : | |
| − | + | {| class="wikitable" style="background-color:#F5F9FA; width:80%; text-align:center" | |
| − | + | |- style="background-color:#9BC5CD" | |
| − | + | | style="width:50%" | [[File:Chaos Field - Order Field text.png]] | |
| − | + | | style="background-color:#AD352C; color :white; width:50%" | [[File:Chaos Field - Chaos Field text.png]] | |
| − | = | + | |- |
| − | + | | The player's shot and Wing Layer have less power. | |
| + | | style="background-color:#EED6D4 " | The shot and Wing Layer evolve into stronger versions of themselves. The properties of the weapons can slightly change as well, as is the case for Ifumi's shot. | ||
| + | |- | ||
| + | | The lock-on laser is only able to target and damage boss parts. Bullets inside the Lock-on laser range in Order Field will not be canceled and they will not contribute to the Hit combo. | ||
| + | | style="background-color:#EED6D4 " | In addition to boss parts, the Lock-on laser can now catch cancelable bullets within its range and add each of them to the Hit combo. | ||
| + | |- | ||
| + | | The bosses fire tamer variations of the attacks, potentially featuring less bullets to cancel. | ||
| + | | style="background-color:#EED6D4 " | The bosses become more aggressive in their attacks, potentially throwing more bullets to cancel in their patterns, but also sometimes adding more uncancelable bullets and homing lasers in the mix. | ||
| + | |- | ||
| + | | Some of the bosses will only feature a base amount of turrets on their bodies. The hidden turrets and boss parts can not be reached in this field. | ||
| + | | style="background-color:#EED6D4 " | The bosses that have Chaos Field-exclusive turrets will open up their cores and deploy said turrets when switching to this field. It will then be possible to target and attack them alongside the base boss parts. | ||
| + | [VIDEO SHOWCASE : https://www.youtube.com/watch?v=b6SQIHHTkK4] | ||
| + | |- | ||
| + | | Destroyed boss turrets will spawn a lot of meta stock items, as to refill the energy gauge better. | ||
| + | | style="background-color:#EED6D4 " | Destroyed boss parts will spawn a much lower amount of meta cubes, limiting the player's ability to keep the combo going for extended periods of time solely in Chaos Field. | ||
|- | |- | ||
| − | || | + | | The sky or the space in the background usually features a soft color such as blue or light yellow. |
| + | | style="background-color:#EED6D4 " | The background turns red. | ||
|} | |} | ||
| − | + | === Characters === | |
| + | ---- | ||
| − | + | Note : The character profiles and ship descriptions have been taken from the official US localization | |
| + | <h4> <span style="display:none;">Hal</span></h4> | ||
| − | + | {| class="wikitable" style="background-color : #E8EAF3; width:80%" | |
| − | + | |- | |
| − | The | + | ! colspan="3"style="background-color : #7C85BE ; color : white; text-align :left" |[[File:Chaos Field - Mixed Blue icon.png|32px]] <big>Hal</big> |
| − | + | |- | |
| − | The | + | | rowspan="2" | [[File:Hal.png|150px|center]] |
| − | + | | colspan="2" | Since he was born, Hal has been training at the research institute to do battle with the Abo. A young boy of 15, he is quiet and expressionless, and will get down and dirty in battle if he's ordered to. However, he's slowly begun to realize that he's involved in a life or death struggle, one that he might not survive. | |
| − | + | |- style="vertical-align: middle;" | |
| + | | colspan="2" | [[File:MixedBlue.png|left|300px]] '''Mixed Blue''' : A standard fighter that is improved and tuned based on the data of past combats. It has well-balanced maneuverability and striking power. | ||
| + | |- | ||
| + | | style="background-color : #B4B9DA ; color : white; text-align:center" | '''<big>Shot</big>''' | ||
| + | | style="width:50%; text-align:center; vertical-align:top" | [[File:Chaos Field - Hal - Shot order.png|250px]] | ||
| + | '''Order Field''' : The ship fires a forward narrow twin shot as well as two side circular shots that slightly wave while spreading outwards. | ||
| + | | style="width:50%; text-align:center; vertical-align:top" | [[File:Chaos Field - Hal - Shot chaos.png|250px]] | ||
| + | '''Chaos Field''' : The shots all gain additional power, and the side shots increase in size. The angle limit for the waving movement of the side bullets also increases, which means those shots can hit targets further away on the ship's left and right sides. | ||
| + | |- | ||
| + | | style="background-color : #B4B9DA ; color : white; text-align:center" | '''<big>Sword</big>''' | ||
| + | | colspan="2" style="text-align:center" | [[File:Chaos Field - Hal - Sword 1.png|200px]] [[File:Chaos Field - Hal - Sword 2.png|200px]] [[File:Chaos Field - Hal - Sword 3.png|200px]] | ||
| + | The ship swings a green sword. Hal's sword swing has an intermediate cooldown duration, longer than Ifumi's but slightly shorter than Jinn's. | ||
| + | |- | ||
| + | | style="background-color : #B4B9DA ; color : white; text-align:center" | '''<big>Wing Layer</big>''' | ||
| + | | style="width:50%; text-align:center; vertical-align:top" | [[File:Chaos Field - Hal - Wing Layer order.png|200px]] | ||
| + | '''Order Field''' : A blue disc is launched slightly ahead of the ship's position and will remain in place until its disappearance. Cancelable bullets that touch said disc will be erased, and targets that touch it will receive continuous tick damage. | ||
| + | | style="width:50%; text-align:center; vertical-align:top" | [[File:Chaos Field - Hal - Wing Layer chaos.png|200px]] | ||
| + | '''Chaos Field''' : The disc size is increased, making it capable of catching more bullets in the vicinity. | ||
|- | |- | ||
| − | + | | style="background-color : #B4B9DA ; color : white; text-align:center" | '''<big>Lock-On Laser</big>''' | |
| − | | | + | | colspan="2" style="text-align:center" | [[File:Chaos Field - Hal - Lock-on Laser.png|250px]] |
| − | + | The lock-on laser range opens up in a fan shape ahead of the ship. It thus covers the front, and the sides slightly. | |
| − | |||
| − | |||
| − | |||
| − | |||
| − | |- | ||
| − | |||
| − | |||
| − | | | ||
| − | |||
| − | |||
| − | |||
| − | |||
| − | |||
| − | |- | ||
| − | |||
| − | |||
| − | |||
| − | |||
| − | | | ||
| − | |||
| − | |||
|} | |} | ||
| − | + | <h4> <span style="display:none;">Ifumi</span></h4> | |
| − | {| class="wikitable" style=" | + | {| class="wikitable" style="background-color : #F5E5E5; width:80%" |
| + | |- | ||
| + | ! colspan="3"style="background-color : #CA7D77 ; color : white; text-align :left" | [[File:Chaos Field - Flawed Red icon.png|32px]] <big>Ifumi</big> | ||
| + | |- | ||
| + | | rowspan="2" | [[File:Ifumi.png|150px|center]] | ||
| + | | colspan="2" | 19 years old---she's a kind-hearted girl who has taken on the role of looking after Hal, ever since he was very young. As would be expected, she too has received combat training, and with excellent results. She is bright and cheerful with everyone and does not despair when times are tough. | ||
| + | |- style="vertical-align: middle;" | ||
| + | | colspan="2" | [[File:FlawedRed.png|left|300px]] '''Flawed Red''' : The newest and most advanced fighter that is designed based on the present standard fighter with emphasis placed on further reinforcement of maneuverability. | ||
|- | |- | ||
| − | | == | + | | style="background-color : #DFA9A9 ; color : white; text-align:center" | '''<big>Shot</big>''' |
| − | + | | style="width:50%; text-align:center; vertical-align:top" | [[File:Chaos Field - Ifumi - Shot order 1.png|250px]] [[File:Chaos Field - Ifumi - Shot order 2.png|250px]] | |
| − | + | '''Order Field''' : Six lasers are fired ahead of the ship, with two in front of the ship and 2 on each side that slightly angle outwards as to create a fan-shaped set of lasers in front of the ship. Whenever one of those lasers hits at target, it will lock-on to it and inflict continuous damage until the target dies, the player stops shooting, or if the player ship gets too far away from the target. | |
| − | + | | style="width:50%; text-align:center; vertical-align:top" | [[File:Chaos Field - Ifumi - Shot chaos.png|250px]] | |
| + | '''Chaos Field''' : The six lasers no longer lock-on to hit targets, but will instead pierce through the bosses. They are also a bit thicker than their Order Field counterparts and spread out slightly wider. | ||
| + | |- | ||
| + | | style="background-color : #DFA9A9 ; color : white; text-align:center" | '''<big>Sword</big>''' | ||
| + | | colspan="2" style="text-align:center" | [[File:Chaos Field - Ifumi - Sword 1.png|200px]] [[File:Chaos Field - Ifumi - Sword 2.png|200px]] [[File:Chaos Field - Ifumi - Sword 3.png|200px]] | ||
| + | The ship swings a red sword. Ifumi's sword swipe combos have the shortest cooldown. | ||
| + | |- | ||
| + | | style="background-color : #DFA9A9 ; color : white; text-align:center" | '''<big>Wing Layer</big>''' | ||
| + | | style="width:50%; text-align:center; vertical-align:top" | [[File:Chaos Field - Ifumi - Wing Layer order.png|250px]] | ||
| + | '''Order Field''' : Two modules are deployed around the ship. They will orbit the ship while following its movements. Cancelable bullets that touch either of the two modules will be canceled. Additionally, enemies and turrets that come into contact with the spinning modules will receive a bit of tick damage. | ||
| + | | style="width:50%; text-align:center; vertical-align:top" | [[File:Chaos Field - Ifumi - Wing Layer chaos.png|250px]] | ||
| + | '''Chaos Field''' : Three modules will be summoned instead of two, and the modules themselves are slightly bigger. This additional module improves the reliability of bullet canceling and decreases the chances that bullets slip past a module and hit the ship. | ||
|- | |- | ||
| − | || | + | | style="background-color : #DFA9A9 ; color : white; text-align:center" | '''<big>Lock-On Laser</big>''' |
| − | || [[File: | + | | colspan="2" style="text-align:center" | [[File:Chaos Field - Ifumi - Lock-on Laser.png|250px]] |
| − | + | Ifumi's lock-on covers a relatively small disc area ahead of her ship. | |
|} | |} | ||
| − | |||
| − | |||
| − | |||
| − | |||
| − | |||
| − | |||
| − | |||
| − | |||
| − | |||
| − | |||
| − | |||
| − | |||
| − | |||
| − | |||
| − | + | <h4> <span style="display:none;">Jinn</span></h4> | |
| − | + | {| class="wikitable" style="background-color : #F0F4DB; width:80%" | |
| − | |||
| − | |||
| − | |||
| − | |||
| − | |||
| − | |||
| − | |||
| − | |||
| − | |||
| − | |||
| − | |||
| − | |||
| − | |||
| − | |||
| − | |||
| − | |||
| − | |||
| − | |||
| − | |||
| − | |||
| − | |||
| − | {| class="wikitable" | ||
|- | |- | ||
| − | + | ! colspan="3"style="background-color : #BBCF54 ; color : white; text-align :left" | [[File:Chaos Field - Fake Yellow icon.png|32px]] <big>Jinn</big> | |
| − | |||
| − | |||
| − | |||
| − | |||
| − | |||
| − | |||
|- | |- | ||
| + | | rowspan="2" | [[File:Jinn.png|150px|center]] | ||
| + | | colspan="2" | He's a mysterious man whose past experience is unknown---it's hard to tell whether he's serious or not. He's said to be 30 years old, but there are some ways in which his thinking is rather childish. | ||
| + | |||
| + | There's also a rumor going on that he was "built" from organic data obtained from captured enemy Abo. | ||
| + | |- style="vertical-align: middle;" | ||
| + | | colspan="2" | [[File:FakeYellow.png|left|300px]] '''Fake Yellow''' : A prototype that was built in the early stages of development. Though its maneuverability is lower then that of the others because of its heavy equipment, its striking performance is higher than that of the present models. | ||
|- | |- | ||
| − | | | + | | style="background-color : #CFDD87 ; color : white; text-align:center" | '''<big>Shot</big>''' |
| − | + | | style="width:50%; text-align:center; vertical-align:top" | [[File:Chaos Field - Jinn - Shot order.png|150px]] | |
| − | + | '''Order Field''' : The ship fires a short-ranged lightning blast attack ahead of it. This blast is also accompanied by piercing circular sparks that first spawn near the ship's cannons, and then travel upwards in stop & go steps rather than by simple moving on a linearly path. The sparks will also slightly move sideways during their course, as to match the ship's own left and right movements. | |
| − | + | | style="width:50%; text-align:center; vertical-align:top" | [[File:Chaos Field - Jinn - Shot chaos.png|150px]] | |
| − | + | '''Chaos Field''' : The forward blast's range is longer, and the electric sparks are bigger. | |
| − | |||
| − | |||
| − | |||
| − | |- | ||
| − | | [[File: | ||
| − | |||
|- | |- | ||
| − | | | + | | style="background-color : #CFDD87 ; color : white; text-align:center" | '''<big>Sword</big>''' |
| + | | colspan="2" style="text-align:center" | [[File:Chaos Field - Jinn - Sword 1.png|200px]] [[File:Chaos Field - Jinn - Sword 2.png|200px]] [[File:Chaos Field - Jinn - Sword 3.png|200px]] | ||
| + | The ship swings a yellow sword. Jinn's sword combo has the longest cooldown out of all three. | ||
|- | |- | ||
| − | | | + | | rowspan="2" style="background-color : #CFDD87 ; color : white; text-align:center" | '''<big>Wing Layer</big>''' |
| + | | style="width:50%; text-align:center; vertical-align:top"| [[File:Chaos Field - Jinn - Wing Layer order.png|250px]] | ||
| + | '''Order Field''' : 8 bat-shaped modules emerge from Jinn's ship and are sent to random locations on the screen. Each of these modules can cancel bullets and damage enemies. Since the modules are able to cancel bullets as soon as they spawn near the ship, the initial deployment can slightly clear the area around the ship. | ||
| + | | style="width:50%; text-align:center; vertical-align:top" | [[File:Chaos Field - Jinn - Wing Layer chaos.png|250px]] | ||
| + | '''Chaos Field''' : Each of the bats grows in size. | ||
|- | |- | ||
| − | | | + | | colspan="2" style="text-align:center" | Note : In the Sakura Flamingo Archives version of the game, the modules' locations are no longer random. Instead, the modules will be arranged in a grid-like fashion. This applies to both Order and Chaos Field variants. [VIDEO SHOWCASE : https://www.youtube.com/watch?v=lxCfoFYIdMo] |
|- | |- | ||
| − | | | + | | style="background-color : #CFDD87 ; color : white; text-align:center" | '''<big>Lock-On Laser</big>''' |
| − | |- | + | | colspan="2" style="text-align:center" | [[File:Chaos Field - Jinn - Lock-on Laser.png|250px]] |
| − | | | + | The lock-on area is composed of two narrow beams fired from the sides of the ships at a ~45° angle. The two beams then swing a bit towards the center, however they end their movement before reaching the center, which leaves a blind spot directly ahead of the ship. |
|} | |} | ||
| − | |||
| − | |||
| − | + | === Items === | |
| − | - | + | ---- |
| − | + | There are a few items types in the game, most notably cubes that can recharge the Meta stock or give points. These can be autocollected by not attacking for a second. | |
| − | |||
| − | [ | + | {| class="wikitable" style="background-color:#F5F9FA; width:80%" |
| − | + | |- style="background-color:#9BC5CD;" | |
| + | | style="width:10%;" | <big><b>Item</b></big> | ||
| + | | style="width:80%;" |<big><b>Description</b></big> | ||
| + | | style="width:10%;" | <big><b>Can be autocollected?</b></big> | ||
| + | |- | ||
| + | | [[File:Chaos Field - Meta Stock item.png]] | ||
| + | | <b>Meta Stock item</b> : Item that is generated when destroying boss parts or taking a hit. In Original mode, it will also spawn when a popcorn enemy is killed. The Meta stock item will replenish part of the Meta gauge, which is used in order to fire the Wing Layer and the Lock-On Laser. Each individual block of the Meta gauge needs 10 Meta Stock items to be filled. In other words, a single Wing Layer or Lock-On Laser use requires 10 Meta Stock items. | ||
| + | | Yes | ||
| + | |- | ||
| + | | [[File:Chaos Field - Point item.png]] | ||
| + | | <b>Point item</b> : Alternate item that spawns in place of the Meta Stock item if the player's Meta gauge is actually full when the items are spawned. These golden items are worth 5.000 points each and will not replenish the Meta gauge even if said gauge gets emptied in between the item spawn and the item collection. | ||
| + | | Yes | ||
| + | |- | ||
| + | | [[File:Radirgy - Milestone logo.png|64px]] | ||
| + | | <b>Milestone logo</b> : Special logo that can be triggered on 1-2 and 3-1 and replenishes one life point when picked up. In order to make the logo appear, the boss has to be killed while in Order Field before the timer goes below 55 seconds (for 1-2) or 64 seconds (for 3-1). Switching to Chaos Field beforehand to inflict additional damage is fine and will not prevent the logo spawn as long as the killing blow occurs in Order Field. | ||
| + | [VIDEO SHOWCASE : https://www.youtube.com/watch?v=Ew8iTmBNnrI & https://www.youtube.com/watch?v=bbB951BT7GM ] | ||
| − | + | One thing to note on 3-1 is that the boss will be moving towards the left edge of the screen when the timer is close to the threshold. As a result, a last second kill will actually spawn the logo a bit too far away from the area the ship can move in, and the logo will be impossible to collect. When the logo gets despawned, the collection SFX will still play, but no life point will be restored. | |
| − | |||
| − | + | [VIDEO SHOWCASE : https://www.youtube.com/watch?v=onqZmuqAldI ] | |
| − | + | | No | |
| − | + | |} | |
| − | |||
| − | |||
| − | |||
| − | |||
| − | |||
| − | |||
| − | |||
| − | |||
| − | |||
| − | |||
| − | |||
| − | |||
| − | |||
| − | |||
| − | |||
| − | |||
| − | |||
| − | |||
| − | |||
| − | |||
| − | |||
| − | |||
| − | |||
| − | |||
| − | |||
| − | |||
| − | |||
| − | |||
| − | |||
| − | |||
| − | |||
| − | |||
| − | |||
| − | |||
| − | |||
| − | |||
| − | |||
| − | |||
| − | |||
| − | |||
| − | |||
| − | |||
| − | |||
| − | |||
| − | |||
| − | |||
| − | |||
| − | |||
| − | |||
| − | |||
| − | |||
| − | |||
| − | |||
| − | |||
| − | |||
| − | |||
| − | |||
| − | |||
| − | |||
| − | |||
| − | |||
| − | |||
| − | |||
| − | |||
| − | |||
| − | |||
| − | |||
| − | |||
| − | |||
| − | |||
| − | |||
| − | |||
| − | |||
| − | |||
| − | |||
| − | |||
| − | |||
| − | |||
| − | |||
| − | |||
| − | |||
| − | |||
| − | |||
| − | |||
| − | |||
| − | |||
| − | |||
| − | |||
| − | |||
| − | |||
| − | |||
| − | |||
| − | |||
| − | |||
| − | |||
| − | |||
| − | |||
| − | |||
| − | |||
| − | |||
| − | |||
| − | |||
| − | |||
| − | |||
| − | |||
| − | |||
| − | |||
| − | |||
| − | |||
| − | |||
| − | |||
| − | |||
| − | |||
| − | |||
| − | |||
| − | |||
| − | |||
| − | |||
| − | |||
| − | |||
| − | |||
| − | |||
| − | |||
| − | |||
| − | |||
| − | |||
| − | |||
| − | |||
| − | |||
| − | |||
| − | |||
| − | |||
| − | |||
| − | |||
| − | |||
| − | |||
| − | |||
| − | |||
| − | |||
| − | |||
| − | |||
| − | |||
| − | |||
| − | |||
| − | |||
| − | |||
| − | |||
| − | |||
| − | |||
| − | |||
| − | |||
| − | |||
| − | |||
| − | |||
| − | |||
| − | |||
| − | |||
| − | |||
| − | |||
| − | |||
| − | |||
| − | |||
| − | |||
| − | |||
| − | |||
| − | |||
| − | |||
| − | |||
| − | |||
| − | |||
| − | |||
| − | |||
| − | |||
| − | |||
| − | |||
| − | |||
| − | |||
| − | |||
| − | |||
| − | |||
| − | |||
| − | |||
| − | |||
| − | |||
| − | |||
| − | |||
| − | |||
| − | |||
| − | |||
| − | |||
| − | |||
| − | |||
| − | |||
| − | |||
| − | |||
| − | |||
| − | |||
| − | |||
| − | |||
| − | |||
| − | |||
| − | |||
| − | |||
| − | |||
| − | |||
| − | |||
| − | |||
| − | |||
| − | |||
| − | - | + | === Scoring === |
| + | ---- | ||
| − | + | Chaos Field's scoring system revolves around the use of specific weapons in order to drive a combo counter up. Since those weapons are also tied to an energy meter, resource management will also play a major role in obtaining the highest possible combos and scores. | |
| − | + | ==== Increasing the combo multiplier ==== | |
| − | - | + | [[File:Chaos Field - Combo information.png]] |
| − | |||
| − | - | + | While the shot and sword can not increase the combo, the Wing Layer and the Lock-on laser are the only weapons able to do so. |
| − | |||
| − | |||
| − | |||
| − | |||
| − | |||
| − | - | + | Whenever a bullet is canceled by the Wing Layer or when it is targeted by the Chaos Field variation of the Lock-on laser, the Hit count will go up by 1. When the Lock-on laser targets a boss part (in either field), it will also increase the Hit count by 1. |
| − | |||
| − | |||
| − | - | + | Since the Lock-on Laser increases the combo as soon as the bullet is locked-on rather than when it is canceled by the homing laser, it is possible to use the sword to erase a locked-on bullet without missing out on the hits the Lock-on Laser generated. |
| − | |||
| − | - | + | Additionally, it is possible to have a single bullet provide two hits instead of one by first locking on to it with the Chaos Field Lock-on Laser, and then erasing it with the Wing Layer before said laser actually reaches it. [VIDEO SHOWCASE : https://www.youtube.com/watch?v=O73PkIzA_OQ] |
| − | https://www.youtube.com/watch?v= | ||
| − | + | The combo counter is visible in the top right of the screen whenever a combo is currently active. Below the hit number is a yellow timer, which stays at the max as the combo increases. However, lulls in bullet canceling or lock-ons will make the timer gauge decrease. If the gauge isn't refilled by increasing the combo, the combo ends entirely. | |
| − | + | Combos are essential for high scoring as the higher the combo, the higher the multiplier for parts and boss kills, as well as for tick points. | |
| − | + | At the beginning of every stage, the combo is reset to 0, but the combo counter and timer will carry over from one boss to another within the same stage. Having a high-value combo on the first boss of a stage can consequently provide scoring benefits on the second and third boss as long as the combo is also maintained through these fights. | |
| − | |||
| − | + | [[File:Chaos Field - 9999 combo.png|100px]] | |
| − | |||
| − | |||
| − | |||
| − | + | The combo's possible max value is 9.999. When the combo reaches this specific value, it can no longer be increased, but the timer itself can also no longer be replenished. Using the special weapons to increase the hit combo will only temporarily freeze the combo gauge, but never fill it as long as the combo is at 9.999. | |
| − | + | [VIDEO SHOWCASE : https://www.youtube.com/watch?v=FzywOkoK4NU] | |
| − | + | ==== Meta cubes VS Point items ==== | |
| − | + | [[File:Chaos Field - Meta Stock item.png]] [[File:Chaos Field - Point item.png]] | |
| − | + | When the meta gauge is already completely full, dedicated yellow point items will spawn instead of more meta cubes. While these items provide more immediate scoring bonuses, it remains preferable to consume the meta gauge and use the special weapons in order to increase the combo counter. A high combo value will be worth a lot more points as the yellow items' value becomes comparatively smaller and smaller as the combo increases. | |
| − | + | ==== Combo VS Time bonus ==== | |
| − | |||
| − | |||
| − | |||
| − | + | Once a boss is defeated, a bonus will be granted depending on how much time was remaining on the clock. However, said bonus remains relatively smaller than the score obtained by killing the boss after having milked its patterns for a high-value combo. | |
| − | + | ==== Halting the combo timer decrease for links ==== | |
| − | + | Even if the combo timer requires either of the special weapons to connect in order to be refilled, it is also possible to temporarily freeze said timer in order to buy time whenever there are no other ways to keep the combo alive. This can occur whenever specific bosses leave the screen and/or don't shoot for a few seconds. | |
| − | |||
| − | + | If the Wing Layer hits the boss without catching any bullets, it will still freeze the timer for as long as there is an overlap between it and the boss. | |
| − | + | [VIDEO SHOWCASE : https://www.youtube.com/watch?v=5zKsiGXtXck ] | |
| − | |||
| − | |||
| − | |||
| − | |||
| − | |||
| − | + | When a Lock-on laser is used in empty air but does not catch any boss part (and/or bullet in Chaos Field), it will nonetheless temporarily freeze the timer. It is possible to use several Lock-on lasers to stall the timer decrease, as long as energy is available to do so. | |
| − | |||
| − | |||
| − | [ | + | [VIDEO SHOWCASE : https://www.youtube.com/watch?v=2USTJOuOink ] |
| − | + | On the other hand, performing a Field Switch does not freeze the combo timer. In case the combo timer is already decreasing, it is preferable to use a special weapon and refill the gauge before switching fields, otherwise the combo risks being reset during the short transition period where the player is unable to move or activate weapons as they switch fields. | |
| − | - | + | ==== Self-destructs for energy recharge ==== |
| − | + | This game features zero penalties for losing lives, and taking a hit will spawn enough meta stock items for three additional special attack uses. Consequently, sacrificing lives on purpose in order to replenish the energy gauge is a viable strategy for extending a combo with no other source of meta stock items available. | |
| − | - | + | The main location when this trick is used is the very final boss' last phase, where the strategy is motivated by a combination of limited parts to damage for meta stock items, very lucrative high-density bullet patterns, and no further boss encounter to threaten survival after all the lives but one are exhausted for score purposes. |
| − | + | == Game modes == | |
| − | + | === Arcade === | |
| − | + | Arcade is the main mode of the game, featured in every port. | |
| − | + | === Original Mode === | |
| − | + | Only available on : GC | |
| − | + | In Original Mode, the player does not only face bosses. Sections with popcorn enemies are interspersed between specific boss fights, or sometimes in the middle of a boss fight as well. | |
| − | |||
| − | + | Popcorn enemies fire bullets that can be canceled for a combo and they can be locked-on as well. When destroyed, they will spawn meta stock items. It is thus possible to gain resources and score during the popcorn segments in a similar fashion as in boss fights. Besides, combos will carry over within a same stage from a popcorn segment to a boss fight, which provides opportunities for even bigger combo potential than in Arcade mode. | |
| − | + | Additionally, a few boss patterns have been altered. Said alterations are relatively minor, as the general shape and concept behind the patterns remains similar, but the speed or bullet type featured in those patterns can be changed. | |
| − | + | == References == | |
| − | + | === Scoreboards === | |
| − | + | * JHA hiscore board : https://wiki.denfaminicogamer.jp/highscore/2004_011_%E3%82%AB%E3%82%AA%E3%82%B9%E3%83%95%E3%82%A3%E3%83%BC%E3%83%AB%E3%83%89 | |
| − | + | * System11 hiscore board : https://shmups.system11.org/viewtopic.php?t=42140 | |
| − | + | * Restart syndrome hiscore board : https://restartsyndrome.com/board.php?id=278 | |
| − | + | * hiscores.shump.com board : https://hiscores.shmup.com/game/112 | |
| − | + | === Replays === | |
| − | + | Please refer to https://shmups.wiki/library/Chaos_Field/Video_Index | |
| − | + | === List of superplay materials === | |
| − | + | Please refer to https://shmups.wiki/library/List_of_superplay_materials#Milestone | |
| − | + | == Story == | |
| − | + | [Taken from the US GC manual] | |
| − | + | The "Chaos Field", a warped and chaotic dimension. | |
| − | + | There humankind was exposed to the threat of annihilation through the invasion of the mysterious "Abo". Humankind resisted them, and a costly battle ensued for many years, a battle with no clear victor. | |
| − | + | Over time, the battle spread out beyond the Chaos Field to engulf another time-space dimension called the "Order Field". | |
| − | + | In order to put a stop to this multi dimensional war, three pilots have been chosen for an assault... | |
| − | + | ---- | |
Latest revision as of 17:13, 11 March 2022
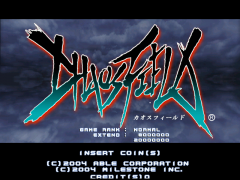
Arcade ver. title screen
| Developer: | Milestone Inc. |
|---|---|
| Publisher: | Able Corporation |
| Director: | Manabu Matsumoto |
| Producer: | Hiroshi Kimura |
| Music: | Kō Hayashi Daisuke Nagata |
| Program: | Jirō Hamaya Manabu Matsumoto Takahiro Kawachi |
| Art: | Ryohei Murakami |
| Release date: | Arcade JP : 25 May 2004 [1] Dreamcast JP : 16 December 2004 [2] GameCube JP : 24 February 2005 [3] US : 20 December 2005 PS2 JP: 21 December 2005 [4] Milestone Shooting Collection 1 (Wii) JP : 10 April 2008 [5] KO : 19 December 2008 [6] US : 23 January 2009[7] Milestone Shooting Collection 2 (Wii) JP : 30 December 2012 [8] Sakura Flamingo Archives (X360) JP: 27, Nov 2014[9] |
| Next game: | Radirgy |
Chaos Field (カオスフィールド) is a 2004 vertical-scrolling shoot-em-up arcade game developed by MileStone Inc. and published by Able Corporation. It was the first game developed by Milestone.
The game consists entirely of boss battles, featuring five stages (called "Phases" in-game) with three bosses each. Each of the three player characters is equipped with a variety of weapons they can use to destroy each of the boss parts and perform bullet canceling combos for scoring. Furthermore, the player ships can flip the environment at will between two parallel dimensions named "Fields", including the titular Chaos Field.
Contents
Gameplay overview
Basic info
- Vertical game, but and regular 4:3 horizontal screen (Configuration also colloquially known as "vertizontal")
- 1 player only
- 8-direction movement and 3 buttons. Home ports can feature up to 5 buttons
- Default extends are at 8 and 20 million points and there are two secret 1UPs
- The player's life stock starts at 3, and is capped at 5
- 5 stages. No loops. A full run lasts around 20 to 25 minutes
- Continuing allows the player to change characters
Controls
- A (Hold): Shot
- B (Tap 1, 2, or 3 times): Sword
- Tapping several times in quick succession will unleash a sword combo
- C: Switch between Order and Chaos Field
- A + B (Simultaneous tap): Wing-Layer (deploys a protective barrier)
- B + C (Simultaneous tap): Lock-On (locks and fires homing beams onto the enemies)
Note :
- The game's ports allow players to map dedicated buttons for the Wing Layer and Lock-On. However, the simultaneous tap inputs have not been removed nor can they be toggled off. It is thus still possible to (accidentally) use either of these weapons by pressing their two buttons at once.
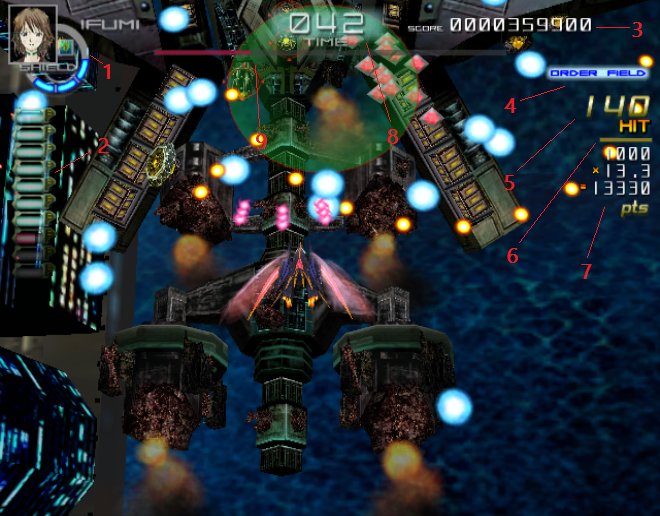
Interface
- 1 : Shield indicator (Player's lives), character name and portrait.
- 2 : Meta gauge, used for some of the weapons.
- Each unit allows one use of the weapons that need it. If a unit is red, it is partially filled but can not be used yet.
- 3 : Player's score
- 4 : Current field. Appears in blue for Order Field, and in red for Chaos Field
- 5 : Amount of hits on the current combo. (Only shows up when a combo is active)
- 6 : Timer gauge for the current combo. (Only shows up when a combo is active)
- 7 : For a destroyed part or boss, a display of its base value, multiplier applied, and final value. (Only shows up temporarily after any part or boss destruction)
- 8 : Boss timer, displayed in seconds. When the timer is below 20 seconds, the ms will also be shown.
- 9 : Boss' HP bar
Game loop
Chaos Field features 5 stages with 3 bosses in it each, for a grand total of 15 bosses to fight one after the other. Every boss has its own timer and each fight ends when the player empties the boss' life bar or when the timer runs out.
Every boss is made of one or multiple parts and turrets. Dealing enough damage to said turrets can destroy them and generate energy cubes. In order to defeat a boss, destroying all the parts is not necessary, but successful destruction of specific turrets is worth additional points and can prevent the boss from using some patterns or attacks.
Some turrets need to be "destroyed" twice before actually being removed. They will generate energy cubes each time they receive enough damage. Some other turrets can be damaged repeatedly for multiple cube spawns over the course of the boss fight.
Weapons
| Weapon | Description | Cost and restrictions |
 Shot Shot
|
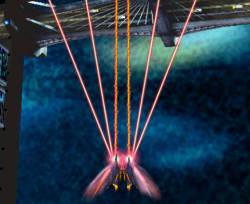
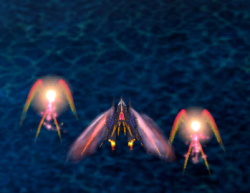
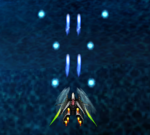
The shot is the most basic weapon available, and it allows player crafts to damage enemies ahead of them by continuously holding the shot button. | None |
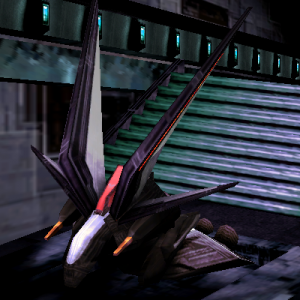
 Sword Sword
|
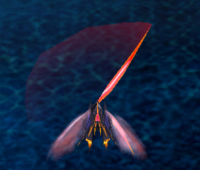
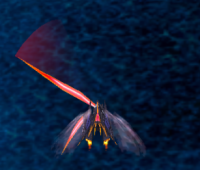
Every ship is equipped with two blades that they can freely swing in front of them. The sword has limited forward range but is able to cancel every non-purple bullet.
When tapping the sword button multiple times in a row, the ship can perform a sword combo with up to three hits, with the first swipe coming from the left, then a second one from the right, followed by both swords simultaneously. Whenever the sword is active, it takes priority over the shot. Holding shot while tapping the sword button will only fire the shot in between the sword combos. All three characters share similar swords, albeit with a different color each. Besides, the cooldown that occurs after performing a sword combo is not the same. Ifumi has the lowest cooldown, Hal is second, and Jinn has the most cooldown. [VIDEO SHOWCASE : https://www.youtube.com/watch?v=qG93wDmNo4s ] |
Unlimited uses, but there is a very short cooldown after a combo |
 Wing Layer Wing Layer
|
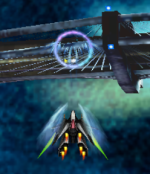
A defensive module that ships can summon and that will cancel bullets which touch it. Each character has a unique type of Wing Layer with its own shape, behavior, and duration. The Wing layer will also deal tick damage on boss parts it touches.
Using the Wing Layer does not grant any invincibility to the player, however they can use the bullet canceling ability to make the playfield safer for them. The Wing Layer remains active for a few seconds before disappearing. Switching fields does not cancel a currently active Wing Layer from the previous field, nor does it force it to change into the Wing Layer variant for the new field. It is thus possible to smuggle one Chaos Field Wing Layer variant into Order Field (and vice-versa) by activating the Wing Layer right before switching fields. [VIDEO SHOWCASE : https://www.youtube.com/watch?v=YvW1eagGb-o ] Only one simultaneous instance of the Wing Layer can be active at max. Once a Wing Layer has been activated, the player has to wait until it naturally fades out before being able to fire the Wing Layer again. |
Requires one block of the meta gauge |
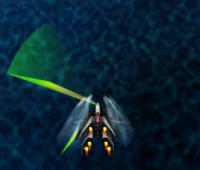
 Lock-on Laser Lock-on Laser
|
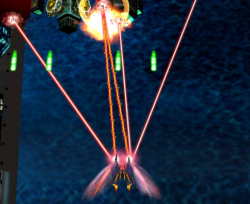
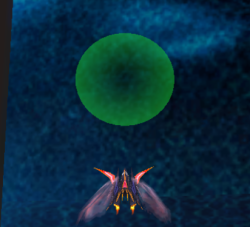
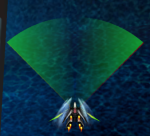
When using the lock-on laser, the ship will temporarily deploy a green radar, whose shape and range differs for each character. Any targets located inside this radar will have a lock-on cursor on it, and the ship then fires off homing lasers that attack every single locked-on target.
As the homing lasers are not instantaneous, there is a noticeable delay between the moment a target is locked and when it is actually damaged. A single lock-on laser use can not lock-on to more than 100 targets at once. [VIDEO SHOWCASE : https://www.youtube.com/watch?v=EwQN2NRzcV4] |
Requires one block of the meta gauge |
 Field Switch Field Switch
|
The player crafts have the ability to switch between Order Field and Chaos Field by using the Field switch. Field switching is a manual action and no boss fight will force the player to switch to a specific field as part of an attack or a phase.
When switching fields, the on-screen bullets will be erased and the player will be invincible for a few seconds. (the ship will have a yellow-ish color) The Field Switch is the only player tool that can provide such invincibility. After using a Field Switch, the ability will be temporary unavailable, until its cooldown ends. A specific sound cue can be heard whenever the Field Switch is made available again. Besides, a player can tell if the Field Switch is available by looking at the top sides of the ship. A transparent aurora-like effect should cover them if the Field Switch is ready. |
Unlimited uses, but there is a ~5 second cooldown after every Field Switch |
Field differences
Throughout the game, the player can switch between two Fields : Order Field and Chaos Field. A new stage will always start in Order Field, but the field will not be reset from a boss to another within the same stage.
The field switching is one of the main mechanics in the game and jumping from one field to another can change the behavior of player tools and bosses. Here is a list of differences between Order Field and Chaos Field :
| The player's shot and Wing Layer have less power. | The shot and Wing Layer evolve into stronger versions of themselves. The properties of the weapons can slightly change as well, as is the case for Ifumi's shot. |
| The lock-on laser is only able to target and damage boss parts. Bullets inside the Lock-on laser range in Order Field will not be canceled and they will not contribute to the Hit combo. | In addition to boss parts, the Lock-on laser can now catch cancelable bullets within its range and add each of them to the Hit combo. |
| The bosses fire tamer variations of the attacks, potentially featuring less bullets to cancel. | The bosses become more aggressive in their attacks, potentially throwing more bullets to cancel in their patterns, but also sometimes adding more uncancelable bullets and homing lasers in the mix. |
| Some of the bosses will only feature a base amount of turrets on their bodies. The hidden turrets and boss parts can not be reached in this field. | The bosses that have Chaos Field-exclusive turrets will open up their cores and deploy said turrets when switching to this field. It will then be possible to target and attack them alongside the base boss parts.
[VIDEO SHOWCASE : https://www.youtube.com/watch?v=b6SQIHHTkK4] |
| Destroyed boss turrets will spawn a lot of meta stock items, as to refill the energy gauge better. | Destroyed boss parts will spawn a much lower amount of meta cubes, limiting the player's ability to keep the combo going for extended periods of time solely in Chaos Field. |
| The sky or the space in the background usually features a soft color such as blue or light yellow. | The background turns red. |
Characters
Note : The character profiles and ship descriptions have been taken from the official US localization
| He's a mysterious man whose past experience is unknown---it's hard to tell whether he's serious or not. He's said to be 30 years old, but there are some ways in which his thinking is rather childish.
There's also a rumor going on that he was "built" from organic data obtained from captured enemy Abo. | ||
| Fake Yellow : A prototype that was built in the early stages of development. Though its maneuverability is lower then that of the others because of its heavy equipment, its striking performance is higher than that of the present models. | ||
| Shot | 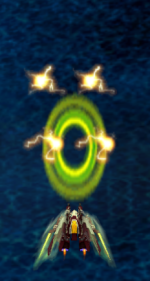
Order Field : The ship fires a short-ranged lightning blast attack ahead of it. This blast is also accompanied by piercing circular sparks that first spawn near the ship's cannons, and then travel upwards in stop & go steps rather than by simple moving on a linearly path. The sparks will also slightly move sideways during their course, as to match the ship's own left and right movements. |

Chaos Field : The forward blast's range is longer, and the electric sparks are bigger. |
| Sword | 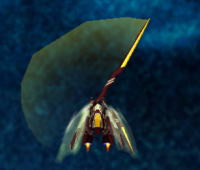  
The ship swings a yellow sword. Jinn's sword combo has the longest cooldown out of all three. | |
| Wing Layer | 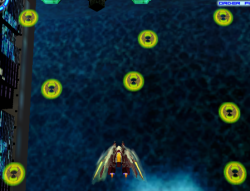
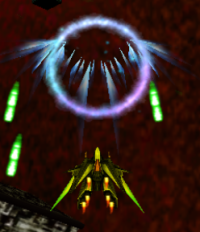
Order Field : 8 bat-shaped modules emerge from Jinn's ship and are sent to random locations on the screen. Each of these modules can cancel bullets and damage enemies. Since the modules are able to cancel bullets as soon as they spawn near the ship, the initial deployment can slightly clear the area around the ship. |

Chaos Field : Each of the bats grows in size. |
| Note : In the Sakura Flamingo Archives version of the game, the modules' locations are no longer random. Instead, the modules will be arranged in a grid-like fashion. This applies to both Order and Chaos Field variants. [VIDEO SHOWCASE : https://www.youtube.com/watch?v=lxCfoFYIdMo] | ||
| Lock-On Laser | 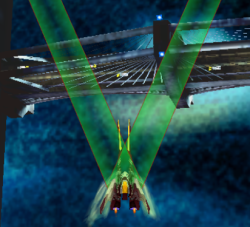
The lock-on area is composed of two narrow beams fired from the sides of the ships at a ~45° angle. The two beams then swing a bit towards the center, however they end their movement before reaching the center, which leaves a blind spot directly ahead of the ship. | |
Items
There are a few items types in the game, most notably cubes that can recharge the Meta stock or give points. These can be autocollected by not attacking for a second.
| Item | Description | Can be autocollected? |

|
Meta Stock item : Item that is generated when destroying boss parts or taking a hit. In Original mode, it will also spawn when a popcorn enemy is killed. The Meta stock item will replenish part of the Meta gauge, which is used in order to fire the Wing Layer and the Lock-On Laser. Each individual block of the Meta gauge needs 10 Meta Stock items to be filled. In other words, a single Wing Layer or Lock-On Laser use requires 10 Meta Stock items. | Yes |

|
Point item : Alternate item that spawns in place of the Meta Stock item if the player's Meta gauge is actually full when the items are spawned. These golden items are worth 5.000 points each and will not replenish the Meta gauge even if said gauge gets emptied in between the item spawn and the item collection. | Yes |

|
Milestone logo : Special logo that can be triggered on 1-2 and 3-1 and replenishes one life point when picked up. In order to make the logo appear, the boss has to be killed while in Order Field before the timer goes below 55 seconds (for 1-2) or 64 seconds (for 3-1). Switching to Chaos Field beforehand to inflict additional damage is fine and will not prevent the logo spawn as long as the killing blow occurs in Order Field.
[VIDEO SHOWCASE : https://www.youtube.com/watch?v=Ew8iTmBNnrI & https://www.youtube.com/watch?v=bbB951BT7GM ] One thing to note on 3-1 is that the boss will be moving towards the left edge of the screen when the timer is close to the threshold. As a result, a last second kill will actually spawn the logo a bit too far away from the area the ship can move in, and the logo will be impossible to collect. When the logo gets despawned, the collection SFX will still play, but no life point will be restored. [VIDEO SHOWCASE : https://www.youtube.com/watch?v=onqZmuqAldI ] |
No |
Scoring
Chaos Field's scoring system revolves around the use of specific weapons in order to drive a combo counter up. Since those weapons are also tied to an energy meter, resource management will also play a major role in obtaining the highest possible combos and scores.
Increasing the combo multiplier
While the shot and sword can not increase the combo, the Wing Layer and the Lock-on laser are the only weapons able to do so.
Whenever a bullet is canceled by the Wing Layer or when it is targeted by the Chaos Field variation of the Lock-on laser, the Hit count will go up by 1. When the Lock-on laser targets a boss part (in either field), it will also increase the Hit count by 1.
Since the Lock-on Laser increases the combo as soon as the bullet is locked-on rather than when it is canceled by the homing laser, it is possible to use the sword to erase a locked-on bullet without missing out on the hits the Lock-on Laser generated.
Additionally, it is possible to have a single bullet provide two hits instead of one by first locking on to it with the Chaos Field Lock-on Laser, and then erasing it with the Wing Layer before said laser actually reaches it. [VIDEO SHOWCASE : https://www.youtube.com/watch?v=O73PkIzA_OQ]
The combo counter is visible in the top right of the screen whenever a combo is currently active. Below the hit number is a yellow timer, which stays at the max as the combo increases. However, lulls in bullet canceling or lock-ons will make the timer gauge decrease. If the gauge isn't refilled by increasing the combo, the combo ends entirely.
Combos are essential for high scoring as the higher the combo, the higher the multiplier for parts and boss kills, as well as for tick points.
At the beginning of every stage, the combo is reset to 0, but the combo counter and timer will carry over from one boss to another within the same stage. Having a high-value combo on the first boss of a stage can consequently provide scoring benefits on the second and third boss as long as the combo is also maintained through these fights.
The combo's possible max value is 9.999. When the combo reaches this specific value, it can no longer be increased, but the timer itself can also no longer be replenished. Using the special weapons to increase the hit combo will only temporarily freeze the combo gauge, but never fill it as long as the combo is at 9.999.
[VIDEO SHOWCASE : https://www.youtube.com/watch?v=FzywOkoK4NU]
Meta cubes VS Point items
When the meta gauge is already completely full, dedicated yellow point items will spawn instead of more meta cubes. While these items provide more immediate scoring bonuses, it remains preferable to consume the meta gauge and use the special weapons in order to increase the combo counter. A high combo value will be worth a lot more points as the yellow items' value becomes comparatively smaller and smaller as the combo increases.
Combo VS Time bonus
Once a boss is defeated, a bonus will be granted depending on how much time was remaining on the clock. However, said bonus remains relatively smaller than the score obtained by killing the boss after having milked its patterns for a high-value combo.
Halting the combo timer decrease for links
Even if the combo timer requires either of the special weapons to connect in order to be refilled, it is also possible to temporarily freeze said timer in order to buy time whenever there are no other ways to keep the combo alive. This can occur whenever specific bosses leave the screen and/or don't shoot for a few seconds.
If the Wing Layer hits the boss without catching any bullets, it will still freeze the timer for as long as there is an overlap between it and the boss.
[VIDEO SHOWCASE : https://www.youtube.com/watch?v=5zKsiGXtXck ]
When a Lock-on laser is used in empty air but does not catch any boss part (and/or bullet in Chaos Field), it will nonetheless temporarily freeze the timer. It is possible to use several Lock-on lasers to stall the timer decrease, as long as energy is available to do so.
[VIDEO SHOWCASE : https://www.youtube.com/watch?v=2USTJOuOink ]
On the other hand, performing a Field Switch does not freeze the combo timer. In case the combo timer is already decreasing, it is preferable to use a special weapon and refill the gauge before switching fields, otherwise the combo risks being reset during the short transition period where the player is unable to move or activate weapons as they switch fields.
Self-destructs for energy recharge
This game features zero penalties for losing lives, and taking a hit will spawn enough meta stock items for three additional special attack uses. Consequently, sacrificing lives on purpose in order to replenish the energy gauge is a viable strategy for extending a combo with no other source of meta stock items available.
The main location when this trick is used is the very final boss' last phase, where the strategy is motivated by a combination of limited parts to damage for meta stock items, very lucrative high-density bullet patterns, and no further boss encounter to threaten survival after all the lives but one are exhausted for score purposes.
Game modes
Arcade
Arcade is the main mode of the game, featured in every port.
Original Mode
Only available on : GC
In Original Mode, the player does not only face bosses. Sections with popcorn enemies are interspersed between specific boss fights, or sometimes in the middle of a boss fight as well.
Popcorn enemies fire bullets that can be canceled for a combo and they can be locked-on as well. When destroyed, they will spawn meta stock items. It is thus possible to gain resources and score during the popcorn segments in a similar fashion as in boss fights. Besides, combos will carry over within a same stage from a popcorn segment to a boss fight, which provides opportunities for even bigger combo potential than in Arcade mode.
Additionally, a few boss patterns have been altered. Said alterations are relatively minor, as the general shape and concept behind the patterns remains similar, but the speed or bullet type featured in those patterns can be changed.
References
Scoreboards
- JHA hiscore board : https://wiki.denfaminicogamer.jp/highscore/2004_011_%E3%82%AB%E3%82%AA%E3%82%B9%E3%83%95%E3%82%A3%E3%83%BC%E3%83%AB%E3%83%89
- System11 hiscore board : https://shmups.system11.org/viewtopic.php?t=42140
- Restart syndrome hiscore board : https://restartsyndrome.com/board.php?id=278
- hiscores.shump.com board : https://hiscores.shmup.com/game/112
Replays
Please refer to https://shmups.wiki/library/Chaos_Field/Video_Index
List of superplay materials
Please refer to https://shmups.wiki/library/List_of_superplay_materials#Milestone
Story
[Taken from the US GC manual]
The "Chaos Field", a warped and chaotic dimension.
There humankind was exposed to the threat of annihilation through the invasion of the mysterious "Abo". Humankind resisted them, and a costly battle ensued for many years, a battle with no clear victor.
Over time, the battle spread out beyond the Chaos Field to engulf another time-space dimension called the "Order Field".
In order to put a stop to this multi dimensional war, three pilots have been chosen for an assault...
- ↑ https://web.archive.org/web/20111103070604fw_/http://www.mile-stone.co.jp/product.html
- ↑ https://web.archive.org/web/20111103070604fw_/http://www.mile-stone.co.jp/product.html
- ↑ https://web.archive.org/web/20111103070604fw_/http://www.mile-stone.co.jp/product.html
- ↑ https://web.archive.org/web/20111103070604fw_/http://www.mile-stone.co.jp/product.html
- ↑ https://web.archive.org/web/20111103070604fw_/http://www.mile-stone.co.jp/product.html
- ↑ https://www.mobygames.com/game/wii/ultimate-shooting-collection/release-info
- ↑ https://www.nintendolife.com/games/wii/ultimate_shooting_collection
- ↑ https://web.archive.org/web/20111103070604fw_/http://www.mile-stone.co.jp/product.html
- ↑ https://www.mobygames.com/game/sakura-flamingo-archives
