Shikigami no Shiro III/Characters
Contents
Note : The character profiles have been taken from the official US localization
| Reika Kirishima | ||||
|---|---|---|---|---|
| A female police officer. Number 0, division 0 in the metropolitan police department. She is known as Time Gal. She has long, silky green hair, wears a bare mid-riff outfit, and has long slim legs. With her anachronous costume and mouth, she strives to be a first-class time criminal. She really has time jumping capabilities as she says, but most people don't believe her (to her dismay). Incidentally, she is only 17 years old. She is a high school student as well as a police officer. Reika travels anywhere from the years 1888 and 2145, and she can be seen appearing in various locations (like in the background). | ||||
| Shot : A dual stream of ripples. The crystal emitters are side-by-side if Reika moves sideways, but move on top and bottom of Reika when she moves on the vertical axis, making the shot narrower but more focused |
Shikigami Type 1 : The crystals stay on Reika's left and right and fire forward shots that slightly angle towards her front. Moving up and down slightly adjusts the angle but the general behavior of the dual shots remains similar. |
Shikigami Type 2 : The crystals fire shots that travel in the direction opposite to the one Reika was moving in. The crystals also rotate around Reika when adjusting their shots depending on her movements. |
Bomb : Reika freezes time for a few seconds. Enemies and bullets will not move, and Reika can fire her shot in order to erase bullets and damage enemies. The shikigami can not be used either. Any enemy killed during the time stop will not spawn any coins. HTMs can't be triggered during the time stop. If an HTM is active when the time stop was triggered, the HTM gauge will freeze as usual, but the tension shot will not be available. | |
| Emilio Stanburke | ||||
|---|---|---|---|---|

|
A good-looking young boy with black hair and suspenders. Only 10 years old, he is a member of the noblest of the royal families in Alcaland and detests foreign intervention into its domestic matters. He is a high-spirited boy who said, "Our country has the strengths of its own traditions." After stating this, he went out to investigate on his own. He always has a worried look on his face, what some people refer to as a Majar melancholic. He uses a demon known as Devour, which can change into various shapes. (In Christian countries, they are called shikigami.) He is very stubborn and proud, and though he has a good personality, he is fixated on authority and has a slight tendency to look down on commoners. | |||
| Shot : Fires two streams of homing shots that target enemies. Each of those streams can target different enemies. |
Shikigami Type 1 : When initiating the shikigami, Emilio will cast an anchor point in one of three directions : forward, top-left, or top-right. The direction depends on Emilio's movement when the laser is being activated. If Emilio is not moving sideways, then the anchor point will be thrown forward. Otherwise it will be thrown in the direction opposite to Emilio's. In other words, moving right will throw the anchor at Emilio's top-left, and moving left will send it to Emilio's top-right. The vertical direction of Emilio's current movement does not have an influence on the anchor point location, and there is no way to throw the anchor behind Emilio or on the same horizontal axis as him. Up until he gets hit or releases the Shikigami, this anchor point will stay in place while Emilio fires a pink laser that travels from his wand to this anchor point. It is therefore possible to change the trajectory and length of the laser by moving Emilio around. |
Shikigami Type 2 : When activating the shikigami, Emilio will start firing a fixed-length pink laser in the direction he's currently moving in. All 8 directions are available for the laser to be facing. The laser's length and orientation will remain consistent for as long as the shikigami is active. |
Bomb : Emilio fires a powerful frontal laser beam as angelic wings appear behind his back. | |
| For both shikigami types, the most damaging part is the halfway point of the laser. Furthermore, Emilio will actually move faster when its shikigami is active. Both shikigamis can also trigger a sound glitch if Emilio activates the shikigami but cancels it right as the purple smoke cloud appears. By doing so, the continuous rattling sound heard when the shikigami is active can be be heard, despite the shikigami not being active. Shooting, bombing and activating an HTM will not interrupt the sound, while dying and activating the shikigami again will make the sound behave as intended again [VIDEO SHOWCASE : https://www.youtube.com/watch?v=U096hiryGy4 ] | ||||
| Kim Mihee | ||||
|---|---|---|---|---|
| A fighting doctor from Seoul, Korea, holding her head while on a plane thinking, why me? Her left hand trembles and is said to be able to kill anyone who touches it. When her hand trembles in the operating room, patients often plead for their lives. Because of this, she has the misfortune of being called a quack, even though she is a skilled surgeon. Due to her bold, free-spirited nature, she did not get along with her conservative parents and left to study abroad: she has not returned to her homeland. Mihee's an avid traveler, but when she went to visit some relatives in Japan, their dojo was closed and they were in prison... As she stood there stunned, a well-dressed investigator saying he was a friend of the relatives approached her. She somehow ended up going to Alcaland.
(Note : The imprisoned relative is Kim Daejeong from Shikigami no Shiro 1 and 2, and the "well-dressed investigator" refers to Gennojo Hyuga) | ||||
| Shot : Kim fires a large forward shot that has a thicker stream in the center and weaker, less frequent forward fireball shots on the left and right sides of the main shot. Kim Daejeong in previous games had a similar shot type, but his fireballs had a homing property. This is no longer the case here. |
Shikigami Type 1 : Kim summons three swords around her that create an upside-down Y shape. The swords inflict continuous damage on enemies when touching them. Depending on the direction Kim moves in, the Y shape will rotate as to always have the crevice between the two top branches of the Y be in the direction Kim is facing. In other words, this means the bottom sword of the Y will face the direction opposite of the one Kim is facing. If Kim stops moving, the sword rotation will match the last direction the player has input, including diagonals. It is possible to simulate a rotating attack by quickly moving in circles. The spinning movement will move the three blades around in a circle motion, damaging enemies around Kim in the process. This is not a special hard-coded property of the shikigami, but simply a natural effect of the sword's directional properties. Compared to the same shikigami type that was featured in Shikigami no Shiro 2, the movement speed when using it is noticeably faster. |
Shikigami Type 2 : Kim summons two swords in front of her. The swords can rotate around Kim, each of the swords on their own side. If Kim moves upwards, the two swords will rotate downwards, and vice-versa for downwards movements. The swords will not rotate if Kim moves sideways. |
Bomb : Kim slows down a bit as she charges a poisonous short-range punch, and then unleashes it. This attack has very limited range and the slower speed during the charge-up makes it harder to aim at far away enemies, but has decent power if it connects. Additionally, any enemy that survives the attack (most likely bosses only) will suffer from a poison aliment, flash in green, and regularly take small amounts of damage regardless of most player actions. The poison effect persists even if the player loses a life or uses another bomb, however it gets disabled if the player loses all lives and will not persist upon using a Continue. In the case of a boss with multiple life bars, the poison effect will also dissipate once the current life bar is emptied. Since the poison effect is part of the bomb, an enemy/boss that dies due to the poison damage will be considered as a bomb kill and therefore not give any coins. [VIDEO SHOWCASE : https://www.youtube.com/watch?v=CtKRVnKjryk ] | |
| Batu Harai | ||||
|---|---|---|---|---|
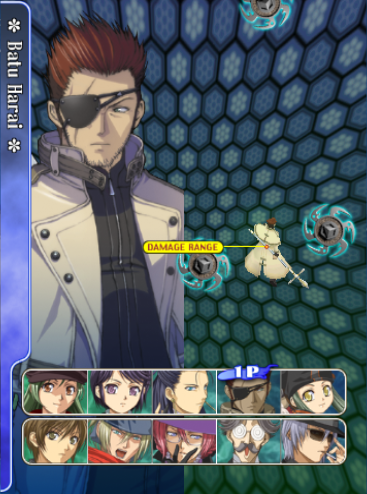
| A brooding exorcist hired by Emilio Stanburke. He is an apostate priest that wields an extending spear in the shape of a cross. He is tired of Emilio's nationalism and wants to hurry and get the job done. He considers the foreign guests demons and has written a petition to headquarters asking for orders to subjugate (i.e. punish) them. He likes hard liquor. | ||||
| Shot : Batu fires a disc-shaped shot in front of him while two other disc-shaped shots spin around him. Getting closer to an enemy can therefore deal more damage even without the tension shot as all those shots hit it. |
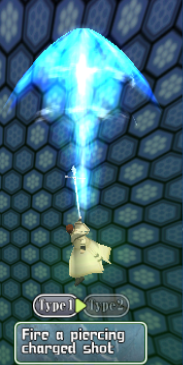
Shikigami Type 1 : After charging the shikigami and then releasing the button, Batu performs a powerful forward stab with his spear. The length of the stab attack depends on how long the shikigami has been charged. |
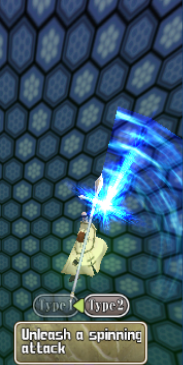
Shikigami Type 2 : After charging the shikigami and then releasing the button, Batu will spin his spear around him, causing damage to enemies around him when the circling attack touches them. The spin attack will last longer if the shikigami was charged longer. However, an advanced trick allows Batu-2's spin attack to keep going. Whenever Batu is spinning his spear, it is actually possible to buffer another shikigami charge. By charging and releasing the button again with the correct timing while the previous shikigami spin is still ongoing, Batu can extend the duration of the attack. Continuously repeating this charge and release process is necessary to keep the shikigami spinning over and over and is also key to high score play with this character. By charging the shikigami to the max level before spinning, the duration within which the next charge can be buffered is higher, while the charges that the player buffers have to be shorter if the initial charge was shorter, as to be able to properly release the charge before the spin stops. [VIDEO SHOWCASE : https://www.youtube.com/watch?v=DRTI9pb8qVs ] |
Bomb : After a short animation, Batu plants his spear at his feet and creates a small exorcism circle around him. The attack also summons a few spiral effects around said circle and which cover the screen. Both inflict damage but the circle is where most of the damage potential is concentrated. | |
| Kohtaro Kuga & Sayo Yuuki | ||||
|---|---|---|---|---|
| Kohtaro : The hero of the series. Due to the death of his longtime shikigami, Sazae, he has come back weaker than before. He still makes the mistake of calling out for Sazae and causes blunders for those around him. This is the story of his rise back from his loss. He has grown taller, and sadness and frustration have cast a shadow over him. But once an incident occurs, he takes action more passionately than before. He has gotten rid of his school uniform and appears in a cool new outfit chosen by Fumiko. He also works as a translator and interpreter.
Sayo : A shrine maiden that was resurrected when she was fused together with Kohtaro's shikigami, Sazae. She feels jealous (and guilty) watching Kohtaro disheartened due to the loss of his partner. Her blunt attitude toward him has changed, and she now tries to be helpful - while rejecting him at the same time. Since her former shikigami, Yata, is a national treasure and cannot be leased out, she has gone out on her own. Since their battle potential is only half when alone, Kohtaro and Sayo travel together. Whether her fusion with Sazae is the cause or not, Sayo's kimono has a tendency to slip off of her shoulder. | ||||
| Shot : A standard forward shot with medium width and power. |
Shikigami Type 1 : Kohtaro summons Sayo as his shikigami, who will then move alongside him for as long as the shikigami is active. Whenever enemies appear on screen, Sayo will then rush towards them and attack them one after the other. Sayo's appearance with this shikigami type is closer to Sazae (who was Kohtaro's shikigami in previous games)'s look. |
Shikigami Type 2 : A blue summoning circle spawns at Kohtaro's current location when the shikigami was activated. Sayo appears on this summoning circle and will stay on it until enemies appear. As with type-1, Sayo will automatically attack enemies; however she will mostly focus on the enemies closer to the summoning circle instead of those near Kohtaro. Letting go of the shikigami button and then pressing it again can be used in order to place the summoning circle elsewhere on the screen. |
Bomb : Kohtaro charges some energy and creates a fiery explosion around him. Four diagonal blasts also spawn, each dealing damage to anything they touch in their path. | |
| Roger Sasuke | ||||
|---|---|---|---|---|
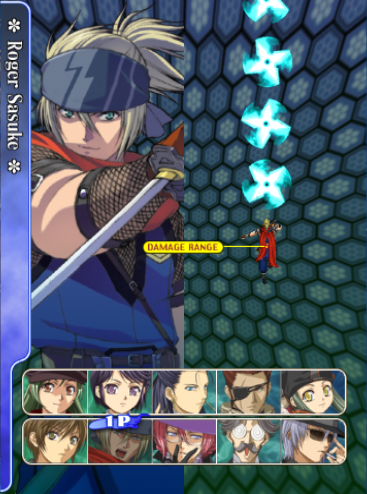
| An American ninja. At this point, Japan's international contribution, psychic abilities, and investigation have nothing to do with him, but Roger looks forward to this trip and participates on his own dime. (He even created the travel pamphlets and handed them out.) From one perspective, he's one of the people that participate in this case with the impurest of intentions, along with Fumiko. He is Kohtaro Kuga's good friend and a serious Wapanese. However, his ninjutsu and methods are authentic, having learned them from the real deal - even his ninja sword is genuine. Because of this, he's as useful as Gennojo, a professional investigator. He is bummed that he is the only one Nagino doesn't call papa. | ||||
| Shot : A stream of spinning shurikens thrown forward. |
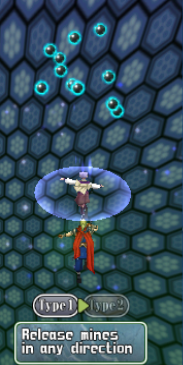
Shikigami Type 1 : Roger's shikigami will appear alongside him and she will summon floating mines around her while the button is being held. When the button is released, the mines will be launched in the direction Roger is moving in. If Roger is not currently moving, the mines will be thrown upwards by default. Upon contact with an enemy or a wall, the mines will explode, causing massive damage. Mines that fly offscreen without touching an enemy or wall will not explode upon touching the screen edges, so it is possible to completely miss your mine throw. |
Shikigami Type 2 : When holding the shikigami button, Roger's shikigami will charge mines around her. When releasing the button, the mines will be dropped around the location where Roger is, scattering around a little bit. They will then explode on contact with an enemy/wall, or on their own after a few seconds. These mines explosions can deal tremendous damage to enemies and bosses. |
Bomb : Roger Sasuke starts spinning around while swinging his sword. The spin deals damage to enemies it touches. While its range is limited, the player can freely control Roger's position as he is swinging in order to hit the enemies on screen while being invincible through the entire bomb duration. | |
| Fumiko Odette Van Stein | ||||
|---|---|---|---|---|
| A gorgeous witch, in many different ways. She is said to be more of a villain than the greatest enemy in the series. Her hobby is to steal the men of other women. Her second hobby is trampling upon people. She has arrived in Alcaland to return to her homeland - and go on a honeymoon. For Fumiko, Alcaland is a memorable place she visited a number of times when she was a young girl. She looks around her surroundings with fond memories and can't help but feel melancholic. | ||||
| Shot : A crystal shot which can be angled by moving sideways. By default the shots will be launched forward, but moving to the right will make Fumiko shoot towards the right, and vice-versa for the left side. The shot's current orientation is not reset when letting go of the shot button, so resetting the shot direction actually requires the player to move in the opposite direction regardless of whether they are shooting or not. |
Shikigami Type 1 : When the shikigami button is held, Fumiko will stop moving and a targeting cursor will appear on screen, as well as a portrait of Munchausen on the top corner on the player's side. The player will actually move the cursor, and when the shikigami button is let go of, a powerful explosion will appear where the cursor was. It will remain on screen for a few seconds and damage anything that touches it. Fumiko can resume moving as soon as the shikigami button is released. Unlike previous entries in the series, Fumiko can also summon other explosions while the current one is still active if the player can quickly summon them. This can be used to quickly destroy bosses or stronger enemies. |
Shikigami Type 2 : By holding the shikigami button, the player will stop Fumiko from moving and summon a targeting cursor which can be moved around. Whenever said cursor overlaps an enemy, a lock-on reticle will appear on them. Upon releasing the shikigami button, a lightning bolt will be fired from Fumiko's wand and attack the locked-on enemies one after the other. If the player holds the shikigami button again while the lightning is still active, enemies that are targeted with the newly spawned cursor can also be attacked by the lightning from the previous attack, even if the player's second lightning attack hasn't been released yet. [VIDEO SHOWCASE : https://www.youtube.com/watch?v=loKQXbM7ips ] |
Bomb : Fumiko casts a spell that creates multiple powerful explosions on the entire screen. Despite the delay between the bomb button press and the summoning of the explosions, Fumiko is invincible right as the button is pressed. | |
| Munchausen | ||||
|---|---|---|---|---|
| He is like a young uncle to Fumiko, and is Kohtaro Kuga's good friend. He shows another side of himself as the versatile butler, and this time around, you can even see him looking cool without his glasses.
"I will educate you. Please prepare yourself." | ||||
| Shot : Munchausen's shot is the same as Fumiko's. A forward crystal shot that gets angled left or right if the player moves in the same direction. Interrupting and restarting the shots will not reset the current shot angle, only moving can readjust it. |
Teleport : Munchausen is a special case as he does not have any bomb. (HTM are fine though) Pressing the bomb button will instead trigger a fast teleport dash in the direction Munchausen is currently moving in. The cooldown between consecutive teleports is around a second. If Munchausen is not currently moving, the teleport will not happen. If an obstacle or bullet is between the initial and final Munchausen positions, the player will not be damaged by it as Munchausen is invincible during the teleport. However, the character can take damage as soon as the teleport ends. An implication of that property is that any invincibility that the character was granted, either due to a life loss or thanks to a HTM activation, will be instantly revoked at the end of a teleport dash. As a result, it's possible to chain-death very quickly by teleporting into a hazard right after dying. [VIDEO SHOWCASE : https://www.youtube.com/watch?v=SXlROyURmVY ] |
Shikigami Type 1 : When the shikigami button is held, a cursor will appear. Munchausen will remain immobile while the player instead moves the reticle around. Letting go of the button unleashes a big explosion on the cursor location. This explosion is bigger than the one caused by Fumiko's Type 1, however there is a limit of one explosion on screen max. |
Shikigami Type 2 : Munchausen summons a pink spinning disc which can be freely moved around to damage and kill enemies. Munchausen is unable to move while the shikigami is deployed, as the directional inputs will control the disc instead. If the player lets go of the shikigami button, the disc will despawn and Munchausen can move again. If Munchausen uses the teleport while the disc is active, the disc will despawn and then respawn on Munchausen's new location. There actually is a special trick which allows the player to keep an active disc in one location and still be able to move Munchausen at the same time. This trick requires the player to summon the pink disc, move it at the desired spot, teleport and let go of the shikigami button in the middle of the teleport. If the glitch was correctly pulled off, the disc will no longer be visible but its hitbox will still remain active where it last was, as long as the player doesn't summon it again, gets hit, or until the pre-boss invincibility occurs. While this invisible shikigami is active, the player can thus move around, teleport again, shoot, and activate HTMs. This is an essential asset for Munchausen-2 scoring, and a helpful addition for survival play too. [VIDEO SHOWCASE : https://www.youtube.com/watch?v=hdqMJQRNhsg ] | |


