Dogyuun/Strategy
Contents
Weapon Tiers
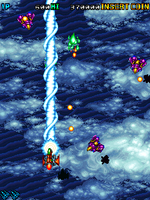
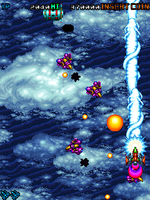
A Tier: Mega Shot (Blue)
- ( ~ ) When not shooting, it starts charging a sphere of energy in front of the ship, which deals damage to enemies at close range (needs more research)
- ( ~ ) This weapon can also be used to block the chest lasers from the Stage 2 boss, but requires use of sustained rapid fire
- ( + ) Best damage potential with rapid fire
- ( + ) Fantastic vertical coverage
- ( + ) Pairs great with Thruster module due to a persistent hitbox when firing single-shot bursts, and the side lasers from the Thruster's options when rapid firing
- ( + ) Uniquely, this is the only weapon that is directly enhanced by equipping the Thruster module!
- ( - ) Weak crowd control ability without a Thruster equipped
- ( - ) Limited horizontal range
- ( - ) Extremely difficult to use against some bosses (such as the Stage 5 boss)
- ( - ) Rapid fire must be sustained via button-mashing; not taking advantage of rapid fire reduces the overall damage of this weapon significantly
- (2P) When using the two-player super ship, this weapon becomes thicker and deals more damage; it becomes capable of tearing through even stronger enemies with ease
B Tier: Homing Fire (Red)
- ( ~ ) Homing ability prioritizes airborne enemies
- ( + ) Highly versatile weapon
- ( + ) Great damage with point-blanking + rapid fire, potentially rivaling Mega Shot in damage
- ( + ) Excellent crowd control
- ( + ) Sharp angled bullet movement gives the weapon good overall accuracy
- ( - ) Only two volleys can be on screen at once
- ( - ) Fairly slow bullet travel speed
- ( - ) Reckless rapid-fire can create problematic situations in zako rushes
- ( - ) In boss fights, when not point-blanking, volleys are more likely to home in on destructible parts instead of the base of the boss itself
- (2P) When using the two-player super ship, this weapon shoots volleys of four shots as a time
C Tier: Psycho Beam / Psychic Beam (Purple)
- ( ~ ) Homing ability prioritizes grounded enemies
- ( + ) Deals the most raw damage per shot
- ( + ) Large bullet trails that also deal damage (equivalent to raw shot damage? requires testing)
- ( + ) As a homing weapon, it allows you to position yourself in safe positions (extremely useful in most boss fights)
- ( - ) Only one volley can be on screen at once
- ( - ) Extremely weak point-blank weapon due to limited volleys
- ( - ) Bends and homes in wide arcs, making it difficult to hit enemies with when they are within certain ranges or positions on screen
- ( - ) Slow refire rate
- (2P) When using the two-player super ship, this weapon shoots volleys of four shots at a time
D Tier: V-Laser (Green)
- ( ~ ) This weapon is uniquely capable of repelling enemy lasers -- an example of this ability is against the Stage 2 boss, where sustained fire will prevent its chest lasers from hitting you
- ( + ) Persistent hitboxes by holding the Fire button
- ( + ) Pairs well with the Thruster, making it good for tearing down big groups of popcorn enemies
- ( + ) No bullet travel time -- press the button to instantly start dealing damage
- ( - ) Very low damage weapon
- ( - ) Huge blind spot in the center
- ( - ) Horrible to useless for point blanking
- ( - ) Severely underpowered in almost all boss encounters in the game
- ( - ) Awful earsore of a sound effect when firing the weapon
- (2P) When using the two-player super ship, this weapon shoots six bolts of lightning instead of two, and they fire from the sides of the ship as well as behind -- however, damage output does not seem to increase very much (if at all)
Basic Strategy
- An important part of routing in Dogyuun involves a combination of ship positioning and your weapon/module loadout. Experiment and find out what equipment will be best for every situation, as some combinations of weapons and modules will work better in one part of the game, but worse in the other.
- For example, you almost never want to use the purple weapon during zako rushes, but it is a great choice for many mid-bosses and end-stage bosses.
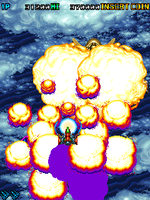
- Although the Bomb module is a one-time use, it deals tremendous amounts of damage, often enough to cause total boss part destruction on bosses, and instantly kill most mid-bosses in the game. It also provides a hefty amount of invincibility and deletes bullets from the screen. It can be good to keep one handy when you know the situation calls for it.
- You can still take advantage of both modules with the super ship. Try tagging in a second player and fusing with their ship if you need the extra firepower. Remember that two-player also forgoes the use of checkpoints, making it a much less difficult 1cc (although I guess it's technically a 2cc?).
- Memorize the color order that the pods cycle through (red ▶ blue ▶ purple ▶ green ▶ ...). This order will always be the same.
- Weapon pods that are freshly opened will always open starting with the same color in all runs. This means that if you open up a weapon capsule, and it opens up as a green weapon, it will always open up as a green weapon in that particular area of the map on every run. You can take advantage of this to plan your equipment routes ahead of time.
Advanced Strats
- The Sylfer can only equip one module at a time, but to mitigate this, you can collect a weapon capsule with your tractor beam carrying the backup module that you want to use, and when you need it, you can release the capsule (C button to release it and then shoot it open, or physically ram the capsule into an enemy or projectile) to collect your backup. This enables you to carry a spare Bomb with you, or keep a Thruster handy for when you've spent your equipped Bomb.
- This is also an advanced way to use two bombs in particularly challenging areas.
- You will also continually gain a tractor beam's passive +10pts bonus for carrying a weapon capsule, making it useful for scoring as well as survival.
- There is often a weapon capsule containing a Bomb that appears just before a difficult mid-boss section, or during sections that send swarms of enemies shooting at the player. However, the player might already have a Thruster equipped that they don't wish to sacrifice. A neat way to save your Thruster module but still take advantage of the Bomb is to fly to the top of the screen, un-equip the module (C button), then collect the Bomb. They can then time their bomb right at the appearance of the mid-boss, then retrieve their Thruster before it scrolls off-screen.
Double Extend / 200000pts Glitch
After defeating a Boss using the weapon that spawns the secret 1UP/100K item capsule (which spawns after shortly after going into the next stage), capture the capsule with the Tractor Beam, and carry it with you throughout the entire stage up to the next Boss. Defeat that boss with the appropriate weapon above, and a second item capsule will spawn. Slam the two capsules into each other, and they will both spawn the 1UP/100K item. Through this strategy, you can either obtain two extends from this glitch, or continuously obtain double 100000pts items. The challenge in utilizing this glitch comes from ensuring that the item capsule isn't destroyed by enemy fire or collisions before reaching the Boss.
Enemy Overview
Low-Class Enemies
| Enemy | Description | Appearance |
|---|---|---|
| 100pts
|
Basic zako.
Flies heading straight for the player while shooting a single bullet, also in trajectory of the player. Once it reaches a certain range of the player, it begins to fly away, towards the edges of the screen. |
Stage 1
|
| 100pts
|
Basic zako spawned by the mid-boss of the first stage.
They move down from the position they were spawned, and do not fire bullets. |
Stage 1
|
| 1000pts
|
A sturdy enemy type. These enemies quickly descend from the screen.
Once they reach their position, they charge and fire a long beam downwards, then descend off screen. |
Stage 1
|
Mid-Boss Enemies
| Enemy | Description | Appearance |
|---|---|---|
14,000pts
|
The mid-boss of the first stage.
This enemy attacks by firing missiles from its side hatch, volleys of spread bullets from its top eye, and releases green zako from its side hatches. The nose of the ship, the zako hatches on the sides, and the armor covering the hatches are destructible. Hitting the vulnerable center of the enemy (after destroying the nose) gives the player 100pts each hit that registers. | Nose: 1000pts | Armor: 1000pts | Side Hatch: 1500pts | Missiles: 100pts |
|
Stage 1
|
| Example | Example | Example |
Individual Stage Breakdown
Stage 1
Checkpoint 1-1
Recommended Weapon: Mega Shot
At the start of the first stage, many ![]() will start coming down at the player from the very top of the screen (about 25). They don't move very quickly and are not particularly aggressive. You can pretty easily move from the left of the screen to the right of the screen shooting the beam and not risk taking damage.
will start coming down at the player from the very top of the screen (about 25). They don't move very quickly and are not particularly aggressive. You can pretty easily move from the left of the screen to the right of the screen shooting the beam and not risk taking damage.
This is also a good opportunity to tractor-beam one of the ![]() to begin earning the passive +10pts every 10 frames bonus from smaller captured objects. You can set up a fairly consistent enemy grab at the start of the stage by moving towards the bottom left of the screen until the first two zako spawn, luring the one on the right as close to the bottom of the screen as possible, then fly towards it with the tractor beam deployed and grab it.
to begin earning the passive +10pts every 10 frames bonus from smaller captured objects. You can set up a fairly consistent enemy grab at the start of the stage by moving towards the bottom left of the screen until the first two zako spawn, luring the one on the right as close to the bottom of the screen as possible, then fly towards it with the tractor beam deployed and grab it.
An easy way to handle this initial zako rush (in exchange for the 2500pts you would receive from destroying them, and sacrificing the tractor beam's passive score bonus) is to take advantage of a safespot simply by sitting near the top of the screen (about one ship space away from the score counter) for a few seconds. The zako are programmed to fly away from the player once they reach a certain range of distance. Because of this, if you position yourself just right, they will spawn on the top of the screen, briefly fly towards the player, and then turn around and fly away! (If the player's positioning is too low, they will likely get shot by the incoming zako's bullets before they turn around; if they are positioned too high, however, the incoming zako are likely to crash directly into the player.)
The first weapon capsule of the game appears at the end of the zako rush; blow it open to collect a Bomb module.
Shortly after, the player will be attacked by the first mid-boss of the game (right).
This mid-boss starts its attack by shooting a quick spread of bullets from its top eye, spawns ![]() from its side hatches, and fires large missiles from its missile pods. The front "nose" of the ship can be destroyed, as well as the green armor protecting the zako hatches and the zako hatches themselves (see here). Check the Enemy Overview section for information on point values.
from its side hatches, and fires large missiles from its missile pods. The front "nose" of the ship can be destroyed, as well as the green armor protecting the zako hatches and the zako hatches themselves (see here). Check the Enemy Overview section for information on point values.
If you want to shoot this boss down quickly, you can use the Bomb that you collected a moment ago (bottom left, 3rd screenshot). The Bomb module is so massively powerful that it will destroy them nearly instantly.
If the mid-boss is destroyed quick enough, an additional wave of ![]() will begin spawning, as well as a weapon capsule on the left side of the screen, containing a Thruster module. This is the earliest point of the game that the player can collect a Thruster. A second mid-boss will then spawn shortly after.
will begin spawning, as well as a weapon capsule on the left side of the screen, containing a Thruster module. This is the earliest point of the game that the player can collect a Thruster. A second mid-boss will then spawn shortly after.
If you held onto the first Bomb that you collected during the first mid-boss fight, you can leave the Thruster pickup on screen until the second mid-boss appears. Once it appears, you can fire off the Bomb (which will likely destroy the boss) and then collect the Thruster immediately after. This "bomb-and-switch" technique is very useful, as it allows you to use the massive power of the Bomb without being left without a module, so make a note of it; you will be seeing this trick come into use many times over the course of the game.
If you do speed-kill the second mid-boss, you'll trigger an early spawn of up to five ![]() enemies, as well as another rush of
enemies, as well as another rush of ![]() , followed by five more
, followed by five more ![]() .
.
| The above strategy for the Stage 1 mid-boss is beneficial for scoring, but if you are aiming more for survival, you can instead choose to slowly dismantle and stall the first mid-boss, eventually causing it to time out and descend off-screen. Stalling the mid-boss will prevent enemies from spawning until it has flown off-screen, or until it is destroyed. |
Checkpoint 1-2
Recommended Weapon: Homing Fire
Stage 2
(in progress)
Checkpoint 2-1
Recommended Weapon: Mega Shot / Homing Fire
Checkpoint 2-2
Recommended Weapon: Homing Fire
Checkpoint 2-3
Recommended Weapon: Homing Fire
Stage 3
(in progress)
Checkpoint 3-1
Recommended Weapon: V-Laser / Mega Shot
Checkpoint 3-2
Recommended Weapon: Homing Fire / Psycho Beam
Stage 3 Boss
Recommended Weapon: Psycho Beam / V-Laser (with Bomb)
Stage 4
(in progress)
Checkpoint 4-1
Recommended Weapon: Mega Shot / V-Laser
Stage 5
(in progress)
Stage 6
(in progress)
Stage 7
(in progress)
Stage 8
(in progress)
Stage 9
(in progress)
Stage 10
(in progress)


