Difference between revisions of "(OutZone)/Strategy"
| Line 311: | Line 311: | ||
This stage seems daunting at first, but ends up being easier than the previous stage, as well as the easiest recovery stage, thanks to its generous middle section of powerups dropped by soldiers. | This stage seems daunting at first, but ends up being easier than the previous stage, as well as the easiest recovery stage, thanks to its generous middle section of powerups dropped by soldiers. | ||
| − | 5-Boss | + | Start this stage by moving forward and destroying a few squadrons of soldiers above you. As you move forward in this section, mechanized snakes will pop out of the wall sections to the left and right. Newer players can feel free to use bombs when a mechanized snake appears, as they each drop either a special item or a bomb. While moving upwards, watch out for soldiers that appear from the left/right areas of the screen. |
| + | |||
| + | Next, you'll come to a gap with a couple of moving platforms. Use these to cross the gaps and defeat the 2 groups of soldiers that appear on the right/top of the screen. | ||
| + | For the rest of this section, every single solider spawned is red (which means they will drop a guaranteed special item or bomb). They also take a while to fire any bullets, so it is beneficial to use your regular shot for most soldiers ( and bomb when you are cornered on a platform). You may need to use a seperate autofire button if you do pick up the Flamethrower special weapon in this section. Make sure to not fall in between the stationary platform/moving platform gaps. | ||
| + | |||
| + | You'll come across 2 energy refills and a weapon change right next to a big platform. Once you step on the main platform, it will start moving forward and a sequence of enemies will appear. These enemies will generally appear from the left right, and you can move from one side of the platform to another while dodging their shots. Use bombs if you get cornered or if two squadrons of these enemies appear at the same time. Afterwards, the platform will stop in front of 5-Boss. | ||
| + | |||
| + | |||
| + | |||
| + | 5-Boss: | ||
| + | |||
Stay in the middle of the platform as this boss moves down the screen and fires his guns to the left/right of you. He will move to the right or/left, so stay to the center and damage his main body and side guns with your main shot. Once you do this, his inner core will be exposed, and he will start firing missiles at you while green fly enemies periodically appear to the left/right of you. Bomb if you get trapped by the missiles and shoot the inner core enough times to destroy the boss. | Stay in the middle of the platform as this boss moves down the screen and fires his guns to the left/right of you. He will move to the right or/left, so stay to the center and damage his main body and side guns with your main shot. Once you do this, his inner core will be exposed, and he will start firing missiles at you while green fly enemies periodically appear to the left/right of you. Bomb if you get trapped by the missiles and shoot the inner core enough times to destroy the boss. | ||
| Line 322: | Line 332: | ||
A very long stage | A very long stage | ||
| − | 6-Boss | + | |
| + | 6-Boss: | ||
| + | |||
This boss can be difficult for a newbie to this game, due to being invulnerable except for his singular attack and tendency to get somewhat close later on in the fight. | This boss can be difficult for a newbie to this game, due to being invulnerable except for his singular attack and tendency to get somewhat close later on in the fight. | ||
His signature attack is for one of his four arms to glow blue and extend downwards ( based on your position) towards your direction, and then his eye opens and fires a spread at you. You can only damage the boss when the eye is open. One other thing to keep in mind is that he may pause for a moment before his singular attack, be patient and keep your position until his arm glows, and then move away from him. You may need to use several bombs on this boss, especially if you are not fully powered up. | His signature attack is for one of his four arms to glow blue and extend downwards ( based on your position) towards your direction, and then his eye opens and fires a spread at you. You can only damage the boss when the eye is open. One other thing to keep in mind is that he may pause for a moment before his singular attack, be patient and keep your position until his arm glows, and then move away from him. You may need to use several bombs on this boss, especially if you are not fully powered up. | ||
| Line 334: | Line 346: | ||
A very long stage. | A very long stage. | ||
| − | 7-Boss | + | 7-Boss: |
| + | |||
The final boss of the game! | The final boss of the game! | ||
Revision as of 20:44, 31 March 2021
See (Template Page)/Strategy (Scoring) for routing and techniques that are primarily focused on achieving high scores.
See (Template Page)/Strategy (Survival) for optimized safe routes, speed-kill strategies, and helpful information that prioritizes clearing the game over scoring high.
These two sections above only need to be included if the game in question has vastly different routes between playing for score and playing for survival. If there is not a major difference in routing, then scoring and survival strategies will just be included in the stage/checkpoint that it refers to.
Contents
Weapon Tier List
This section is used to list out all strengths and weaknesses with the weapons in the game, and to sort of evaluate their general strength and usefulness.
(X) Tier: Fixed 3 Way Shot
- ( ~ ) Shoots a 3 way shot directly in front of your player.
- ( + ) High damage with autofire, good range at full power, good for recovery. Great for all boss battles.
- ( - ) Cannot aim at enemies behind you or hiding behind certain wall angles. Poor refire if not using autofire.
(X) Tier: Free Range Weapon
- ( ~ ) Shoots small pink lasers in the direction of your player.
- ( + ) Can be aimed in 8 directions, generally high damage once it is fully powered up.
- ( - ) Not the most useful when surrounded by enemies and for boss battles.
(X) Tier: Super Ball
- ( ~ ) A ball that constantly spins around your player appears and will cause contact damage to any enemies it hits. The ball can be released directly in front of you by a button press and will shortly return to spinning around you.
- ( + ) Extremely high damage, useful for damaging enemies from a distance and for sections with a lot of walls.
- ( - ) The brief pause when releasing a ball in front of you can leave you open to enemy fire, limited range.
(X) Tier: Super Burner
- ( ~ ) Shoots out a flamethrower that will extend in front of the player, and can change its trajectory based on the player's change in direction.
- ( + ) It can be aimed in 8 directions.
- ( - ) Hardest weapon to control, can be easily overwhelmed when surrounded by enemies.
Basic Strategy
- The game gives you a lot of bombs ( you can stock up to 10). Make sure to use them if you feel like you're becoming trapped, and on difficult larger enemies and bosses. Using bombs is also useful for quickly gaining some distance if you notice that your energy meter is running low.
- Make sure to destroy all pink boxes and pick up energy items. Grabbing the Blue SP (Speed Up) and Green SP (Energy Extend) items will also make a big difference in surviving from stage 3 onwards ( even if they are random item drops).
- In the maze like sections of stage 3 & 6 use the walls & free range weapon to your advantage to pick off the soldiers hiding by the walls & popping out of the generators. If you get trapped or fail to destroy them before they start firing on your position bomb. These will be explained in more detail in the stage breakdowns below
- Try not to die before stage 5. If you can make it that far, you'll be able to gain most of your bombs back & additional points even with freely bombing.
- On the final boss, point-blanking the boss while having 4-5 bombs is usually enough to take him down.
Advanced Strategy
- If you're interested in scoring, then it is imperative to activate the zero wing bonus as early as possible. Since it needs 8 c items to be activated, you can achieve this before it appears in stage 2 by any combination of c items in stages 1 & 2=8. If you want to keep your fixed way shot while maintaining the bonus, you can pick up a special weapon and then a C item, since it reverts you back to the normal weapon you had before picking up the special weapon.
- Similar to other toaplan games of this era, subsequent loops will have enemies fire faster bullets & have less reload time based on survival rank. Bosses will also have slightly higher HP. In this game, the difficulty maxes out in loop 3.
Enemy Overview
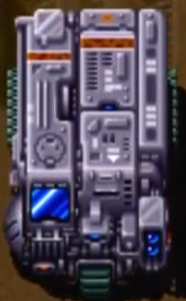
Most enemies will aim relative to your position. Some larger enemies and bosses will net x pts per shot + points ( upon enemy destruction).
Enemies
| Enemy | Value (points) | Contains Item | HP | Notes | ||
|---|---|---|---|---|---|---|

|
390 | No | 1 | |||

|
390 | Yes | 1 | |||

|
500 | No | 1 | |||
|
1700 | No | 1 | |||
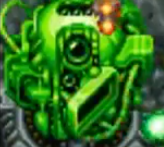
|
500 | No | 1 | |||
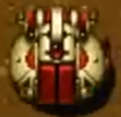
|
2500 | No | 1 | |||

|
290 | No | 1 | |||

|
430 | No | 1 | |||

|
410 | No | 1 | |||

|
1330 | No | 1 | |||
Bosses
Individual Stage Breakdown
Stage 1:
First stage of the game. Your main goal in this stage is to build up the power of your main shot and accumulate some extra bombs.
You will start off with a free range 8-way main shot, but feel free to experiment with the fixed 3-way shot ( & vice versa) by picking up C items along the way. The two power-up items should appear before the midpoint of the stage.
Periodically throughout the stage, some larger truck/tank-like enemies will move downards on the screen and stop in front of the player. The player can destroy these immediately by shooting closely to the enemy. You can also hide behind walls to block incoming enemy bullets.
- Advanced Strategy*
Red solider enemies appear after x amount of enemies ( someone should double check if there is a exact number or if its random), and will drop either a power-up or bomb on this stage. One way to get more of these red soliders to spawn is by waiting for the truck/tank to finish unloading all of its soliders after it stops partway down the screen. This can give you an extra 2-3 bombs compared to killing all enemies immediately.
- Advanced Strategy
You can uncover Toaplan's mascot, Pipiru near the end of the stage. There is a rock hole you need to shoot enough times in order for Pipiru to appear. Pipiru will remain on the screen in front of you until you shoot it a certain number of times. After that, Pipiru will begin to ricochet around the screen and will be destroyed after enough damage is dealt to him. You gain 5,000 pts for destroying him, but if you keep Pipiru alive till the 1st boss, you will recieve 20,000 points. ( will need to fact check and insert picture here)
Near the end of the stage, you will encounter two turrets and a destructible gate which will bring you to the 1st boss ( aptly named 1-Boss on the ground)
Boss: 1-Boss
This boss is made up of 4 pink blobs that fire semi-aimed large orange bullets at you. Dealing with all 4 of these at once can be a bit difficult for most new players, so it is essential for them to point blank one of the blobs ( usually the top left) to quickly destroy one of them. If you are find yourself getting trapped between bullets, make sure to bomb. 1 bomb will heavily damage most of the blobs, and 2 bombs will destroy around 1-2 blobs and leave you with more room to dodge. Once there is 1 blob left, the firing speed of the remaining blob's bullets increases dramatically. Take out the last blob by firing directly at him when he is closer to the top of the screen, and hang out on the left side of the screen when he moves closer to the bottom of the screen. Destroying him will complete Stage 1. Your total bomb bonus will be tallied, and your energy will be restored to full.
Note: The bullets from the blobs become even faster on subsequent loops, making this a much more difficult fight, and you likely won't be fully powered up even if you don't die on the stage. Don't be afraid to use 2-3 bombs to destroy most of the blobs if you get trapped early on in the fight. The recovery checkpoint on this boss will most likely require all 3 bombs to get past.
Stage 2:
This stage introduces a few new hazards in the way of bottomless pits, new enemies, and also will introduce you to one of multiple Special Weapons ( listed on the General page under weapons).
- Advanced Strategy
- Hishouzame planes The player can uncover a helpful Easter Egg in the early part of this stage. In the section with some trees, if you destroy the trees corresponding with your score digits ( e.x. 286,950- destroy tree 2, then 8 etc), then a squadron of hishouzame planes ( same behavior as the helper bomb in Daisenpuu) will appear on screen and provide additional firepower until all planes have been destroyed or until you die.
You will come across a bridge and then a path that splits into two. Take the right path and proceed upwards on the brownish road. You will fall and die if you move off the road into the pits surrounding the road. Next, you'll come across two destructible gates; destroy them and watch out for the purple robots that fire at you from behind both gates. On the second gate, a large red enemy will appear from the middle of the screen; stay below or far to the left to avoid its fire.
After destroying a few more enemy soliders, one big red enemy will appear from the top middle of the screen, and two other big enemies will appear from the left and right hatches.
- Advanced Strategy
This is the first stage that will allow you to recieve the Zero Wing bonus. In order to activate the bonus, you must collect 8 C Items. Once you have done that, the Zero Wing bonus will appear from the left side of predetermined points ( assuming you collected 8 C Items before the checkpoint of that area) in the stage and fly to the right. When you shoot the ship, you will receive a 5,000 pt bonus with a multiplier; which can scale up to 80,000 points if the ship is shot at the very right of the screen ( fact check needed). If you collect another C item, you will need to collect 7 more C items to reactivate the Zero Wing bonus.
Proceed past the next group of enemies to arrive at another yellow road junction with multiple paths. Take your time and utilize your fixed 3-way shot at this section to destroy the turrets, destroy the soliders that spawn from the left/right sides at 3/4 different points ( 8 max at each spawn point). After the last spawn point, head upwards to arrive at the second boss.
2-Boss:
"Look at what we got here, a multi-assault tank! Watch yourself, kid" -Bob, 1995
This boss is a gigantic monoeye tank, and requires a little bit of strategy to take down its arensal of 2 gun turrets, a big eye that can fire a DNA beam at multiple positions, and a hatch that shoots out flaming robots that fire blue 3-way bullets.
Your main course of action is to quickly destroy one of the gun turrets ( left or right) by briefly positioning yourself in front of the turret, and moving out of the way while firing at it. Once both are destroyed, focus your fire on the main eye while dodging his beams. You can dodge his middle one by squeezing through the large gaps created by the beam, or by moving to the side with the left/right beams. The fire robots will appear from his middle hatch and can be destroyed by point-blanking them from the side or bombing. With ample amounts of damage from an autofire 3-way shot or the Super Ball Special weapon, this tank should go down fairly quickly before he can release any fire robots.
Note: On loop 2 and above, the gun turrets and the eye have slightly higher HP, which may require you to use a bomb or two if you find yourself trapped. Recovery via checkpoint on this boss is not too difficult, but may require bomb usage on the fire robots.
Stage 3:
This stage has the first big roadblock for most players: the wall-maze section, and 3-Boss.
Before that, you start off by entering the path carved through the wreckage of 2-Boss. Make your way upwards by destroying the foots soliders, and silver robots that fire 3-way shots. You will come to a gate, and notice a series of turrets that fire 45 degree lasers at you. Wait for the first two on the left/right to fire, then moderately inch up on the left/right side of the screen while avoiding the other laser turrets. Use a bomb if you find yourself trapped by the enemy soldiers here.
You will come across the first maze section here. The free range shot is a bit more useful in this section for eliminating enemies that are already in position on the top/sides of the screen, as well enemies that run in from offscreen on the left/right. If you feel trapped, use a bomb.
- A zero wing bonus appears after this section
After destroying some enemies & a few turrets with items, a second wall maze section will appear. Enemies will pop out from the left and right, and you should use try to strafe the enemies from behind walls.
A gate opens, and in the next section some purple soldiers will pop up as a few rows of green enemies rise from below. Try to position yourself on the left and move to the right while destroying each green formation, and bomb if you get trapped at the edge of the gray platform.
Move forward as you come across 3-Boss.
3-Boss
The boss will start the fight by unveiling a laser from the left side, that will cut the ground on the right . The ground behind the cutline will sink into the lava, so you will need to move forward after the ground is cut by the laser, while destroying the small enemies that continually emerge from the boss's sides. The boss will repeat this once more, this time cutting the ground from the left diagonally downwards, requiring you to move forward. Afterwards, the boss will open his main eye and fire a few yellow rings at you at irregular intervals. Shoot the eye when it opens while destroying the enemies on the sides, and it will be destroyed after a short amount of time. Stage 4:
Not an easy stage, there are a lot of sections that can easily trap players without careful planning and/or bombing.
Move forward and destroy the gate ahead of you.
Tatsujin Ship (Stage 4) At the beginning of stage 4 (right after the boss that uses lasers to cut the floor apart), you will face this door: Make sure you have exactly 7 bombs in stock when you walk through that gate and the Tatsujin ship will appear to help you.
In the next section, take your time moving vertically forward, as green soldiers will appear from the top of the screen and from the right side of the screen as you move upwards. There are a few turrets that appear in this section.
- Advanced Tip* - The turrets can be easily destroyed by inching slightly forward just as they appear on screen. Your shot can damage them and they will be unable to fire normally.
The next section has a number of soldiers and green mobile enemies (from stage 1) appear. Keep moving forward while destroying them until you get close to a couple of crates. Some long brownish enemies will appear and fire orange balls from the sides.
You'll come across a section of the stage with gaps. There are a total of 3 platforms that pass by a regular intervals, with a respawning grey solider each time they appear. Destroy the solider when crossing the platform, and bomb if too many other soliders spawn on the sides of the platforms.
Next, you'll come across a long narrow section. It's good to have the 3-way main shot here, as you can destroy the side turrets on the far left and right while dealing damage to the enemies coming directly from above.
A section of crates awaits; take your time to poke out and destroy enemies that appear on the sides of the stage. You'll comes across a midboss train, which has one main part that needs to be destroyed ( the one firing the fireball at you), and you can proceed onwards.
The last section has a lot of crates that restrict your movement. While dealing with the enemies that pop out of the sides, you will move upwards, and want to likely use a bomb or two on the last portion (wall ahead/ two walls on the side with two paths on the left right) and just move swiftly upwards, where you will encounter 4-Boss
4-Boss This boss cannot be damaged at first. He will fire 4 missiles, that release yellow projectiles when destroyed by your shot. Afterwards, he will move downwards and remove his outer shell, revealing a blue interior with spiny wheels around him. The spiny wheels will move outward, allowing you to move in between the spiny gaps and damage the main blue interior for a short period before the wheels move inwards. He does this once more before putting his outer shell back on, and repeating his attack cycle. 3-way or super ball destroys this boss pretty easily.
Stage 5:
This stage seems daunting at first, but ends up being easier than the previous stage, as well as the easiest recovery stage, thanks to its generous middle section of powerups dropped by soldiers.
Start this stage by moving forward and destroying a few squadrons of soldiers above you. As you move forward in this section, mechanized snakes will pop out of the wall sections to the left and right. Newer players can feel free to use bombs when a mechanized snake appears, as they each drop either a special item or a bomb. While moving upwards, watch out for soldiers that appear from the left/right areas of the screen.
Next, you'll come to a gap with a couple of moving platforms. Use these to cross the gaps and defeat the 2 groups of soldiers that appear on the right/top of the screen. For the rest of this section, every single solider spawned is red (which means they will drop a guaranteed special item or bomb). They also take a while to fire any bullets, so it is beneficial to use your regular shot for most soldiers ( and bomb when you are cornered on a platform). You may need to use a seperate autofire button if you do pick up the Flamethrower special weapon in this section. Make sure to not fall in between the stationary platform/moving platform gaps.
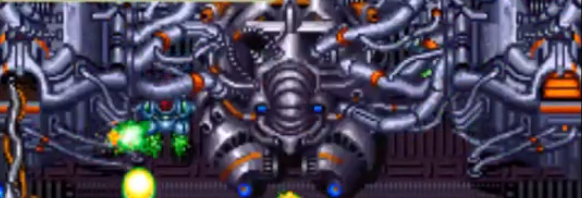
You'll come across 2 energy refills and a weapon change right next to a big platform. Once you step on the main platform, it will start moving forward and a sequence of enemies will appear. These enemies will generally appear from the left right, and you can move from one side of the platform to another while dodging their shots. Use bombs if you get cornered or if two squadrons of these enemies appear at the same time. Afterwards, the platform will stop in front of 5-Boss.
5-Boss:
Stay in the middle of the platform as this boss moves down the screen and fires his guns to the left/right of you. He will move to the right or/left, so stay to the center and damage his main body and side guns with your main shot. Once you do this, his inner core will be exposed, and he will start firing missiles at you while green fly enemies periodically appear to the left/right of you. Bomb if you get trapped by the missiles and shoot the inner core enough times to destroy the boss.
Stage 6:
A very long stage
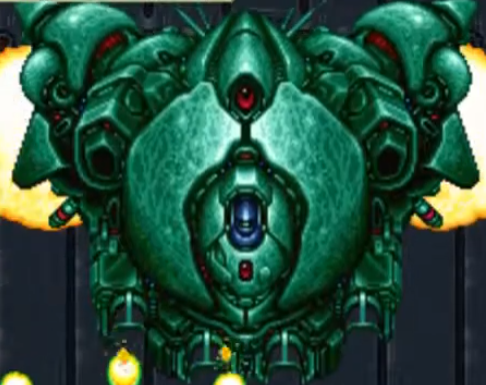
6-Boss:
This boss can be difficult for a newbie to this game, due to being invulnerable except for his singular attack and tendency to get somewhat close later on in the fight. His signature attack is for one of his four arms to glow blue and extend downwards ( based on your position) towards your direction, and then his eye opens and fires a spread at you. You can only damage the boss when the eye is open. One other thing to keep in mind is that he may pause for a moment before his singular attack, be patient and keep your position until his arm glows, and then move away from him. You may need to use several bombs on this boss, especially if you are not fully powered up.
Stage 7:
A very long stage.
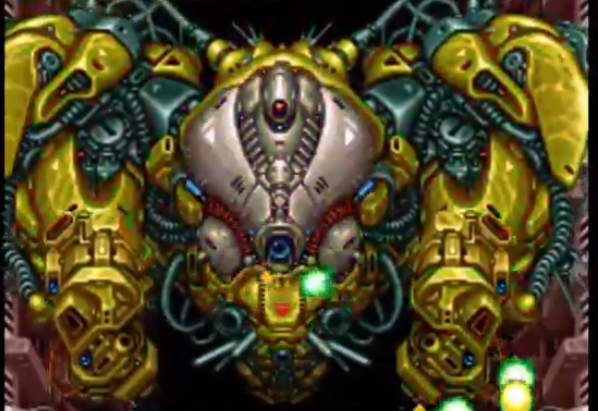
7-Boss:
The final boss of the game!
This boss likes to start off by releasing a little white ball worm that somewhat homes in on your position ( and will be relaunched periodically during the fight). Afterwards, the boss will have a sound affect where it launches a few orange balls towards your position from the left hand as a greeen sword appears, and then extends this hand completely downwards. He will then repeat this on the other hand, and switch back and forth (until both arms are destroyed). When you shoot the main body enough times, its armor comes off and its eye will start shooting fast orange balls at your position. If you shoot it enough times, the body will disintegrate, and you will be treated with a "Congratulation! You've Completed This Game" alongside the main character ( or Pipiru if you got the stage 1 pipiru bonus) egging you to keep playing for 10 million?! in Japanese. Afterwards, you will be brought back to the first stage.
References & Contributors
- Primary info provided by ggmaximo
