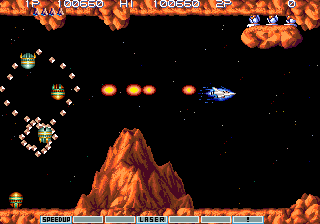
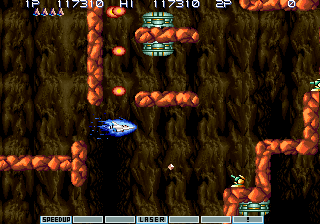
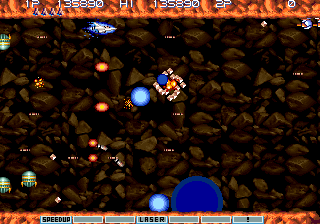
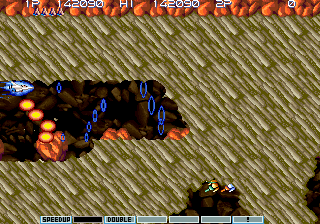
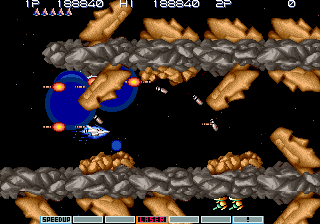
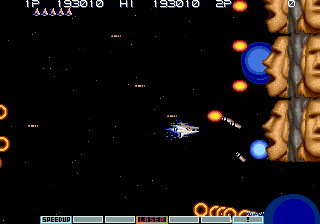
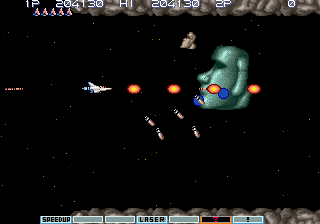
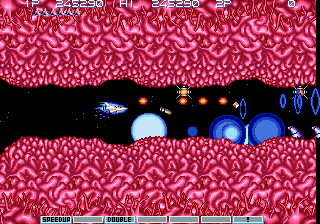
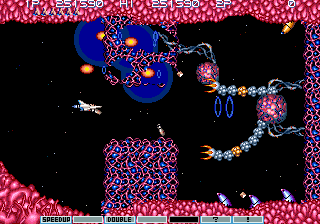
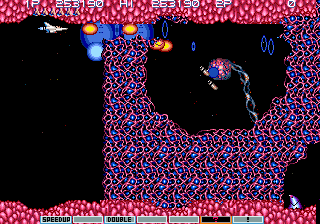
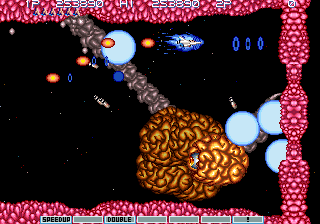
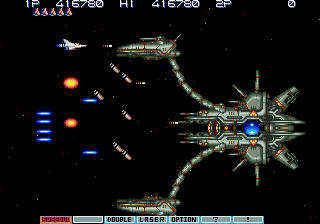
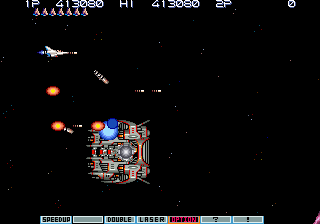
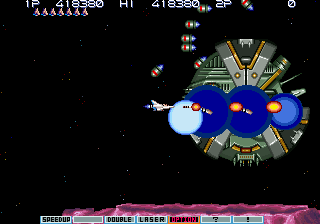
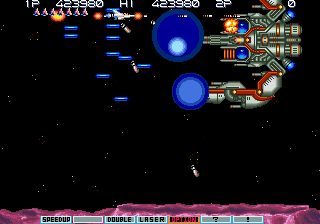
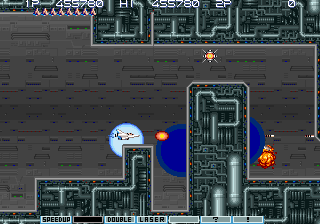
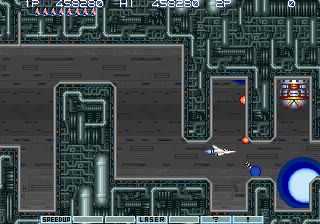
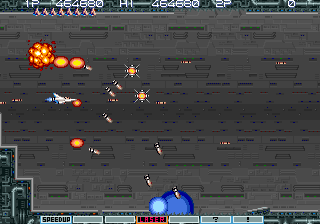
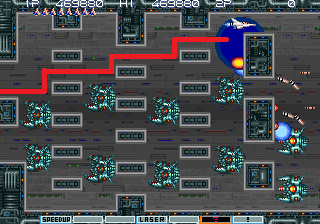
Gradius III: Densetsu kara Shinwa e/Strategy
This page aims to offer general gameplay tips and individual stage descriptions with a survival focus.
Contents
- 1 Notes
- 2 General advice
- 3 Loop 1 Guide
- 3.1 Stage 1 - Sand Storm
- 3.2 Boss - Goliath
- 3.3 Stage 2 - Aqua Illusion
- 3.4 Boss - Bubble Eye
- 3.5 Stage 3 - In The Wind
- 3.6 Boss - Big Core Mk 3
- 3.7 Stage 4 - High Speed Dimension
- 3.8 Stage 5 - Easter Stone
- 3.9 Bosses - Dogas and Vaif
- 3.10 Stage 6 - Dead End Cell
- 3.11 Boss - Gregol
- 3.12 Stage 7 - Fire Scramble
- 3.13 Boss - Wyvern and Vulture Dragon
- 3.14 Stage 8 - Cosmo Plant
- 3.15 Boss - Choking Weed
- 3.16 Stage 9 - Crystal Labyrinth
- 3.17 Boss: Lizard Core
- 3.18 Stage 10-1 - Boss On Parade
- 3.19 First Boss - Tetran
- 3.20 Second Boss - Covered Core
- 3.21 Third Boss - Big Core Mk 2
- 3.22 Fourth Boss - Crystal Core
- 3.23 Fifth Boss - Death Mk 2
- 3.24 Sixth Boss - Dellinger Core
- 3.25 Stage 10-2 - Mechanical Base
- 3.26 Boss - Disrupt
- 3.27 Boss - Shadow Gear
- 3.28 Meatballs
- 3.29 Final Boss - Bacterion
- 3.30 Escape
Notes
As the writer of the following guide is more familiar with Type B and because it is the most popular ship for a clear, this will mostly be written with Type B in mind, and only for the first loop, as the second one is a massive step up in terms of difficulty. Most strategies would apply with all ships, but some parts will require specific precaution with a ship and not the others. Eventually, this guide will be improved with strategies for other ships. The most popular shield type is the Force Field, and the guide is written with this one in mind, as it is by far the most popular shield, and the best one.
The optimal choice for the number of speed ups is either 2 or 3, and this mostly depends on the player's preference. 1 speed up would be too slow, more than 3 would be too much. This may change your upgrade path a little bit.
Generally speaking, it is extremely difficult to recover from a death, and it is likely that the player will want to throw away the run after their first death. One notable exception is Stage 9 (Crystal Stage), as the recovery is moderately easy to perform, while the cube rush is extremely inconsistent to beat, so this recovery absolutely has to be learned. Another easy recovery checkpoint is the meatball section, which is arguably easier at low power. The checkpoint before can also be recoverable thanks to a safespot.
The guide was written with the arcade version in mind, and therefore with slowdown. In some places, a different approach would have to be taken if playing on the PS2 version with Wait Level 0 (no slowdown), or if emulating with overclock.
Also, early space sections are generally ignored as they are easy and don't require much strategy.
It should be noted, for the purpose of this guide, that any mention of the word "random" essentially means that it would be extremely difficult to manipulate, and will not be consistent across runs. The game seems to use the frame counter for what little "randomness" it contains, and while it is not technically random, it is next to impossible to do a complete run while being consistently frame-perfect.
When this guide refers to a "Shield", this can also mean Force Field and not necessarily the type of protection literally called "Shield" (the two pods in front of the ship). This is mostly meant to avoid repetition, and in order to stay general.
General advice
Regenerate your shield
Shields can take a fixed number of hits. In the case of the force field, it's 6 for most projectiles. If you know that a hard part is coming up, while you're in another part that is easy and dropping many capsules, you can take hits on purpose in order to lose your shield and reactivate it, in order to tackle the next part of the game with a full shield. The underground section in Stage 3, or space sections in most stages, are a good example of this.
Don't collect all capsules
This can go with the previous point. In some parts you will want to switch to another weapon at a precise moment, or you want to have a shield ready because the next part is dangerous. For this reason, it is not recommended to get every capsule you see, and is simply better to keep the cursor on the upgrade you will want to use later.
If you know that there are many capsules ahead, and that dodging all of them can be difficult, you might instead want to collect enough capsules to have the cursor just 1 upgrade before the one you will want, as a security.
Force Field size
The sprite for the force field will go through 3 different states depending on the number of hits it took, which can help you guess how many hits it has left. However, instead of going from bigger, to middle, to smaller, it actually goes from bigger, to smaller, to middle size, which can be deceptive. At 0 or 1 hits taken, it's big. After 2 or 3 hits, it's the smallest. After 4 or 5 hits, it's at an intermediate size.
Abuse enemy aiming
Enemies in this game aim very poorly and can only shoot at specific angles. Generally speaking, you can abuse this by staying near the very top of the screen. Enemies will shoot horizontally, but if you're a little down below, you'll dodge them, while enemies won't even be able to actually aim at you. Then, you can simply use your options to destroy them, or some shots like Ripple are enough to do the trick.
More shooting = more slowdown
Even in some parts where shooting could be useless in itself, you will still want to shoot as much as possible, especially your missiles, to generate a lot of slowdown and dodge incoming hazards easily.
Position your options ahead of time
A staple of the franchise, and one of the keys to succeed in the game. Your options will follow you around, but unlike you, can go through any hazard the stages might offer. This means that you can use your options to shoot through walls. For that, you simply have to stay close to the wall, tap left slowly as the scrolling moves, and you will eventually see your option reaching the other end of the wall. This routing technique has to be used as early as Stage 3.
Option Hunter
The Option Hunter makes a return from Gradius II. Gradius III has three type of Option Hunters. For the most part they share the same behavior: they will appear on the left side of the screen, move around a little, then try to aim for you. They will charge when they are aligned with you. When they are about to charge, you want to be in the right half of the screen. Ideally bait them close to one edge of the screen, and quickly move to the other side. Then, you will want to make many small movements in order to get your options out of the way, whether it's moving in circles (if there's enough room), or moving left and right.
About each individual Option Hunter:
- The first Option Hunter follows the description above.
- The second Option Hunter is the one from Gradius II and has the same behavior as the first one. Unique to this one is that it can be destroyed by the player's own weaponry if their Options happened to be stolen.
- The third Option Hunter has the same initial behavior as the previous two. However, when it charges at the player it moves in a wave-like pattern and it cannot be destroyed, making it potentially the most dangerous Option Hunter if it appears at the wrong time.
Assuming the player is at full power and a life hasn't been lost yet, each Option Hunter will appear in the same place. The first one is in the intro section of the Moai stage, the second is before the main portion of the Fire stage begins, the third one is halfway through the Cube Rush section of stage 9, and the fourth one will appear at the spinning lasers section of the final stage. The Option Hunter cycle is carried between credits, this means if the player had a long enough credit to make the Gradius II Option Hunter appear and then had to restart, the first Option Hunter that appears will be the third one.
It should be noted that unlike in Gradius II, the Option Hunter can appear even if the player doesn't have 4 options. However, having a different number of options can change its spawn times compared to what was described above.
Universally, each Option Hunter can be destroyed with the Mega Crash attack (the "!" for the default ship types). If the Mega Crash is used before an Option Hunter manages to stole an Option it'll die instantly, whereas using it after Options have been stolen will destroy the Option Hunter and leave the Option(s) it caught floating with a gray color scheme. Using the Mega Crash for this purpose can be very useful for the hunter appearing during the Cube Rush on no-miss pace.
Close capsules
Likely due to a programming oversight, if you collect several capsules in quick succession, the game will think you only collected one, and precautions must be taken when several capsules are very close to each other. This can happen anywhere if you destroy enemies at the wrong place, and even in the final stage, where a group of 4 ground turrets will drop several capsules very close to each other. If you aren't confident in going slow enough, you can simply move left of the group of capsules, then let the scrolling move you to them. Unless there are two capsules extremely close to each other at 1 pixel of distance, this should allow you to collect all of them.
Use the upgrade bar as a landmark for positioning
Some parts will require fairly precise positioning ahead of time, and most of the time this is the only thing you will be able to use to position yourself. So, for example, you'll have to tell yourself that when taking on the second part of the Moai boss, you'll want to position yourself just above the "Missiles" upgrade.
Ship Selection
Type B is the most popular of the pre-built ships, thanks to its very powerful Spread Bombs. Tail Gun is also very useful for several parts of the game, as it is one of the few weapons that can eliminate threats from behind without option positioning. Ripple is also a very convenient weapon with strong coverage.
The player has the choice to use Weapon Edit to create their own desired ship using predetermined weapons, which is one of the strongest solutions if the player makes good decisions. Unfortunately, not all weapons are available, such as the regular Spread Bombs, which are replaced with similar missiles that shoot behind. Mega Crash is also unavailable. A popular Weapon Edit selection appears to be Normal Missiles, Tail Gun, Twin Laser. This plays very close to Type B but with weaker missiles and a stronger laser. However, the player might want to changes their loadout depending on the parts they struggle with, and the possibilities are very numerous.
Loop 1 Guide
Stage 1 - Sand Storm
Recommended upgrade path: 2 or 3 speed ups -> option 1 -> missile -> option 2
This stage can actually be pretty difficult for an early stage. Unfortunately, it is very hard to describe a very specific strategy, since the difficulty mainly comes from the fact that you're underpowered and need to be precise, killing enemies as they appear.
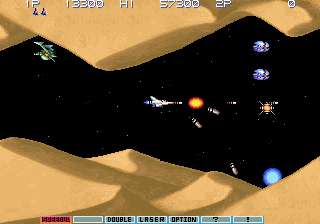
Once you're done with the easy space part, you should be at two or three speed ups, an option, and missiles almost ready. The general approach is to kill the enemies on the ceiling as soon as you can in order to not be overwhelmed. If you fail to kill the duckers, try to bait them to the right of the screen, then move left quickly and kill them.
Generally speaking, you want to be at the middle of the screen to kill enemies quickly.
Near the middle point of the stage, there will be a sand dragon coming from the left, while a sand lion shoots at you. You will want to stay on the left edge of the screen and shoot to your heart's content while moving a little bit up to dodge the lion's projectile. The sand dragon should be dead from your shots and you can resume the stage normally.
You should end the stage with 2 options, missiles, 2 speed ups, and the "double" slot of your upgrade bar highlighted (or missiles if you play with 3 speed ups). It is very important to collect as many capsules as possible for the following stage, but missing one or two capsules isn't overly dramatic.
Boss - Goliath
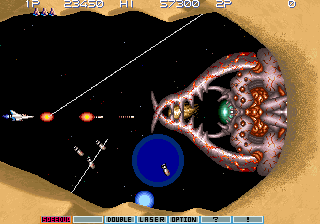
The boss itself is fairly easy, although it is random. Just stay on the left edge, near the middle, and keep shooting. Most spiders won't even reach you, and if one does get closer, you have lots of room to move away. Note that the spider webs are only a visual effect and can't hurt you or won't slow you down, so feel free to go into them if you have to dodge.
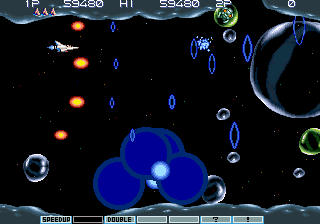
Stage 2 - Aqua Illusion
Recommended upgrades: laser, then getting all 4 options (shield is mostly useless)
This stage is another brutal one despite being early in the game, and again, isn't really routable. The general strategy is to keep your options spread out, shooting your lasers and missiles all the time, while staying near the left edge of the screen to avoid the bubbles coming from above. Don't be all the way to the left however, as some enemies will come from behind, so be on the lookout for those.
It is important to keep either your ship or one of your options near the top to dispatch the turrets or hatches on the ceiling.
If you failed to get some power up capsules early on and take too much time to activate the 4th option, the second half of the stage can be difficult because of the sheer number of bubbles, and it's therefore important to make sure you collected everything up to this point.
When you see an arrangement of two hatches, one on top and the other on the ground, simply take care of the top one, then slowly move down to dodge the enemy bullets and get in position to kill the other hatch.
Once you get to the end, there will be enemies coming from holes on the top and bottom of the screen. However, you still want to destroy the turrets on the ceiling to not be overwhelmed, so make sure to position yourself near the ceiling before moving down. This way, while you move down to dodge enemies, your options should take care of the turrets. Then, simply move to the right of the screen, while your options stay behind you and kill the enemies trying to get to you.
You will have to improvise a lot, this stage can be very unpredictable and you will never do the exact same thing twice.
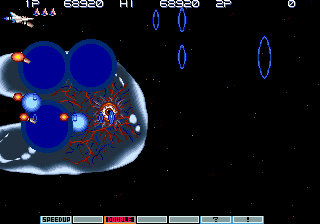
Boss - Bubble Eye
Start in the middle, then move to the left edge of the screen, then up, for some easy damage. Then, simply keep moving in front of it while shooting. Destroying the bubbles as they appear is your top priority.
At some point the boss will move to the left again. If you dealt enough damage, you should be able to stay in front of it and going into the hole while shooting, and it should die at this point. If you feel you've not done enough damage, simple move up, with your options spread out on top of the boss, so you can destroy the bubbles, and resume normally.
Stage 3 - In The Wind
Recommended upgrades: Force field immediately, double for the middle part of the stage (depending on ship), laser for the end.
This is a very long stage that could be divided into three parts, plus the early space section and boss.
The first part will be done very differently depending on the ship. Soon enough, you will get to a section where the screen is divided into three parts, and many hatches everywhere. First of all, move up to kill the two enemies at the ceiling, then quickly move to the ground, and up again, so you can have your options spread out, killing all hatches. If you want to optimize score, care has to be taken to not destroy the hatches, and missiles shouldn't be used.
After this part, there will be a pillar at the top, and another hatch: you can stay in the top-right corner, moving back left a little, so your options will go past the pillar and kill the hatch. If using Type B, the Double shot can easily take care of any hatch at this point.
With Type B, it is really recommended to switch to the Tail Gun ("Double") at this part, as there will be many enemies coming from behind. Make sure to destroy all the rocks from the left volcano (either with your shot or missiles), then move to the other side when they stop erupting.
With Tail Gun, this part will be very straightforward, as you can easily take care of the jumpers. Some ships have ways of shooting upwards to kill the hatches and you can exploit this, for others you'll have to use the common trick of getting to a favorable position and moving left, so your options go through walls and kill enemies.
The trickiest part will be the 3 falling rocks. You can easily notice them as they stand out. These rocks will move down as soon as you get under them, and you should barely move under them in order to bait them, then go back left immediately after, as you probably won't have enough time to get to the other side.
Then, in order to enter the second part of the stage, the player has to get into a hole in the ground. Getting there too early is dangerous as turrets will wait for you to kill you. Moving there as soon as the ground stops shaking is a good timing.
The underground part is fairly easy, despite its maze-like appearance, and difficulty would come from optimizing score, which won't be covered here. There are many capsules there, so if your force field has been greatly damaged, it could be worth it to take a few hits on purpose to lose it, then activate it again. After this, collect one or two capsules to get closer to the "laser" upgrade (not activating it now), as it will be needed for the end of the stage.
At the start, using the second corridor from the bottom is fairly safe. The bottom one has volcanos which may be too dangerous. Then, the player simply has to position their options to go through walls to take care of the hatches, and make sure to quickly go back up at the end of the portion.
The long corridor is very tricky, especially without a Tail Gun, because of the jumpers coming from behind. A ship without a way of shooting backwards would have to stay on the left side of the screen, their options spread out, hoping to kill the jumpers with their missiles. A ship with Tail Gun shouldn't have too much problem there, as long as they take care of enemies on the ceiling, and often move up and down the kill the jumpers and other flying enemies. Having a force field active there is extremely useful because of the barrage of bullets from all directions.
You will want to switch to Laser for the final stretch of the stage, the digging.
Rocks will be hidden into the ground, and will fall down if the ground under them has been destroyed. Hitboxes can be a little janky, so the player may have to reposition themselves a little to completely destroy the ground. The rocks' position will always be the same across runs, which means a path can be memorized. The general strategy is to stay at the top (visiting the wide open areas when possible), and spread your options vertically, to the right of the ship, a little bit. This way, the options should be able to dig under any rock that would be on the player's path. As hitboxes for the ground may be janky, the player may have to reposition themselves a little, but should avoid moving too much in order to keep a good formation.
Finally, there will be some volcanos, and the player gets to the final stretch of the stage. This has to be done differently depending on the ship, and Type B will have a fairly hard time. Therefore, the following will apply to Type B, and most other ships should be able to adapt their strategy fine. The player has to move down to kill the bottom hatch, then stay very close to the ceiling and volcano, and move left slowly. If the player stays at the top, the scrolling will eventually push them against the volcano, and they will have to move down a little bit (around 1 ship height).
Eventually, the options will go through the volcano and destroy the hatch. Missiles should normally take care of the bottom-right hatch in most cases. Then, once all hatches are taken care of, the player can move down and shoot at the flying enemies (Iron Maidens), which will keep spawning for some time.
Boss - Big Core Mk 3
In order to be ready for the boss, it is absolutely recommended to move to the right as soon as Iron Maidens stop appearing, which is only possible if the top hatch was destroyed. Get close to the right wall and move back left slowly. This way, your options will be on top of the boss when it appears and deal massive damage. The boss will move according to your position, meaning that if your positioning is consistent across runs, you can find and memorize safespots, for example by using details on the wall as a guide to position yourself before the boss even appears.
In the image example, the ship is positioned so that the cockpit is just to the left of the corner in the wall. Using this strategy, you should be able to destroy the boss as it fires its 4th set of lasers. No effort has to be made to dodge the first 2 lasers, but the player has to move back a little for the third one, then down a little for the fourth one. If it didn't die, then you can still damage it as it is closed. Normally, only the bottom core will be alive, and you should have no problem finishing it while dodging its easy pattern.
The boss will behave differently depending on which cores have been destroyed, and keeping the bottom core for last leads to the easiest pattern.
Stage 4 - High Speed Dimension
There is nothing to say about this stage as it is very straightforward. You get plenty of capsules, so don't take many risks to catch all of them, as they don't even bring you points. If you entered this stage with a damaged shield, it will actually get repaired and you will enter the next stage will a brand new shield again.
When it is about to end (you can use the music as a cue), make sure to be ready to move down immediately when the next stage starts.
The only goal of the stage is to reactivate a shield if you lost it in the previous one.
Stage 5 - Easter Stone
Recommended upgrades: Double. Shield is useless for the stage, but have one ready for the boss.
Move down immediately and keep moving down, this should take care of the enemies. Eventually, a new enemy will appear from behind: the Option Hunter, which will try to steal your options. To dodge them, you simply move to the right, bait it somewhere, and move somewhere else, making a lot of small movements to make sure your options follow you. This option hunter isn't too hard to dodge, as it will only start moving when there are almost no enemies remaining.
Once you have destroyed the first 2-3 waves of enemies during the space section, switch to Double, then enter Stage 5 proper. A ship with Tail Gun will have a much easier time there.
Make sure you have a shield ready for the boss. If you lose it during the stage, don't activate it, as it's not useful, makes Moai shoot more circles, and because you may lose it because of the bigger hitbox. You should get more than enough capsules during the stage to have a shield ready to be activated at the end of the stage, but this may require moving to several different corridors to collect all the capsules.
In the first part of the stage, big Moai heads will spit smaller heads. It should be noted that these small Moais don't have a hitbox immediately, which means you don't have to panic if one gets onto you, but instead quickly move to a safe place. For this part, try to have options behind you in order to destroy the Moai's projectiles, as many heads will spawn to the left while you would generally prefer to stay to the right.
There will be eventually a part with 4 big Moai heads coming almost at the same time, and you want to move between them by moving to the right as soon as possible, in order to not get walled.
The stage is divided into small corridors, and generally speaking you want to stay on the top left part of the corridors. Many heads will face right or down, and the general strategy for those is to stay just to the left, while letting your options move right slowly, destroying them.
Many heads will only start firing when you get to their horizontal position, so you may want to wait for your options to be on top of them, then move above/under them, and destroy them immediately. This is made easier by the Spread Bombs of Type B, but the general strategy remains the same with all ships, sometimes with greater accuracy required.
Near the middle of the stage, there's a part with several turrets dropping capsules. If you still have your shield, you want to highlight the Laser, not activating it, and stop collecting capsules. There will be two more capsules near the end of the stage, so if you lose your shield after this point, collect the next 2 to reactivate a shield. Otherwise, it's better to have Laser already highlighted for the next stage.
The final part of the stage contains Moai heads on rotating pillars. Position your options in order to shoot at 2 pillars or more, in order to get some breathing room, and as a security in case you fail to hit one of the heads. Your missiles can also contribute to the task, depending on the ship.
Bosses - Dogas and Vaif
This is why you want to have your shield ready as a security net, as a stray bullet may be able to hit you. It's basically impossible to recover from this checkpoint after a death, so you absolutely need to pass these two bosses first try.
This boss' movement is always the same across runs. At the start, try having your options in a straight line, on top of the boss, to deal more damage. Eventually, it will move to the bottom-left corner and you have to go above it, then quickly move back under and to the left. Spread your options a little to make it easier to hit, and it should die soon after.
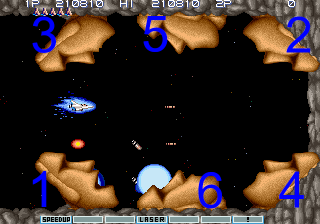
Then, get ready for the second boss, Vaif. It is extremely important to have your Double shot activated for this boss. These heads, like the previous ones, can only be hurt when they open their mouth. They will shoot several small Moai heads which you can destroy, but have very misleading hitboxes that are bigger than their sprites, so the player has to be careful. You have to remember their order of attack, which is always the same, and destroy them as soon as you can.
Assuming they're all destroyed on the first attempt, the order is: Bottom-Left, Top-Right, Top-Left, Bottom-Right, Top-Middle, Bottom-Middle. If a head wasn't destroyed, the order will be reset and resume from the start again, with destroyed statues out of the cycle. For example, if Bottom-Left was destroyed, then Top-Right was opened but not successfully destroyed, what will happen is that Top-Left will shoot next (as it is the normal cycle), then the boss will restart the cycle and Top-Right will shoot again, then Top-Left again (if still alive), then the cycle resumes with Bottom-Right, and so on. It is difficult to explain but makes sense as you play. Remembering how the cycle reset works is key, in case you failed to destroy one of the heads, which can be likely.
To begin the fight, position your ship above the "Missile" upgrade slot, aligning yourself vertically with the bottom-left head's mouth. Move up a little, and your options should be on top of the mouth and destroy it as soon as it opens it. Then, the procedure will be different depending on the ship, but should be obvious. Some ships will have a hard time destroying specific heads. For example, Type A will struggle to kill the Top-Left one, Type B will struggle with the Top-Middle one and can only shoot it from the right at a specific spot which is hard to hit. If only one head remains, it is easy to simply time out the boss, as this doesn't take long.
Stage 6 - Dead End Cell
Recommended upgrades: Laser, Shield
There aren't many capsules at the start of the stage, but the priority is to get laser in order to deal more damage. There aren't many bullets, so even a shieldless ship should do fine in this stage. For that reason, it is preferable to end the previous stage by having Laser already highlighted, so you can activate it immediately.
Depending on the ship, you may want to use your missiles to destroy the big cell enemies. For example, the missiles for Type B deal a lot of damage and are much more efficient than the Laser.
Shortly, the player will enter a narrow corridor, and it is advisable to position the options ahead of the ship while waiting in the middle of the screen. The options will quickly dispatch the cells, and you likely won't even have to move for the whole section.
At the end of the corridor, there will be a cell slightly above, and this one will be harder to destroy. It is important to take care of it, otherwise it will chase you and make your life harder. You can either position yourself and all your options near the top of the tunnel, or get really close and pointblank it. A small running enemy will also move along the ceiling while you attempt to destroy the cell, and you have to be careful about it.
Then, you are facing regenerating walls which can be tricky to deal with. The general advice to travel inside the walls is to damage them all at once, your options lined up horizontally, and move quickly. Otherwise, they tend to regenerate all at once and kill you, even if you keep shooting. For the first open area, you will want to have your options spread vertically, shooting missiles, while your ship stays at the middle of the screen. This should take care of all the cells and smaller enemies on the ceiling and ground.
For the second open area, you will want to stay in the top-right corner, moving back left slowly. Your options will be beyond the wall and shoot the enemy. To move to the open area safely, dig into a lower part of the wall, as it is risky to shoot at a wall that is only partially damaged.
Then, you can ignore the bottom enemy and focus on the top one. Wait for the turret to fire, then quickly move to the top while firing, and the cell should die. Wait a little before shooting the cell walls, and when the scrolling has advanced enough, shoot and move quickly. The cell enemy will despawn quickly.
Boss - Gregol
Its movement is also the same across all runs and can be memorized to optimize damage. Just shoot at the eye while it is open. Periodically, it will stop shooting and moving, then extend its arms. You have to be very careful about this attack, as the first arm is fast, aimed at you, and will kill you if you don't move away, so keep an eye for when it stops moving. You will be trapped between the two arms, but should have no issue destroying one before it moves again (normally, it should be the left one). When it is destroyed, the boss will move to where the other arm is located and the cycle will restart.
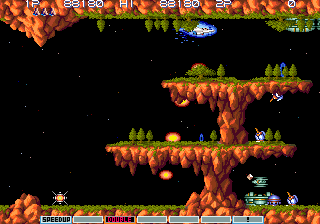
Stage 7 - Fire Scramble
Recommended upgrades: Keep the laser, deploy a shield and have another one ready.
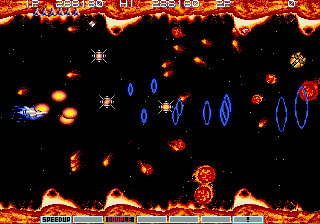
The fire stage is one of the two infamous stages in Gradius III, along with the Crystal Stage (cube rush). Like the cube rush, for the most part there is unfortunately not much of a strategy to safely remember, as it is a very chaotic stage.
Similar to Stage 2, the big fireballs' starting position is actually fixed. However, should you want to shoot them (and, in most cases, you will want to), you will always do it at a slightly different timing or position from run to run, therefore getting a different arrangement for the small fireballs each time. You therefore can't hope to memorize a route you can blindly follow, and need to improvise.
If playing without slowdown (or during higher loops), it is better to avoid shooting at the fireballs. Otherwise, for any other setup (PCB, emulation, PS2 with slowdown, ACA release...) it is recommended to shoot the fireballs in order to have them separating into smaller fireballs and generating slowdown. If using Type B, avoid using your missiles, as they make it harder to see the fireballs, and focus on shooting with your laser instead, that's enough to get good slowdown. However, with any ship that doesn't have spread bombs, feel free to use your missiles for additional slowdown. There is simply no miracle solution to the stage, and doing a pacifist route is extremely risky at max power (and therefore higher rank), you simply have to get used to dodging.
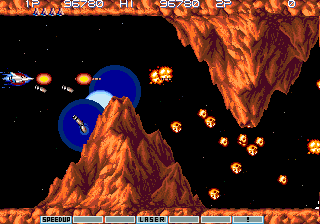
The part with the volcanos is tricky, as you probably won't have a lot of fireballs at this point, meaning less slowdown (especially if you don't fire your missiles). It is, however, a part that can actually be routed fairly easily with decent consistency. The following is extremely subjective, and other better approaches may exist, but can be worth trying if you struggle with this part.
When the first volcano appears on the right, try to have a shield activated, your options on a straight line, just above the volcano. At this point you ideally want the upgrade bar to be in the 5th slot, to have a shield almost ready, but taking into account the nearby capsules just above that will be hard to avoid.
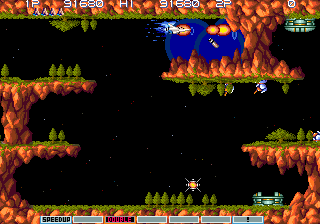
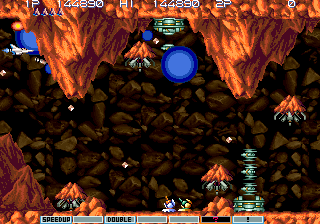
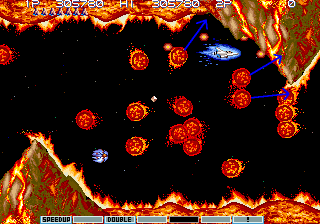
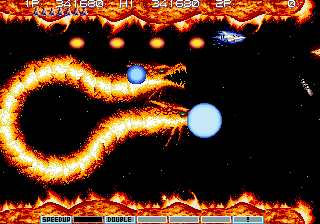
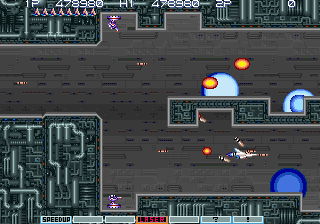
When the bottom volcano reaches the middle of the screen, approximatively (there is no real optimal solution, you have some margin), stop shooting, then move up, close to the upside-down volcano, tapping a little bit to avoid the aimed bullets and the big fireballs (which will always be the same across all runs). If done correctly, you will be safe for a few seconds. The hardest part from there is to find a good moment to move down. At some point, not long after you've moved, there should be a couple of fireballs going around you and into the volcano, then another one just below moving up, which are shown on the image above. After they've passed you, you want to move down, using your missiles at the same time for more slowdown, making extremely large moves if you're with Type B, as you'd be going pretty much blind because of the explosions. If done correctly, you will keep getting fairly consistent slowdown, and there are no fireballs that will be hidden by your Spread Bombs if you have them.
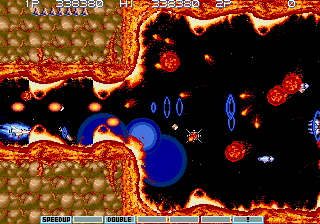
Finally, the corridor is very hard as you have little room for dodging. Try to have a shield ready for it. If possible, try to have your options ahead of you while you're against the left edge of the screen. You can use your missiles for more slowdown, they shouldn't hide bullets even with Type B. Note that the flames in the background won't hurt you, so you have a little more space to maneuver than what you might think.
Boss - Wyvern and Vulture Dragon
There isn't much to say about the first phase, other than you have to be to the left edge of the screen if it decides to move left, and otherwise try to keep your distances from the wall in case some fireballs spawn.
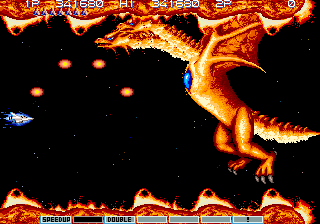
For the second phase, using a Mega Crash can instantly kill the two heads. Otherwise, there isn't much to it, and you have to keep your distance because of their fireballs. Avoid going into corners or edges of the screen as you may get walled by it.
Stage 8 - Cosmo Plant
Upgrades: Still Laser, have a shield ready for the boss.
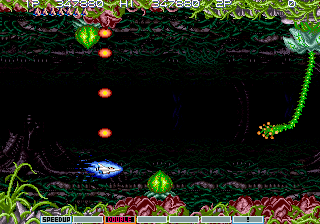
This is a really easy stage and your only concern is to have a shield ready for the boss. The games gives many capsules, and if you collect all of them, you will be able to reload your shield during the space section, then have your upgrade bar on the Shield slot before reaching the boss. If your shield is close to being destroyed at the start of the stage, you may want to take a few hits on purpose in order to destroy it, then reload it.
If the tentacles grab you, don't panic, simply move the other way and they will eventually let go of you. In a few places there will be organic hatches spawning enemies, remember to position your options ahead of time if you don't have weaponry to shoot up.
Boss - Choking Weed
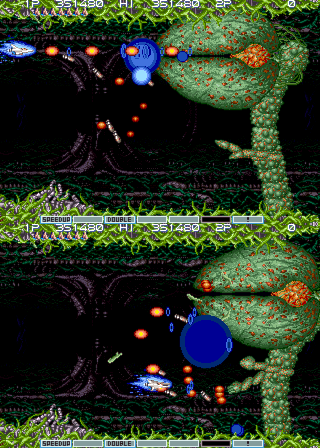
Short explanation: stay in front of the mouth all the time and tank the hits with a Force Field. Destroy the arms when the mouth is not exposed, but don't bother trying at the start of the fight.
Long explanation:
Start in front of it, and while it sucks you in closer, keep moving left to compensate for it, while trying to dodge the bullets. You should almost never let go of the left direction while it's trying to suck you in. Don't worry about the twigs that move in the background, they're only visual flair and don't harm you.
After the boss pauses, destroy the two arms at the bottom, and get in front of the head again to finish it. Trying to destroy the arms at the beginning of the fight is a waste of time and you should focus on the mouth instead. Bullets can be hard to dodge and you want to stay in front of the boss as much as possible, which is why it's essential to bring a shield to tank some hits while only micro-dodging.
Normally, you won't be able to destroy the boss the first time it tries to bring you closer, but you should destroy it on its second attempt, as long as you stay in front of it. While it may look scary because you will get really close to the boss, it is actually very consistent.
As long as you still have a Force Field active, your ship should stay in front of the mouth no matter what. Trying to macro-dodge the bullets is a mistake, as you won't be able to hit the boss while doing so, delaying the fight and risking to get sucked up too close.
Trying to escape while you're close to the boss is a lost cause. If you go beyond the first third of the screen, escaping down is almost impossible, and you should just stay in front of the boss while hoping it's enough to finish it or that it will stop its attack in time (in most cases, you should be safe).
Stage 9 - Crystal Labyrinth
- Upgrades (at full power): Laser, have a Mega Crash ready if it is equipped
- Recommended upgrades for the checkpoint: 2 speed ups, missiles, 2 options.
For the early part of the stage with crystals, stay in the top portion of the screen. As long as you manipulate your options to have them go through crystals, you should be fine. At the end, when you get to the cube rush area, move to the right to destroy the 4 small cannons that will appear at the bottom as they spawn (the first one at the very bottom is the hardest to kill), then move up and use your missiles to kill the top cannons, all while staying behind the crystals. The route when recovering is the same, just harder to execute.
The cube rush is infamously hard, and it is unfortunately likely that you will get a game over to it at some point even if you spend dozens of hours practicing it. Therefore, it is paramount to learn the checkpoint, as it's one of the few in the game that aren't too hard.
When recovering, start by quickly moving up to destroy the top row of enemies, and let the 3 other enemies get in front of you before killing them. Then kill the capsule-dropping enemy, the 3 next enemies, and move down, speeding up in the process when possible (you should have 2 speed ups at this point). With Type B, missiles greatly help killing enemies and should be activated as soon as possible after the 2 speed ups. For the rest, it's a matter of remembering where the enemies will spawn and moving in front of them as soon as possible. You absolutely want to activate 2 options, as it will greatly help for the rest of the game.
If you want to make save states to practice different cube patterns, make sure you have one before killing the Stage 8 boss, or, if practicing the checkpoint, one in Stage 9 before dying. Basically, the cube pattern you get depends on the frame counter since the game was started (which can be considered impossible to control). Since the game is autoscrolling most of the time, if you load a save state at the start or middle of the stage, you will always get the same pattern no matter what you do, and therefore need to find a way to enter the stage at a slightly different time. If you want to practice different patterns from a save state, try not to kill the Stage 8 boss at exactly the same time, or self-destructing in Stage 9 at the exact same time (ideally you have to go into a wall yourself instead of letting an enemy kill you), since you'd enter the Stage at the same frame every time and get the same pattern, which nullifies the point.
When practicing, don't feel hopeless. Some patterns are pretty much impossible (and extremely hard even when save-stating every 2 seconds), so you may want to self-destruct and try again with a different "seed". It is not rare for someone in an actual run to enter the stage with 10 lives and lose all of them to this part. However, some patterns can be fairly easy with cubes getting in perfect positions and shielding you by themselves, with no effort to be done, so don't get into a false sense of security: if you feel you have mastered a pattern you were practicing with save states, try self-destructing and doing it again with another pattern.
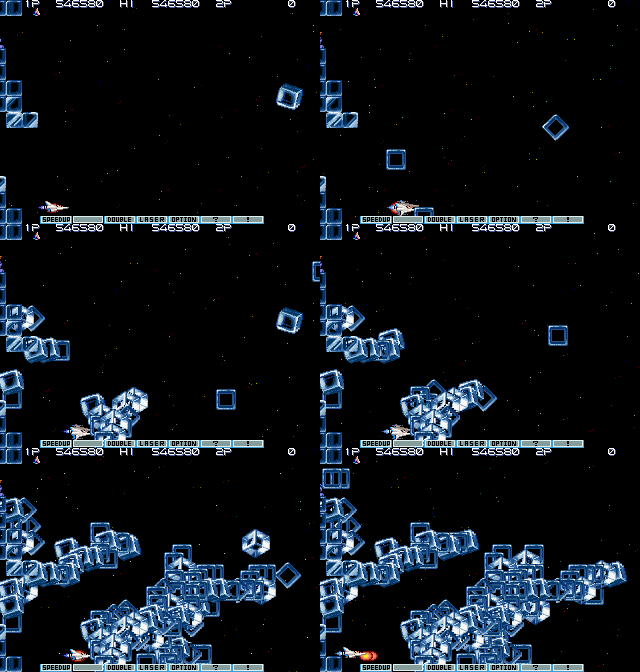
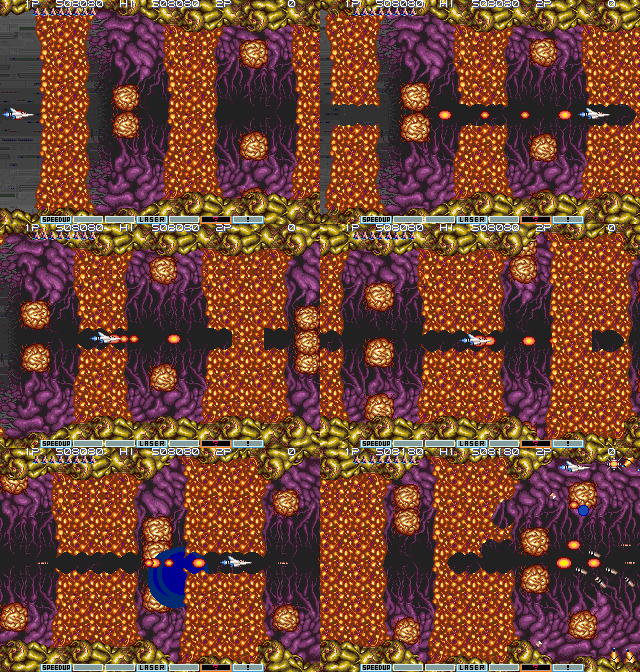
The general strategy is to build a wall. Start by being on top of the "Speed up" upgrade to bait the first cube, moving back when you see it coming. Then, get close to the cube, in order to bait another one to get on top of it. The early cubes start rushing when they're at the right side of the screen and you can see them coming, so dodging them shouldn't be an issue. While the vertical positions of the cubes are random, the timing at which they will charge at you is always the same: the first one will always charge early, while the 12th one is extremely dangerous and charges when it's near the left edge of the screen. Note that if you're unlucky, the early cubes might appear at the bottom of the screen, and you won't be able to bait it for a wall. If this happens, quickly move up to redirect it above where the wall will be, otherwise it may get in the way.
When the cubes start rushing at you, move out of the way a little, as the hitboxes can be bigger than what you'd expect. Sometimes, the cubes will even kill you through a wall. For the cubes that start rushing when they're in the left half of the screen, you have to anticipate them a little. Since the timing is always the same, with some experience you can know which one will charge and start moving preemptively.
Unfortunately, since the cube rush is essentially random, it is impossible to write a coherent guide about it, and find a more detailed and consistent strategy. There are 2880 different patterns, which means it's impossible to memorize all of them, let alone write about them.
If your goal is to clear one loop of the game, don't overthink the cube rush and don't try to beat every single pattern the game gives you. It is less time (and brain) consuming to learn the checkpoint properly in order to get there more often, and try your luck at the cube casino again. Some patterns are extremely hard and you shouldn't hope to beat them consistently. However, practice is still recommended in order to get familiar with the timing of the cubes, as you often have to move a little in order to dodge them after having baited them.
To add insult to injury, if you no-missed the game up to this point and reach it with 4 options, an option hunter will appear during the cube rush. The safest choice is to have a mega crash ready (there are many capsules early in the stage), and to use it after the hunter stole your options to get them back. Otherwise, you may be forced to get out of the way and expose yourself, but the Hunter generally appears at a terrible time where cubes will rush at you.
The animated picture above shows a typical cube rush run with wall construction. Note that even if the ship was positioned to the left of the screen, the cubes' aiming is poor, and they may drop more to the right, which is not optimal. At the 4th image, the ship can almost be considered safe, even though accidents can still happen and the player has to be mindful of cubes coming from above.
Boss: Lizard Core
Lizard Core can be tricky if you don't know how to approach it. However, the important thing to know is that the arms won't fire if you're close enough. Start the fight by positioning yourself between the "Speed up" and "Missile" upgrade slots (you can use the little red "bar" at the bottom of the Vic Viper sprite as a guide). This is a sweet spot where the boss normally won't shoot, and you won't ram into the arms even if they're almost closed. As long as you don't move left or right, and only move up and down, you won't get shot by the arms, and only have to worry about the main body.
The boss will periodically close itself before reopening after a few seconds. Since you can't damage it at this moment, avoid it and wait on one side.
From there, simply move either above or below the boss, letting your options damage it. Its barrage of bullets will be hard to dodge and will sometimes trap you, so if you see the boss moving towards one edge of the screen, make sure to move to the other side to not get trapped.
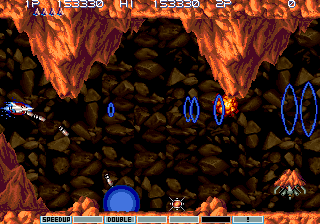
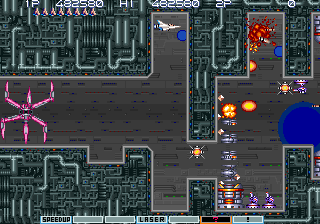
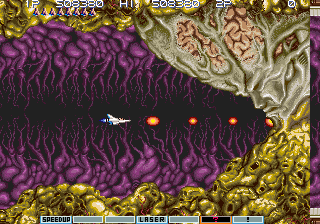
The following assumes you started below the boss: in the first cycle before it closes, it seems safe to move up after the 10th volley of shots. For the second cycle, the volleys are different but it's also safe after the 10th one (including the one fired when it reopens). If your positioning is good, your options will be able to shoot the boss while you stay in front of the arms without being shot, like in the picture above.
Stage 10-1 - Boss On Parade
Recommended upgrades: getting to 3 options if you're recovering from the cube rush. Don't activate the 4th one even if it is ready, as it would make the option hunter appear at a bad time.
First Boss - Tetran
Place yourself in the corner while the boss makes a full 360° movement across the screen. Then, place your options in the middle of the screen and move up to avoid the arms. When the core is exposed, you will destroy it very quickly. Moving to the right can greatly help dodging the bullets, but will often prevent you from killing the boss immediately. This isn't too important as you can safely replace your options in front of the boss right after it retracted its arms.
Second Boss - Covered Core
Start in the middle of the screen, close to the boss. Don't move up and down, only left and right, and keep shooting while dodging the missiles. The boss will die quickly.
Third Boss - Big Core Mk 2
There is a safespot you can abuse. You have to manipulate its movement in order for the safespot to work, and that's why you need to follow the following instructions very carefully. Start in the top-left corner, wait for it to shoot 3 times, and then move down to dodge the big spread. Quickly move back up in the corner. At this point, if your timing was correct (you don't have to be precise), the bullets won't touch you. You can move closer to kill the top core, then stay at the top and kill the bottom core.
Fourth Boss - Crystal Core
While probably the hardest of the boss rush, it remains fairly easy with slowdown, simply don't rush it by staying too close. With slowdown, the bullets are easy to avoid, and otherwise there isn't really a trick to this boss. If you managed to reach this point, it shouldn't be an issue.
Fifth Boss - Death Mk 2
Can be destroyed very quickly with missiles. If you can't kill the first phase quickly, simply dodge the missiles by moving above or below the boss.
Sixth Boss - Dellinger Core
What this boss will do is try to ram into you if you're not in front of it, and otherwise opens up and use a very dangerous volley. Start by moving in the top left corner, wait for the boss to charge, then move down, above the "Option" upgrade (you can touch the ground without dying), and dodge left when it charges again. Wait for it to open up (if you don't, it will charge again and you have to bait it below again), then quickly move up and let your options attack the boss. Your will have to repeat the cycle several times.
At some point the boss will shoot diagonally, but there is nothing to worry about.
When it's about to die, be ready to move to the right edge of the screen to set up a good start to the stage.
Stage 10-2 - Mechanical Base
Upgrade path: 4th option (if recovering from the Cube Rush) -> double -> force field
The first part of the stage will have to be done very differently depending on the ship. Type B will have a harder time because of its struggle to hit upwards, and the following will describe a Type B route.
As the last boss of the Boss Rush is destroyed, move to the right as much as you can, and position yourself in front of the middle of the big hatch. If you have a 4th option ready at this point, activate it. Your top options should be able to destroy the top hatch that spawns enemies, while you need to move back a little to destroy the bottom hatch.
You should be able to get enough capsules to switch to double, which will be used for the rest of the stage.
Then, simply move normally to destroy the other top hatch. Use your missiles to destroy the other bottom hatch, and use the option positioning trick to destroy the other hatch beyond the wall.
Then, quickly move to the right, your options positioned to destroy the two top hatches through the wall, while your missiles kill the bottom hatches. Wait until your missiles kill the third bottom hatch, then move in the opening in the wall to prepare your options, then slowly go to the right to dodge the bullets. Your options will take care of the small enemies. As soon as you seen an opening, move to the other side of the wall.
Try to have a force field ready, but don't activate it, as it would be destroyed in the next section because of the bigger hitbox.
Keep your options spread out to kill the flying tiles, and be mindful of all the smaller enemies. Shortly after you see a wave of 4 enemies on the right, move to the middle of the screen, as there will be a similar set of 4 enemies spawning on the left. Then, go back to the left to be ready for the next enemies.
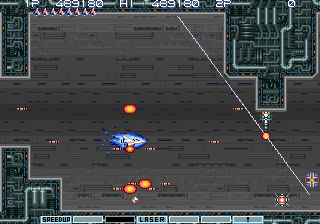
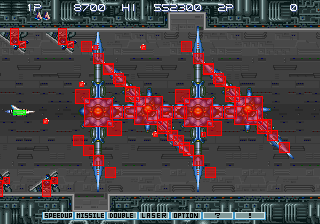
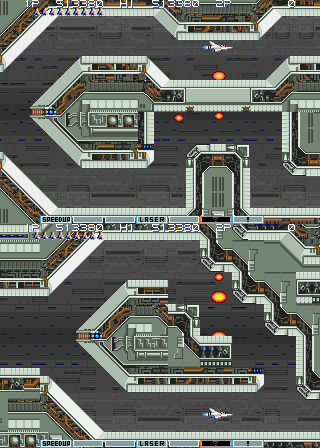
The section with the big laser enemies is tricky and will require to memorize a good path. The image above is a proposed solution. Note that for this specific strat, you have to be on the right edge of the screen for it to work. Also, for the 3rd and 4th lasers, you have to hide behind a wall before moving up. At the end, depending on your ship type, you may struggle to destroy the bottom hatch, but you can simply dodge the bullets by hiding behind the wall, then move down when enemies stop appearing. At this point, activate your shield, then try to get at least 2 of the 4 capsules dropped by enemies for what will come next.
The parts with the moving walls is mostly fine and there isn't much to say about it. Remember that the floors and ceilings having turrets on them will move up and down. The path is very straightforward. The hitbox for these floors and ceilings are very lenient and you can sit on the edges, but this may destroy your Force Field.
You get to a part that splits in two. First move up, then to the lower half. This is to position your options. After you kill two of the red enemies and get their capsules, move back up, as this path is easier. Simply dodge the mini-spider by hiding in the hole. While it looks scary, the hitbox is really generous there. Regarding upgrades, make sure you don't collect too much, and stay on the Shield if you collected enough, without activating it right now.
When your get to the next corridor, you have to dodge another spider. Moving out of the hole is trickier because the spider will still be there, and you have to wait for the tip of your sprite to be inside the wall to move down. Try to have a Shield ready for what's next. If you followed the previous advice, you should have been able to collect enough capsules.
Then, simply move in the top-right corner, moving back left, to destroy the hatches on the other side. When it's safe, move down, use your shield (if you've followed the above route, you should have collected enough capsules), destroy everything you can.
At this point, refrain from using your missiles, try to have as little slowdown as possible. For some reason, the long white lasers aren't affected by slowdown. If you generate too much of it, this part will become much harder. Start by only shooting, without any missiles. Use your missiles only a couple of times to kill the turrets on the ground. Eventually, the option hunter should spawn, and this is the point where you can afford to use your missiles again: you should have gotten a favorable laser alignment, and the slowdown will help you with maneuvers. Once you're done with the lasers, when you get an opportunity, move to the ceiling to kill all the turrets (be very careful and move by tapping, as slowdown may make you crash into the wall). At this point, lasers should be way behind you, and you can move back left a little to make it easier to dodge all the enemies coming from everywhere.
Boss - Disrupt
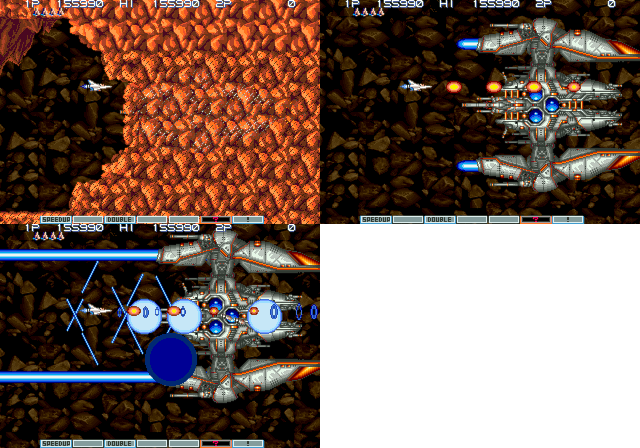
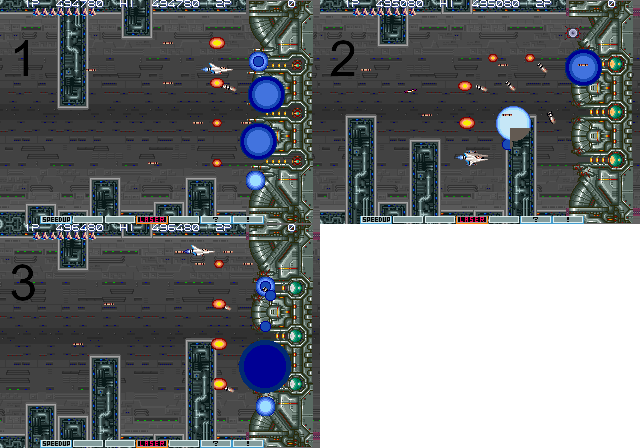
This boss is easily taken care of if you position your options ahead of time, and the animated image above illustrates the procedure. Go above where the Shield upgrade slot is, spreading your options (Part 1), and when the boss finishes appearing, move back left a little in a safe space (Part 2), in case it fires early and you didn't destroy the cannons immediately, which can happen. At this point, all the small cannons should be destroyed. Move to the bottom of the screen to position your options, then go to the top, as there is no dangerous moving ceiling (Part 3). From this point, it's only a matter of aligning your options to kill all three cores.
Boss - Shadow Gear
The part with Shadow Gear will be tricky. As usual in Gradius games, this walking enemy is invincible.
Thankfully, in the Arcade version, there is a hitbox glitch when the 2nd and 4th leg (from the left) are up, and you can simply go through the other legs at that moment (this is not present in the US release of the PS2 version and the PSP version). Use this to your advantage.
First go to the right side at the first opportunity by starting at the bottom, then move back left at the top at the first opportunity. Wait a little, killing the enemy at the top, the red ducker at the bottom, and being mindful of the ducker that will spawn in the bottom-left. Then, stay in the corner, wait for the boss to come close. When it's extremely close, it raise the desired 2nd and 4th legs, and you can move safely.
Meatballs
The "meatballs" section is very difficult, and like the cell walls in stage 6, you want to move all at once because of how their regeneration process works. Otherwise, you want to dig temporary cover in the walls to be protected from meatballs, remember the timing of when they're about to regenerate. Recovery can be practiced there, as it's not very hard to recover from a death there, and a death is likely (but fortunately, not guaranteed).
Since the scrolling moves fairly slowly, you can't hope to advance all the time, and have to wait in some columns from time to time. There are two approaches for that: you can tap dodge slowly, but there is very little room for error. You can also dig cover into the wall and go there temporarily. However these walls will regenerate, so the player will have to go back to where the meatballs are from time to time.
It is important to reach the end of the section as soon as possible, in order to be able to move up (or down) before the turrets even appear. It is also important to enter the meatballs part as late as possible, by waiting until the ship is at the very left of the screen, as it means less unnecessary dodging.
Final Boss - Bacterion
As usual, the final boss is a joke. Just don't get hit by the orbs if you don't want to be thrown to a special stage. If you have several options, you can speedkill it by positioning them on the right of the screen, but it's not really mandatory.
Escape
Finally, for the escape section, go up for the first split, then down for the second split. This part is easier with 3 speed ups. If you only have 2, you will want to start close to the right edge of the screen in order to not get walled. For the parts that make some kind of small stairs, only move up or down, don't move right and just let the scrolling do the job for you, it's easier.
It's basically impossible with only 1 speed up, but you can easily get 6 capsules from the turrets just before, so you should never get there in that condition.
