Difference between revisions of "Great Mahou Daisakusen/Drop list"
| Line 480: | Line 480: | ||
|} | |} | ||
| − | ==Stage 3== | + | ==Stage 3 Enemies== |
| − | === | + | {| class="wikitable" style="background-color:#FFFFFF;" |
| − | + | |- | |
| − | '''Appears in:''' | + | ! colspan="2" | <big>Enemy</big> |
| + | ! <big>Info</big> | ||
| + | |- | ||
| + | | colspan="2" rowspan="1" | [[File:GMD_blade_disk.png]] | ||
| + | | style="text-align: left" | | ||
| + | '''Appears in:''' Every stage. | ||
'''Polarity:''' None. | '''Polarity:''' None. | ||
'''Drops:''' Accessory. | '''Drops:''' Accessory. | ||
| + | |- | ||
| + | |} | ||
| − | === | + | {| class="wikitable" style="background-color:#FFFFFF;" |
| − | + | |- | |
| − | '''Appears in:''' Stage 2, 3 and 6. | + | ! colspan="2" | <big>Enemy</big> |
| + | ! <big>Info</big> | ||
| + | |- | ||
| + | | colspan="2" rowspan="1" | [[File:GMD_flying_gobligan.png]] | ||
| + | | style="text-align: left" | | ||
| + | '''Appears in:''' Stage 2, 3, 5 and 6. | ||
'''Polarity:''' None. | '''Polarity:''' None. | ||
'''Drops:''' Helmet. | '''Drops:''' Helmet. | ||
| + | |- | ||
| + | |} | ||
| − | === | + | {| class="wikitable" style="background-color:#FFFFFF;" |
| − | + | |- | |
| + | ! colspan="2" | <big>Enemy</big> | ||
| + | ! <big>Info</big> | ||
| + | |- | ||
| + | | colspan="2" rowspan="1" | [[File:GMD_hover_turtle.png]] | ||
| + | | style="text-align: left" | | ||
'''Appears in:''' Stage 3 and 4. | '''Appears in:''' Stage 3 and 4. | ||
| Line 508: | Line 527: | ||
*'''Main cannon:''' Helmet. | *'''Main cannon:''' Helmet. | ||
*'''Body:''' Ring, '''Legend Armor.''' | *'''Body:''' Ring, '''Legend Armor.''' | ||
| − | '''Secret item requirements: 4 or more bombs in stock + level 8 charged shot.''' | + | *'''Secret item requirements: 4 or more bombs in stock + level 8 charged shot.''' |
| − | + | |- | |
| − | + | |} | |
| − | '''Appears in:''' | + | {| class="wikitable" style="background-color:#FFFFFF;" |
| + | |- | ||
| + | ! colspan="2" | <big>Enemy</big> | ||
| + | ! <big>Info</big> | ||
| + | |- | ||
| + | | colspan="2" rowspan="1" | [[File:GMD_wizard.png]] | ||
| + | | style="text-align: left" | | ||
| + | '''Appears in:''' Every stage. | ||
'''Polarity:''' <span style="color:red">'''Red'''</span> or <span style="color:blue">'''Blue'''</span>. | '''Polarity:''' <span style="color:red">'''Red'''</span> or <span style="color:blue">'''Blue'''</span>. | ||
'''Drops:''' Staff. | '''Drops:''' Staff. | ||
| + | |- | ||
| + | |} | ||
| − | === | + | {| class="wikitable" style="background-color:#FFFFFF;" |
| − | + | |- | |
| + | ! colspan="2" | <big>Enemy</big> | ||
| + | ! <big>Info</big> | ||
| + | |- | ||
| + | | colspan="2" rowspan="1" | [[File:GMD_yellow_plane.png]] | ||
| + | | style="text-align: left" | | ||
'''Appears in:''' Stage 1, 2, 3, 4 and 6. | '''Appears in:''' Stage 1, 2, 3, 4 and 6. | ||
| Line 525: | Line 558: | ||
'''Drops:''' Food. | '''Drops:''' Food. | ||
| + | |- | ||
| + | |} | ||
| − | === | + | {| class="wikitable" style="background-color:#FFFFFF;" |
| − | + | |- | |
| − | '''Appears in:''' Stage | + | ! colspan="2" | <big>Enemy</big> |
| + | ! <big>Info</big> | ||
| + | |- | ||
| + | | colspan="2" rowspan="1" | [[File:GMD_st3-6_dragon.png]] | ||
| + | | style="text-align: left" | | ||
| + | '''Appears in:''' Stage 3 and 6. | ||
'''Polarity:''' <span style="color:red">'''Red'''</span> or <span style="color:blue">'''Blue'''</span>. | '''Polarity:''' <span style="color:red">'''Red'''</span> or <span style="color:blue">'''Blue'''</span>. | ||
'''Drops:''' | '''Drops:''' | ||
| − | *'''Wings:''' | + | *'''Wings:''' Shield. |
| − | *'''Body:''' | + | *'''Body:''' Axe. |
| − | + | |- | |
| − | + | |} | |
| + | {| class="wikitable" style="background-color:#FFFFFF;" | ||
| + | |- | ||
| + | ! colspan="2" | <big>Enemy</big> | ||
| + | ! <big>Info</big> | ||
| + | |- | ||
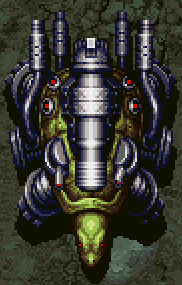
| + | | colspan="2" rowspan="1" | [[File:GMD_st3_large_drill.png]] | ||
| + | | style="text-align: left" | | ||
'''Appears in:''' Stage 3. | '''Appears in:''' Stage 3. | ||
| Line 545: | Line 592: | ||
'''Secret item requirement: Empty bomb gauge.''' | '''Secret item requirement: Empty bomb gauge.''' | ||
| + | |- | ||
| + | |} | ||
| − | === | + | {| class="wikitable" style="background-color:#FFFFFF;" |
| − | + | |- | |
| + | ! colspan="2" | <big>Enemy</big> | ||
| + | ! <big>Info</big> | ||
| + | |- | ||
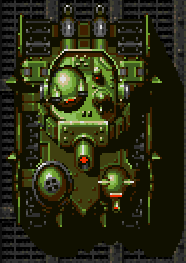
| + | | colspan="2" rowspan="1" | [[File:GMD_tank3.png]] | ||
| + | | style="text-align: left" | | ||
'''Appears in:''' Stage 1, 3, 4 and 5. | '''Appears in:''' Stage 1, 3, 4 and 5. | ||
| Line 556: | Line 610: | ||
*'''Body:''' Shoes. | *'''Body:''' Shoes. | ||
| − | + | '''Note:''' Technically this enemy is in stage 2 and 6 on top of the carriers. However it's a different version that only drops a single item therefore it's treated as a unique enemy. | |
| + | |- | ||
| + | |} | ||
| + | {| class="wikitable" style="background-color:#FFFFFF;" | ||
| + | |- | ||
| + | ! colspan="2" | <big>Enemy</big> | ||
| + | ! <big>Info</big> | ||
| + | |- | ||
| + | | colspan="2" rowspan="1" | [[File:GMD_small_turret1.png]] | ||
| + | | style="text-align: left" | | ||
'''Appears in:''' Stage 3, 5 and 6. | '''Appears in:''' Stage 3, 5 and 6. | ||
| Line 563: | Line 626: | ||
'''Drops:''' Food. | '''Drops:''' Food. | ||
| + | |- | ||
| + | |} | ||
| − | === | + | {| class="wikitable" style="background-color:#FFFFFF;" |
| − | + | |- | |
| − | '''Appears in:''' Stage 1 | + | ! colspan="2" | <big>Enemy</big> |
| + | ! <big>Info</big> | ||
| + | |- | ||
| + | | colspan="2" rowspan="1" | [[File:GMD_tank1.png]] | ||
| + | | style="text-align: left" | | ||
| + | '''Appears in:''' Stage 1, 3, 4, and 5. | ||
'''Polarity:''' None. | '''Polarity:''' None. | ||
| Line 574: | Line 644: | ||
*'''Body:''' Shoes. | *'''Body:''' Shoes. | ||
| − | + | '''Note:''' Technically this enemy is in stage 2 and 6 on top of the carriers. However it's a different version that only drops a single item therefore it's treated as a unique enemy. | |
| + | |- | ||
| + | |} | ||
| + | {| class="wikitable" style="background-color:#FFFFFF;" | ||
| + | |- | ||
| + | ! colspan="2" | <big>Enemy</big> | ||
| + | ! <big>Info</big> | ||
| + | |- | ||
| + | | colspan="2" rowspan="1" | [[File:GMD_laser cannon.png]] | ||
| + | | style="text-align: left" | | ||
'''Appears in:''' Stage 3 and 5. | '''Appears in:''' Stage 3 and 5. | ||
| Line 581: | Line 660: | ||
'''Drops:''' Sword. | '''Drops:''' Sword. | ||
| + | |- | ||
| + | |} | ||
| − | === | + | {| class="wikitable" style="background-color:#FFFFFF;" |
| − | + | |- | |
| + | ! colspan="2" | <big>Enemy</big> | ||
| + | ! <big>Info</big> | ||
| + | |- | ||
| + | | colspan="2" rowspan="1" | [[File:GMD_magic_ship.png]] | ||
| + | | style="text-align: left" | | ||
'''Appears in:''' Stage 3, 4 and 6. | '''Appears in:''' Stage 3, 4 and 6. | ||
| Line 589: | Line 675: | ||
'''Drops:''' Staff. | '''Drops:''' Staff. | ||
| + | |- | ||
| + | |} | ||
| − | === | + | {| class="wikitable" style="background-color:#FFFFFF;" |
| − | + | |- | |
| + | ! colspan="2" | <big>Enemy</big> | ||
| + | ! <big>Info</big> | ||
| + | |- | ||
| + | | colspan="2" rowspan="1" | [[File:GMD_st3_dormant_dragon.png]] | ||
| + | | style="text-align: left" | | ||
'''Appears in:''' Stage 3. | '''Appears in:''' Stage 3. | ||
| Line 597: | Line 690: | ||
'''Drops:''' Armor. | '''Drops:''' Armor. | ||
| + | |- | ||
| + | |} | ||
| − | === | + | {| class="wikitable" style="background-color:#FFFFFF;" |
| − | + | |- | |
| − | '''Appears in:''' Stage 1 | + | ! colspan="2" | <big>Enemy</big> |
| + | ! <big>Info</big> | ||
| + | |- | ||
| + | | colspan="2" rowspan="1" | [[File:GMD_st3_large_tank.png]] | ||
| + | | style="text-align: left" | | ||
| + | '''Appears in:''' Stage 1, 3, 4 and 5. | ||
'''Polarity:''' None. | '''Polarity:''' None. | ||
| Line 613: | Line 713: | ||
'''Note:''' There are multiple versions of this tank found throughout the game with a different arrangement of turrets, these turrets follow the same item drop as the ones found in tanks (e.g. a large tank with a spinning turret on top will drop the Accessory once said turret is destroyed). | '''Note:''' There are multiple versions of this tank found throughout the game with a different arrangement of turrets, these turrets follow the same item drop as the ones found in tanks (e.g. a large tank with a spinning turret on top will drop the Accessory once said turret is destroyed). | ||
| + | |- | ||
| + | |} | ||
| − | === | + | {| class="wikitable" style="background-color:#FFFFFF;" |
| − | + | |- | |
| − | '''Appears in:''' Stage 3 | + | ! colspan="2" | <big>Enemy</big> |
| + | ! <big>Info</big> | ||
| + | |- | ||
| + | | colspan="2" rowspan="1" | [[File:GMD_large_turret1.png]] | ||
| + | | style="text-align: left" | | ||
| + | '''Appears in:''' Stage 3 and 5. | ||
'''Polarity:''' None. | '''Polarity:''' None. | ||
'''Drops:''' Sword. | '''Drops:''' Sword. | ||
| + | |- | ||
| + | |} | ||
| − | === | + | {| class="wikitable" style="background-color:#FFFFFF;" |
| − | + | |- | |
| + | ! colspan="2" | <big>Enemy</big> | ||
| + | ! <big>Info</big> | ||
| + | |- | ||
| + | | colspan="2" rowspan="1" | [[File:GMD_large_turret2.png]] | ||
| + | | style="text-align: left" | | ||
'''Appears in:''' Stage 3, 5 and 6. | '''Appears in:''' Stage 3, 5 and 6. | ||
| Line 629: | Line 743: | ||
'''Drops:''' Ring. | '''Drops:''' Ring. | ||
| + | |- | ||
| + | |} | ||
| + | |||
| + | ==Stage 3 Mid-boss== | ||
| + | |||
| + | {| class="wikitable" style="background-color:#FFFFFF;" | ||
| + | |- | ||
| + | ! colspan="2" | <big>Enemy</big> | ||
| + | ! <big>Info</big> | ||
| + | |- | ||
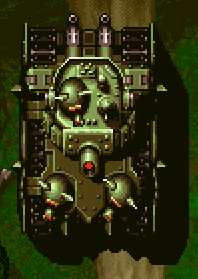
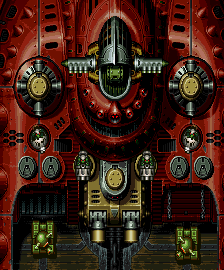
| + | | colspan="2" rowspan="1" | [[File:GMD_st3_midboss.png]] | ||
| + | | style="text-align: left" | | ||
| + | '''Appears in:''' Stage 3. | ||
| + | |||
| + | '''Polarity:''' <span style="color:red">'''Red'''</span>, none (everything but the cockpit and its core). | ||
| + | |||
| + | '''Drops:''' | ||
| + | *'''Twin laser turret:''' | ||
| + | **'''Side turrets:''' Staff. | ||
| + | **'''Body:''' Accessory. | ||
| + | *'''Doors:''' Food. | ||
| + | *'''Enclosing turret:''' Food. | ||
| + | *'''Small turrets:''' Food. | ||
| + | *'''Large spinning turret:''' Ring. | ||
| + | *'''Cockpit guns:''' Armor. | ||
| + | *'''Cockpit:''' Shield. | ||
| + | *'''Core:''' Helmet. | ||
| + | |- | ||
| + | |} | ||
==Stage 4== | ==Stage 4== | ||
Revision as of 18:25, 13 March 2023
This page lists all of the enemies in Great Mahou Daisakusen and the items they drop once destroyed, knowing what items each enemy has and where to find them is essential for scoring.
Every enemy is listed in order of appearance, only present once per stage to avoid repeats, with a few exceptions.
Contents
- 1 Stage 1 Enemies
- 2 Stage 2 Enemies
- 3 Stage 3 Enemies
- 4 Stage 3 Mid-boss
- 5 Stage 4
- 5.1 Spinning blade disk
- 5.2 Drill bug
- 5.3 Treasure chest
- 5.4 Mimic
- 5.5 Single turret tank
- 5.6 Twin turret tank
- 5.7 Large shielded ship
- 5.8 Wizard
- 5.9 Spinning turret tank
- 5.10 Cannon Turtle
- 5.11 Yellow plane
- 5.12 Drill truck
- 5.13 Mid-size ship
- 5.14 Large tank
- 5.15 Missile tank
- 5.16 Beholder
- 5.17 Beholder clone
- 5.18 Spiked shield ship
- 5.19 Water single turret tank
- 5.20 Serpent
- 5.21 Water spinning turret tank
- 5.22 Water twin turret tank
- 5.23 Bombs gobligan
- 5.24 Homing bullets gobligan
- 5.25 Water missile tank
- 5.26 Hover turtle
- 5.27 Gobligan
- 6 Stage 5
- 6.1 Train
- 6.2 Spinning blade disk
- 6.3 Single turret tank
- 6.4 Twin turret tank
- 6.5 Spinning turret tank
- 6.6 Missile tank
- 6.7 Large twin turret
- 6.8 Flying gobligan
- 6.9 Wizard
- 6.10 Brown turret
- 6.11 Small turret
- 6.12 Large single turret
- 6.13 Large tank
- 6.14 Large ship
- 6.15 Large laser turret
- 6.16 Containers and barrels
- 6.17 Snails
- 6.18 Cannon Turtle
- 6.19 Drills and tanks
- 6.20 Dormant Busturtle
- 6.21 Large tank
- 6.22 Gray ship
- 6.23 Gobligan
- 6.24 Large tank
- 6.25 Large tank
- 6.26 Large tank
- 6.27 Cage
- 6.28 Baby dragon
- 6.29 Bombs gobligan
- 6.30 Homing bullets gobligan
- 7 Stage 6
- 7.1 Spinning blade disk
- 7.2 Missile gobligan
- 7.3 Rocket arms gobligan
- 7.4 Bombs gobligan
- 7.5 Homing bullets gobligan
- 7.6 Flying gobligan
- 7.7 Large ship
- 7.8 Mid-size ship
- 7.9 Large shielded ship
- 7.10 Kamikaze spinning blade
- 7.11 White ship
- 7.12 Flying missile tank
- 7.13 Flying spinning turret tank
- 7.14 Wizard
- 7.15 Baby dragon
- 7.16 Carrier ship
- 7.17 Gray ship
- 7.18 Yellow plane
- 7.19 Flying twin turret tank
- 7.20 Drill bug
- 7.21 Beholder
- 7.22 Beholder clone
- 7.23 Dragon
- 7.24 Small turret
- 7.25 Large twin turret
- 7.26 Spinning turret
- 7.27 Twin laser cannon
- 8 References
Stage 1 Enemies
| Enemy | Info | |
|---|---|---|
|
Appears in: Every stage. Polarity: None. Drops: Accessory. | |
| Enemy | Info | |
|---|---|---|

|
Appears in: Every stage. Polarity: Red or Blue. Drops: Staff. | |
| Enemy | Info | |
|---|---|---|

|
Appears in: Stage 1, 2, 3, 4 and 6. Polarity: None. Drops: Food. | |
| Enemy | Info | |
|---|---|---|
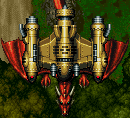
|
Appears in: Stage 1 and 2. Polarity: Red or Blue. Drops:
Note: There is another version of this enemy in stage 3 and 6 with different item drops. | |
| Enemy | Info | |
|---|---|---|

|
Appears in: Stage 1. Polarity: None. Drops: Axe. | |
| Enemy | Info | |
|---|---|---|

|
Appears in: Stage 1, 4 and 5. Polarity: None. Drops:
| |
| Enemy | Info | |
|---|---|---|
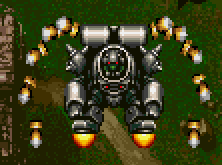
|
Appears in: Stage 1, 2 and 6. Polarity: None. Drops: Accessory. | |
| Enemy | Info | |
|---|---|---|
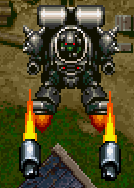
|
Appears in: Stage 1, 2 and 6. Polarity: None. Drops:
| |
Stage 2 Enemies
| Enemy | Info | |
|---|---|---|

|
Appears in: Stage 2 and 6. Polarity: None. Drops: Axe. | |
| Enemy | Info | |
|---|---|---|

|
Appears in: Stage 2 and 6. Polarity: None. Drops:
| |
| Enemy | Info | |
|---|---|---|
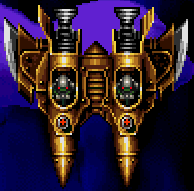
|
Appears in: Stage 2, 5 and 6. Polarity: None. Drops:
| |
| Enemy | Info | |
|---|---|---|
|
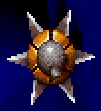
Appears in: Stage 2 and 6. Polarity: None. Drops: Sword. | |
| Enemy | Info | |
|---|---|---|

|
Appears in: Every stage. Polarity: None. Drops: Accessory. | |
| Enemy | Info | |
|---|---|---|

|
Appears in: Every stage. Polarity: Red or Blue. Drops: Staff. | |
| Enemy | Info | |
|---|---|---|

|
Appears in: Stage 1, 2, 3, 4 and 6. Polarity: None. Drops: Food. | |
| Enemy | Info | |
|---|---|---|

|
Appears in: Stage 1 and 2. Polarity: Red or Blue. Drops:
Note: There is another version of this enemy in stage 3 and 6 with different item drops. | |
| Enemy | Info | |
|---|---|---|
|
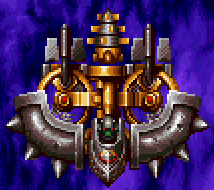
Appears in: Stage 2 and 4. Polarity: None. Drops:
| |
| Enemy | Info | |
|---|---|---|

|
Appears in: Stage 2 and 6. Polarity: None. Drops:
| |
| Enemy | Info | |
|---|---|---|

|
Appears in: Stage 2 and 6. Polarity: None. Drops:
| |
| Enemy | Info | |
|---|---|---|

|
Appears in: Stage 2, 3, 5 and 6. Polarity: None. Drops: Helmet. | |
| Enemy | Info | |
|---|---|---|

|
Appears in: Stage 1, 2 and 6. Polarity: None. Drops: Accessory. | |
| Enemy | Info | |
|---|---|---|

|
Appears in: Stage 1, 2 and 6. Polarity: None. Drops:
| |
| Enemy | Info | |
|---|---|---|
|
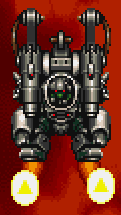
Appears in: Stage 2, 4, 5 and 6. Polarity: None. Drops: Ring. | |
Stage 3 Enemies
| Enemy | Info | |
|---|---|---|

|
Appears in: Every stage. Polarity: None. Drops: Accessory. | |
| Enemy | Info | |
|---|---|---|

|
Appears in: Stage 2, 3, 5 and 6. Polarity: None. Drops: Helmet. | |
| Enemy | Info | |
|---|---|---|

|
Appears in: Every stage. Polarity: Red or Blue. Drops: Staff. | |
| Enemy | Info | |
|---|---|---|

|
Appears in: Stage 1, 2, 3, 4 and 6. Polarity: None. Drops: Food. | |
| Enemy | Info | |
|---|---|---|
|
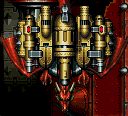
Appears in: Stage 3 and 6. Polarity: Red or Blue. Drops:
| |
| Enemy | Info | |
|---|---|---|

|
Appears in: Stage 3. Polarity: Red. Drops: Sword, Mobichan. Secret item requirement: Empty bomb gauge. | |
| Enemy | Info | |
|---|---|---|

|
Appears in: Stage 3, 5 and 6. Polarity: None. Drops: Food. | |
| Enemy | Info | |
|---|---|---|
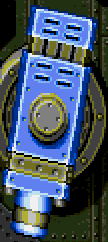
|
Appears in: Stage 3 and 5. Polarity: Red or Blue. Drops: Sword. | |
| Enemy | Info | |
|---|---|---|
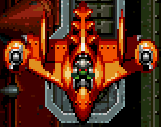
|
Appears in: Stage 3, 4 and 6. Polarity: Red or Blue. Drops: Staff. | |
| Enemy | Info | |
|---|---|---|
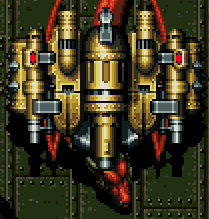
|
Appears in: Stage 3. Polarity: Red. Drops: Armor. | |
| Enemy | Info | |
|---|---|---|
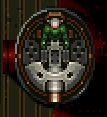
|
Appears in: Stage 3 and 5. Polarity: None. Drops: Sword. | |
| Enemy | Info | |
|---|---|---|
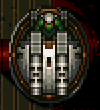
|
Appears in: Stage 3, 5 and 6. Polarity: None. Drops: Ring. | |
Stage 3 Mid-boss
Stage 4
Spinning blade disk
Appears in: Stage 1, 2, 3, 4, 5 and 6.
Polarity: None.
Drops: Accessory.
Drill bug
Appears in: Stage 4 and 6.
Polarity: None.
Drops:
- Drill: Ring.
- Bug: Shield.
Treasure chest
Appears in: Stage 4.
Polarity: None.
Drops: Uncollected items from regular sets, items from the Jewel and Capcom sets.
Secret item requirement: Have a x12 multiplier (all regular sets completed).
Mimic
Appears in: Stage 4.
Polarity: None.
Drops: Axe, Legend Shield.
Secret item requirements: Have any of the "armor" item sets (Shield, Armor or Helmet) completed + 4 or more bombs in stock.
Single turret tank
Appears in: Stage 1, 2, 3, 4, 5 and 6.
Polarity: None.
Drops:
- Turret: Food.
- Body: Shoes.
Twin turret tank
Appears in: Stage 1, 3, 4 and 5.
Polarity: None.
Drops:
- Turret: Staff.
- Body: Shoes.
Large shielded ship
Appears in: Stage 4 and 6.
Polarity: None.
Drops:
- Core: Armor.
- Left spiked shield: Helmet.
- Body: Armor.
Note: The left shield can be destroyed and will drop its corresponding item but the right one does not, possibly a bug.
Wizard
Appears in: Stage 1, 2, 3, 4, 5 and 6.
Polarity: Red or Blue.
Drops: Staff.
Spinning turret tank
Appears in: Stage 1, 4 and 5.
Polarity: None.
Drops:
- Turret: Accessory.
- Body: Shoes.
Cannon Turtle
Appears in: Stage 4 and 5.
Polarity: None.
Drops:
- Turrets: Shoes.
- Cannon: Helmet.
- Body: Treasure, Legend Boots.
Secret item requirements: 4 or more bombs in stock + level 8 charged shot.
Yellow plane
Appears in: Stage 1, 2, 3, 4 and 6.
Polarity: None.
Drops: Food.
Drill truck
Appears in: Stage 4.
Polarity: None.
Drops:
- Single turrets: Shield.
- Spread gun: Armor.
- Turret on back: Staff.
- Drill: Treasure, Bamboo.
- Secret item requirement: Empty bomb gauge.
- Body: Treasure.
Mid-size ship
Appears in: Stage 3, 4 and 6.
Polarity: Red or Blue.
Drops: Staff.
Large tank
Appears in: Stage 1, 2, 3, 4 and 5.
Polarity: None.
Drops:
- Spinning turret: Accessory.
- Main turret: Shield.
- Spinning turret underneath: Armor.
- Body: Shield.
Note: There are multiple versions of this tank found throughout the game with a different arrangement of turrets, these turrets follow the same item drop as the ones found in tanks (e.g. a large tank with a spinning turret on top will drop the Accessory once said turret is destroyed).
Missile tank
Appears in: Stage 4 and 5.
Polarity: None.
Drops:
- Missile launcher: Accessory.
- Body: Shoes.
Beholder
Appears in: Stage 4 and 6.
Polarity: Red or Blue.
Drops: Armor.
Beholder clone
Appears in: Stage 4 and 6.
Polarity: Red or Blue.
Drops: Axe.
Spiked shield ship
Appears in: Stage 2 and 4.
Polarity: None.
Drops:
- Core: Armor
- Spiked shield: Helmet.
- Body: Armor.
Water single turret tank
Appears in: Stage 4.
Polarity: None.
Drops:
- Turret: Food.
- Body: Armor.
Serpent
Appears in: Stage 4.
Polarity: Blue.
Drops: Staff, Holstein.
Secret item requirement: Empty bomb gauge.
Water spinning turret tank
Appears in: Stage 4.
Polarity: None.
Drops:
- Turret: Accessory.
- Body: Armor.
Water twin turret tank
Appears in: Stage 4.
Polarity: None.
Drops:
- Turret: Staff.
- Body: Armor.
Bombs gobligan
Appears in: Stage 4, 5 and 6.
Polarity: None.
Drops: Shield.
Homing bullets gobligan
Appears in: Stage 2, 4, 5 and 6.
Polarity: None.
Drops: Ring.
Water missile tank
Appears in: Stage 4.
Polarity: None.
Drops:
- Missile launcher: Accessory.
- Body: Armor.
Hover turtle
Appears in: Stage 3 and 4.
Polarity: None.
Drops:
- Small turrets: Shoes.
- Main cannon: Helmet.
- Body: Ring, Legend Armor.
Secret item requirements: 4 or more bombs in stock + level 8 charged shot.
Gobligan
Appears in: Stage 1, 4 and 5.
Polarity: None.
Drops: Food.
Stage 5
Train
Appears in: Stage 5.
Polarity: None.
Drops: Sword.
Spinning blade disk
Appears in: Stage 1, 2, 3, 4, 5 and 6.
Polarity: None.
Drops: Accessory.
Single turret tank
Appears in: Stage 1, 2, 3, 4, 5 and 6.
Polarity: None.
Drops:
- Turret: Food.
- Body: Shoes.
Twin turret tank
Appears in: Stage 1, 3, 4 and 5.
Polarity: None.
Drops:
- Turret: Staff.
- Body: Shoes.
Spinning turret tank
Appears in: Stage 1, 4 and 5.
Polarity: None.
Drops:
- Turret: Accessory.
- Body: Shoes.
Missile tank
Appears in: Stage 4 and 5.
Polarity: None.
Drops:
- Missile launcher: Accessory.
- Body: Shoes.
Large twin turret
Appears in: Stage 3, 5 and 6.
Polarity: None.
Drops: Ring.
Flying gobligan
Appears in: Stage 2, 3, 5 and 6.
Polarity: None.
Drops: Helmet.
Wizard
Appears in: Stage 1, 2, 3, 4, 5 and 6.
Polarity: Red or Blue.
Drops: Staff.
Brown turret
Appears in: Stage 5.
Polarity: None.
Drops: Food
Small turret
Appears in: Stage 3, 5 and 6.
Polarity: None.
Drops: Food.
Large single turret
Appears in: Stage 3, and 5.
Polarity: None.
Drops: Sword.
Large tank
Appears in: Stage 1, 2, 3, 4 and 5.
Polarity: None.
Drops:
- Single turret: Food.
- Twin turret: Staff.
- Main turret: Shield.
- Spinning turret underneath: Armor.
- Body: Shield.
Note: There are multiple versions of this tank found throughout the game with a different arrangement of turrets, these turrets follow the same item drop as the ones found in tanks (e.g. a large tank with a spinning turret on top will drop the Accessory once said turret is destroyed).
Large ship
Appears in: Stage 2, 5 and 6.
Polarity: None.
Drops:
- Core: Food.
- Body: Helmet.
Large laser turret
Appears in: Stage 3 and 5.
Polarity: Red or Blue.
Drops: Sword.
Containers and barrels
Appears in: Stage 5.
Polarity: None.
Drops: Food.
Snails
Appears in: Stage 5.
Polarity: None.
Drops:
- Turrets: Shoes.
- Shell: Shield.
Cannon Turtle
Appears in: Stage 4 and 5.
Polarity: None.
Drops:
- Turrets: Shoes.
- Cannon: Helmet.
- Body: Treasure, Legend Boots.
Secret item requirements: 4 or more bombs in stock + level 8 charged shot.
Drills and tanks
Appears in: Stage 5.
Polarity: None.
Drops: Food.
Dormant Busturtle
Appears in: Stage 5.
Polarity: None.
Drops:
- Large twin turret: Ring
- Head: Armor.
Large tank
Appears in: Stage 1, 2, 3, 4 and 5.
Polarity: None.
Drops:
- Single turret: Food.
- Main turret: Shield.
- Spinning turret underneath: Armor.
- Body: Shield.
Note: There are multiple versions of this tank found throughout the game with a different arrangement of turrets, these turrets follow the same item drop as the ones found in tanks (e.g. a large tank with a spinning turret on top will drop the Accessory once said turret is destroyed).
Gray ship
Appears in: Stage 5.
Polarity: None.
Drops:
- Sword.
Gobligan
Appears in: Stage 1, 4 and 5.
Polarity: None.
Drops: Food.
Large tank
Appears in: Stage 1, 2, 3, 4 and 5.
Polarity: None.
Drops:
- Spinning turret: Accessory.
- Single turret: Food.
- Main turret: Shield.
- Spinning turret underneath: Armor.
- Body: Shield.
Note: There are multiple versions of this tank found throughout the game with a different arrangement of turrets, these turrets follow the same item drop as the ones found in tanks (e.g. a large tank with a spinning turret on top will drop the Accessory once said turret is destroyed).
Large tank
Appears in: Stage 1, 2, 3, 4 and 5.
Polarity: None.
Drops:
- Missile launcher: Accessory.
- Single turret: Food.
- Main turret: Shield.
- Spinning turret underneath: Armor.
- Body: Shield.
Note: There are multiple versions of this tank found throughout the game with a different arrangement of turrets, these turrets follow the same item drop as the ones found in tanks (e.g. a large tank with a spinning turret on top will drop the Accessory once said turret is destroyed).
Large tank
Appears in: Stage 1, 2, 3, 4 and 5.
Polarity: None.
Drops:
- Twin turret: Staff.
- Single turret: Food.
- Main turret: Shield.
- Spinning turret underneath: Armor.
- Body: Shield.
Note: There are multiple versions of this tank found throughout the game with a different arrangement of turrets, these turrets follow the same item drop as the ones found in tanks (e.g. a large tank with a spinning turret on top will drop the Accessory once said turret is destroyed).
Cage
Appears in: Stage 5.
Polarity: None.
Drops: Shield.
Baby dragon
Appears in: Stage 5 and 6.
Polarity: Red or Blue.
Drops: Accessory.
Bombs gobligan
Appears in: Stage 4, 5 and 6.
Polarity: None.
Drops: Shield.
Homing bullets gobligan
Appears in: Stage 2, 4, 5 and 6.
Polarity: None.
Drops: Ring.
Stage 6
Spinning blade disk
Appears in: Stage 1, 2, 3, 4, 5 and 6.
Polarity: None.
Drops: Accessory.
Missile gobligan
Appears in: Stage 1, 2 and 6.
Polarity: None.
Drops: Accessory.
Rocket arms gobligan
Appears in: Stage 1, 2 and 6.
Polarity: None.
Drops:
- Arms: Sword.
- Body: Accessory.
Bombs gobligan
Appears in: Stage 4, 5 and 6.
Polarity: None.
Drops: Shield.
Homing bullets gobligan
Appears in: Stage 2, 4, 5 and 6.
Polarity: None.
Drops: Ring.
Flying gobligan
Appears in: Stage 2, 3, 5 and 6.
Polarity: None.
Drops: Helmet.
Large ship
Appears in: Stage 2, 5 and 6.
Polarity: None.
Drops:
- Core: Food.
- Body: Helmet.
Mid-size ship
Appears in: Stage 3, 4 and 6.
Polarity: Red or Blue.
Drops: Staff.
Large shielded ship
Appears in: Stage 4 and 6.
Polarity: None.
Drops:
- Core: Armor.
- Left spiked shield: Helmet.
- Body: Armor.
Note: The left shield can be destroyed and will drop its corresponding item but the right one does not, possibly a bug.
Kamikaze spinning blade
Appears in: Stage 2 and 6.
Polarity: None.
Drops: Sword.
White ship
Appears in: Stage 2 and 6.
Polarity: None.
Drops: Axe.
Flying missile tank
Appears in: Stage 6.
Polarity: None.
Drops:
- Missile launcher: Accessory.
- Body: Armor.
Flying spinning turret tank
Appears in: Stage 2 and 6.
Polarity: None.
Drops:
- Turret: Accessory.
- Body: Armor.
Wizard
Appears in: Stage 1, 2, 3, 4, 5 and 6.
Polarity: Red or Blue.
Drops: Staff.
Baby dragon
Appears in: Stage 5 and 6.
Polarity: Red or Blue.
Drops: Accessory.
Carrier ship
Appears in: Stage 2 and 6.
Polarity: Red.
Drops:
Gray ship
Appears in: Stage 6.
Polarity: None.
Drops:
- Shields: Helmet.
- Drill: Food.
- Body: Sword.
Yellow plane
Appears in: Stage 1, 2, 3, 4 and 6.
Polarity: None.
Drops: Food.
Flying twin turret tank
Appears in: Stage 2 and 6.
Polarity: None.
Drops:
- Turret: Staff.
- Body: Armor.
Drill bug
Appears in: Stage 4 and 6.
Polarity: None.
Drops:
- Drill: Ring.
- Bug: Shield.
Beholder
Appears in: Stage 4 and 6.
Polarity: Red or Blue.
Drops: Armor.
Beholder clone
Appears in: Stage 4 and 6.
Polarity: Red or Blue.
Drops: Axe.
Dragon
Appears in: Stage 1, 2, 3 and 6.
Polarity: Red or Blue.
Drops:
- Wings: Armor.
- Body: Shield (stage 1 and 2), Axe (stage 3 and 6).
Small turret
Appears in: Stage 3, 5 and 6.
Polarity: None.
Drops: Food.
Large twin turret
Appears in: Stage 3, 5 and 6.
Polarity: None.
Drops: Ring.
Spinning turret
Appears in: Stage 6.
Polarity: None.
Drops: Ring.
Twin laser cannon
Appears in: Stage 6.
Polarity: None.
Drops:
- Turrets: Staff.
- Body: Accessory.
