Difference between revisions of "Raiden IV/Strategy"
72.8% Water (talk | contribs) |
72.8% Water (talk | contribs) |
||
| (One intermediate revision by the same user not shown) | |||
| Line 29: | Line 29: | ||
[[File:Raiden IV Boss 2 Extract.png|thumb|none|upright=1.2]] | [[File:Raiden IV Boss 2 Extract.png|thumb|none|upright=1.2]] | ||
| − | There is an easy and satisfying speed kill that can be performed on the first phase of this boss. With the vulcan (ideally fully powered), place yourself under one of its wings before it | + | There is an easy and satisfying speed kill that can be performed on the first phase of this boss. With the vulcan (ideally fully powered), place yourself under one of its wings before it starts to fire/move. It will move left then right, and only shoot downwards until a second after it stop on the right-hand side of the screen. At this point (if it hasn't died already), be prepared to move downwards to avoid a few bullets, then continue the attack. |
=== Stage 3 === | === Stage 3 === | ||
Latest revision as of 22:00, 2 February 2021
This page looks at both survival and scoring strategies in Raiden IV.
Contents
Basic Strategy
- Include some good "starter advice" for a player interested in playing this game.
- It's probably not a bad idea to explain good "times" to take advantage of certain mechanics (such as, "leave lots of bullets on screen and then do a big cancel for big points").
- Let the player know of some techniques in shmups that the player might have to apply, such as macro-dodging / micro/tap-dodging, how to maximize damage, etc.
Advanced Strategy
- This section would contain particularly advanced gameplay techniques and more scoring information.
- Ideally, this is information that you probably wouldn't tell someone who just picked up the game. Players looking at this section are typically aiming to reach the next level of play.
Individual Stage Breakdown
Differences between game modes and between loop 1 and 2 will be noted within each stage section.
Stage 1
Boss: Exerey Iss
Stage 2
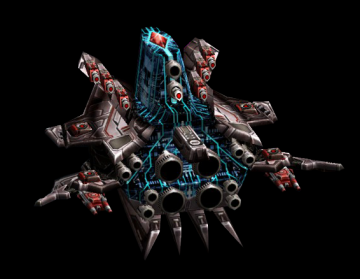
Boss: Ordo, Fulas, Mairazard
There is an easy and satisfying speed kill that can be performed on the first phase of this boss. With the vulcan (ideally fully powered), place yourself under one of its wings before it starts to fire/move. It will move left then right, and only shoot downwards until a second after it stop on the right-hand side of the screen. At this point (if it hasn't died already), be prepared to move downwards to avoid a few bullets, then continue the attack.
Stage 3
Boss: Famel Ya
The final phase of this fight can be quite difficult. As well as its other attacks, the boss periodically shoots concentric circles of bullets at you. Early in the fight, these circles overlap with a spreadshot attack, combining to make arguably the most unreadable attack in the whole game. Thankfully, if you don't look at it too hard, the attack is fairly easy to stream, as all elements of it are aimed. Before the attack begins, take position at the bottom of the screen, a little away from one side. When the attack starts, tap your way across at a pace that puts you into the next gap of the spread shot, and all bullets will sail past you.
Stage 4
Boss: Aguden, Ewat
Stage 5
Boss
Stage 6
Boss
Stage 7
Boss: Horda Gardia
Weapon Tier List
This is a section that doesn't necessarily need to be included, depending on the game in question. This section should be used to list out all strengths and weaknesses with the weapons in the game, and to sort of evaluate their general strength and usefulness. Ideally, every weapon should include a positive ( + ) and a negative ( - ).
(X) Tier: Weapon Name
- ( ~ ) Unique element of the weapon, nothing necessarily "better" or "worse" than any other weapon
- ( + ) A positive aspect of the weapon that it does well, such as high damage, high refire, homing, etc.
- ( - ) A negative aspect of the weapon, such as poor refire, low damage, weak homing, and the like.
Enemy Overview
In this section, detailed information (if available) about all enemies, mid-bosses and bosses would be included on this page. Each enemy would be accompanied with a graphic, a score value (if available), and description of its behavior. For bonus points, include some clickable diagrams that showcase the behavior of the enemy! For games that have disassemblies and debug modes available, this would potentially be an interesting way to isolate enemy behavior and really show how it works!

