Difference between revisions of "R-Type/Strategy"
JammaGaming (talk | contribs) |
JammaGaming (talk | contribs) |
||
| Line 4: | Line 4: | ||
== Basic Strategy == | == Basic Strategy == | ||
*Some people call it a memorizer, some people call it a puzzle game. Either way, you won't get far in R-Type unless you have a strategy for every situation. Take it stage by stage and enjoy the process. Don't feel bad about looking things up or using cheap tactics. This is a brutal game, so take all the help you can get. | *Some people call it a memorizer, some people call it a puzzle game. Either way, you won't get far in R-Type unless you have a strategy for every situation. Take it stage by stage and enjoy the process. Don't feel bad about looking things up or using cheap tactics. This is a brutal game, so take all the help you can get. | ||
| − | *You don't need to worry about switching the side your force pod is attached to until the stage 3 boss, where it quite obvious what you need to do. After this point, switching the force pod side becomes an essential mechanic that you must make use of. Sections that seem to be an impossible | + | *You don't need to worry about switching the side your force pod is attached to until the stage 3 boss, where it quite obvious what you need to do. After this point, switching the force pod side becomes an essential mechanic that you must make use of. Sections that seem to be an impossible barrage will quickly fall before you with a well timed pod switch. Get good at the maneouvre. Fire your pod at a wall to shorten the distance it travels so you can get it back onto your ship quicker. |
*Practice is the key to this game - learn the patterns, learn how the different enemy ships react to you. | *Practice is the key to this game - learn the patterns, learn how the different enemy ships react to you. | ||
| + | *The easiest route through the game is to stick with the Red power up (Air Laser aka Helix) for most of it, only swapping at certain points. It's recommended to only collect one speed up. | ||
---- | ---- | ||
Revision as of 09:37, 28 August 2023
Contents
Basic Strategy
- Some people call it a memorizer, some people call it a puzzle game. Either way, you won't get far in R-Type unless you have a strategy for every situation. Take it stage by stage and enjoy the process. Don't feel bad about looking things up or using cheap tactics. This is a brutal game, so take all the help you can get.
- You don't need to worry about switching the side your force pod is attached to until the stage 3 boss, where it quite obvious what you need to do. After this point, switching the force pod side becomes an essential mechanic that you must make use of. Sections that seem to be an impossible barrage will quickly fall before you with a well timed pod switch. Get good at the maneouvre. Fire your pod at a wall to shorten the distance it travels so you can get it back onto your ship quicker.
- Practice is the key to this game - learn the patterns, learn how the different enemy ships react to you.
- The easiest route through the game is to stick with the Red power up (Air Laser aka Helix) for most of it, only swapping at certain points. It's recommended to only collect one speed up.
Advanced Strategy
[Add additional strategy notes here]
- [This section would contain particularly advanced gameplay techniques and more scoring information.]
- [Ideally, this is information that you probably wouldn't tell someone who just picked up the game. Players looking at this section are typically aiming to reach the next level of play.]
Individual Stage Breakdown
Stage 1
[Add strategies here]
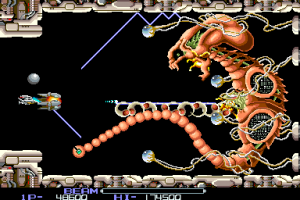
Boss: Dobkeratops
Stage 2
[Add strategies here]
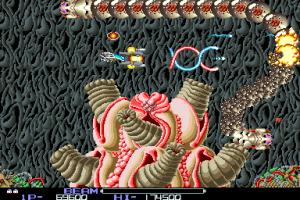
Boss: Cyst
Stage 3
[Add strategies here]
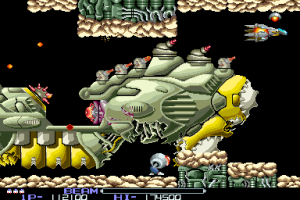
Boss: Warship
Stage 4
[Add strategies here]
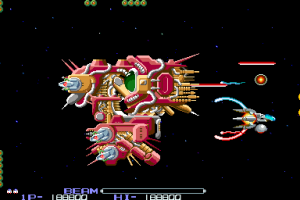
Boss: Compiler
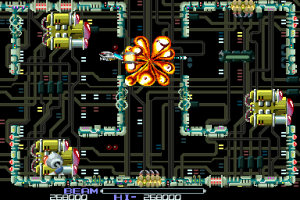
Though the weak points are "inside" the boss at the start of the fight (when the three pieces of the boss are close together), your special weapons can still hit them and destroy the parts before they have even had a chance to separate. So don't wait around: flip your force pod onto the back of the ship, and as the boss makes its entrance get up close to the bottom section and let it rip. The correct positioning will take practice, but when you get it right you will take out the bottom section before the boss has even reached stopped on the right side of the screen. With the next weak point now exposed, continue your assault. The final weak point faces the left, so destroy it with a charged frontal shot.
Stage 5
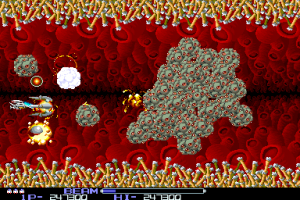
If your ship is fully powered up upon entering this stage with two bits, missile and red laser, the furthest top left corner of the screen is a safe spot for the majority of the stage as long as you keep firing. Early on there are two of the large serpent-like enemies who will fly directly into the safe spot. As their movement patterns are slow and well telegraphed you can simply slide out of the way of their path and then slide straight back into that top left corner afterwards. Once those two enemies have been dodged you can stay positioned there for the rest of the stage, continuously firing as your bits and force protect you from any fire and you are safely positioned out of the way of any potentially force-piercing lasers. As flying into the floor and ceiling unusually does not destroy your ship in this stage and there is no level terrain in your way, this is extremely easy and safe to pull off.
Boss: Bellmite
This boss is probably the #1 run killer for a 1-ALL run, as its movement is erratic, and the orbs surrounding its core are quite fast when launched at you (and can be similarly erratic when bouncing off of the walls, depending on where the boss has moved on the screen). You can manipulate the opening of the fight somewhat by sitting just above the middle of the screen on the far left side, which if done correctly, should have Bellmite start the fight slowly moving to the right side of the screen, but otherwise you'll have to shoot down as many orbs as you can to reveal the core while trying not to get boxed in by the aggressive attacks/movement from the boss. Red laser, assuming you've successfully kept it throughout Stage 5, is the best option for this fight, as it absolutely chews through the orbs compared to blue or yellow. If you're unfortunate enough to come into this fight with Yellow (or are on recovery), you'll probably be best served de-attaching your force pod and letting the extra DPS from that chip away at the orbs while you dodge like a madman.
Stage 6
[Add strategies here]
Boss: Dops Rush
Trying to manouvre around these hulking cubes while they dance around the play area would be a pain, but there is an easier way.
Fly your ship just to the left of where the dops drop down the screen, in the gap in the wall of the upper portion of the screen. The front of your ship (not including your force pod) should be pretty much lined up with the right-hand end of the thin, vertical wall above you. That means your force pod will be overlapping with the dops that drop down the screen.
In this position, each dop is destroyed with one charged shot. You don't have to move, as every dop is destroyed before it moves past you and becomes a threat. That said, if any of the wall-hugging enemies have been left alive, don't get too complacent: usually their bullets will hit a wall before they reach you, but not always. Ten or so dead dops later, and this boss fight is over.
Stage 7
The start of this stage is one of the few sections in the game where the yellow weapon is somewhat useful. You get one near the end of stage 6 anyway, and it will easily hit the missile launchers that can hide underneath the platform in this stage. You can switch it out to a blue laser immediately after.
Boss: Bronco
You can fight this boss honestly, or cheese it with a safe spot.
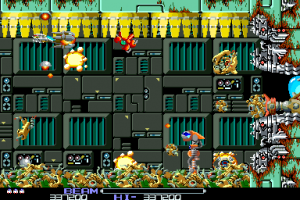
The safe spot, if you choose to use it, is between the two leftmost yellow trash chutes. You want you ship to just overlap with the open chute spite. It is ambiguous where the ceiling starts, so fly too high and you will meet instant death by collision. But get it right, and all trash and bullets will either sail past you or die to your force pod, and you simple wait out the fight until the boss gives up.
If you decide to fight it honestly, your upper bit device is going to earn it's keep. Most of the trash that falls will be destroyed by the bit, with one exception,: the large green boxes. You have to be prepared to dodge these, and hope none of them fall directly from above you later in the fight, when things have sped up. Where and when they fall seems to be random.
Don't move around too much: your bit moves around too, and might not be directly above you when you need it. Kill the boss quickly, because the falling of the trash speeds up the longer the fight goes. Know what your vertical position needs to be to hit the boss when he appears (lining yourself up with something in the background helps).
Though there is always a bit to collect before the boss, if you died after the checkpoint and (against all odds!) managed to struggle your way here, you will have to fight the boss without a force pod, as there is no opportunity to collect a single laser crystal after the checkpoint. Needless to say, this will be the hardest version of the fight, and without the force pod you won't be able to take advantage of the safe spot. It is possible — try and stay between the chutes, be prepared to dodge the large green boxes, and kill the boss while the garbage is still dropping slowly — but you will need a healthy serving of luck, so I hope it's good to you!
Stage 8
[Add strategies here]
Boss: Bydo (Core)
Are you ready? Do you have two bit devices still on your ship? This boss is going to look very different depending on whether you do or not.
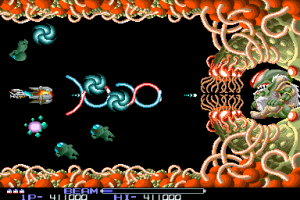
Either way, to start with you're going to have to get past the boss's barrier. With the force shielding you, you're totally safe if you stay on the left side of the screen in the middle. This is also where to need to be to launch the pod at the boss, so wait it out there for awhile until the boss shrieks and opens the barrier. Launch your pod, and keep firing. The barrier will close, but you will continue to do damage with every shot. Now you just have to survive.
If you've managed to keep your bit devices this far (which means not dying at all in the second half of the game), the Bydo core is easy. As long as you keep firing at a good rate, you should be safe. The shots will kill the babies and the whirlwinds will never touch you. However, sometimes you will seem to be in a safe position only to have a baby break through and touch the ship, potentially ruining your whole run. I find that being slightly above the central position (but not so high that the whirlwind can hit you!) helps avoid this.
You don't have two bits? Well, substitute bits for balls: you're going to have to dodge. The whirlwinds have fixed patterns. Their movements will only ever cover a section of the screen, leaving other areas safe. The more whirlwinds that come out, though, the less safe space there is, and as you can't kill the boss before three whirlwinds are out you may have to weave in and out of their trajectories. Still, learning what those trajectories are will make this element of the fight much easier.
Know that the babies also spawn with fixed timing, though there is some variation in their direction, so this part of the fight can also be somewhat learned. Getting a feel for when a group of babies is about to try and dogpile you will make it easier to reacti appropriately.
Weapon Tier List
This is a section that doesn't necessarily need to be included, depending on the game in question. This section should be used to list out all strengths and weaknesses with the weapons in the game, and to sort of evaluate their general strength and usefulness. Ideally, every weapon should include a positive ( + ) and a negative ( - ).
(X) Tier: Weapon Name
- ( ~ ) Unique element of the weapon, nothing necessarily "better" or "worse" than any other weapon
- ( + ) A positive aspect of the weapon that it does well, such as high damage, high refire, homing, etc.
- ( - ) A negative aspect of the weapon, such as poor refire, low damage, weak homing, and the like.
Enemy Overview
In this section, detailed information (if available) about all enemies, mid-bosses and bosses would be included on this page. Each enemy would be accompanied with a graphic, a score value (if available), and description of its behavior. For bonus points, include some clickable diagrams that showcase the behavior of the enemy! For games that have disassemblies and debug modes available, this would potentially be an interesting way to isolate enemy behavior and really show how it works!
