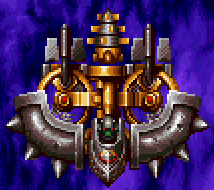
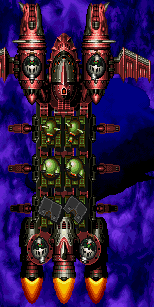
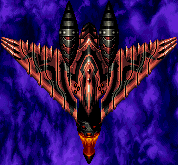
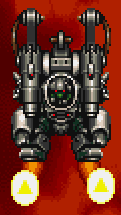
Difference between revisions of "Great Mahou Daisakusen/Drop list"
| Line 5: | Line 5: | ||
==Stage 1 Enemies== | ==Stage 1 Enemies== | ||
| − | {| class="wikitable" style="background-color:#FFFFFF;" | + | {| class="wikitable" style="background-color:#FFFFFF; width: 100%" |
|- | |- | ||
| − | ! colspan="2" | <big>Enemy</big> | + | ! colspan="2" style="width: 18.4%;" | <big>Enemy</big> |
! <big>Info</big> | ! <big>Info</big> | ||
|- | |- | ||
| − | | colspan="2" rowspan="1" | [[File:GMD_blade_disk.png]] | + | | colspan="2" rowspan="1" | [[File:GMD_blade_disk.png|center]] |
| style="text-align: left" | | | style="text-align: left" | | ||
'''Description:''' Zako enemy. Its bullets can be sealed. | '''Description:''' Zako enemy. Its bullets can be sealed. | ||
| Line 22: | Line 22: | ||
|} | |} | ||
| − | {| class="wikitable" style="background-color:#FFFFFF;" | + | {| class="wikitable" style="background-color:#FFFFFF; width: 100%" |
|- | |- | ||
| − | ! colspan="2" | <big>Enemy</big> | + | ! colspan="2" style="width: 18.4%;" | <big>Enemy</big> |
! <big>Info</big> | ! <big>Info</big> | ||
|- | |- | ||
| − | | colspan="2" rowspan="1" | [[File:GMD_wizard.png]] | + | | colspan="2" rowspan="1" | [[File:GMD_wizard.png|center]] |
| style="text-align: left" | | | style="text-align: left" | | ||
'''Description:''' Fires 3-Way aimed magic bullets, can be sealed. | '''Description:''' Fires 3-Way aimed magic bullets, can be sealed. | ||
| Line 39: | Line 39: | ||
|} | |} | ||
| − | {| class="wikitable" style="background-color:#FFFFFF;" | + | {| class="wikitable" style="background-color:#FFFFFF; width: 100%" |
|- | |- | ||
| − | ! colspan="2" | <big>Enemy</big> | + | ! colspan="2" style="width: 18.4%;" | <big>Enemy</big> |
! <big>Info</big> | ! <big>Info</big> | ||
|- | |- | ||
| − | | colspan="2" rowspan="1" | [[File:GMD_tank1.png]] | + | | colspan="2" rowspan="1" | [[File:GMD_tank1.png|center]] |
| style="text-align: left" | | | style="text-align: left" | | ||
'''Description:''' Aims at the player and fires single bullets. | '''Description:''' Aims at the player and fires single bullets. | ||
| Line 58: | Line 58: | ||
|} | |} | ||
| − | {| class="wikitable" style="background-color:#FFFFFF;" | + | {| class="wikitable" style="background-color:#FFFFFF; width: 100%" |
|- | |- | ||
| − | ! colspan="2" | <big>Enemy</big> | + | ! colspan="2" style="width: 18.4%;" | <big>Enemy</big> |
! <big>Info</big> | ! <big>Info</big> | ||
|- | |- | ||
| − | | colspan="2" rowspan="1" | [[File:GMD_yellow_plane.png]] | + | | colspan="2" rowspan="1" | [[File:GMD_yellow_plane.png|center]] |
| style="text-align: left" | | | style="text-align: left" | | ||
'''Description:''' Frequently used as a "filler" enemy after a big enemy has been taken out, can be lured off-screen by moving upwards while sealing its bullets. | '''Description:''' Frequently used as a "filler" enemy after a big enemy has been taken out, can be lured off-screen by moving upwards while sealing its bullets. | ||
| Line 75: | Line 75: | ||
|} | |} | ||
| − | {| class="wikitable" style="background-color:#FFFFFF;" | + | {| class="wikitable" style="background-color:#FFFFFF; width: 100%" |
|- | |- | ||
| − | ! colspan="2" | <big>Enemy</big> | + | ! colspan="2" style="width: 18.4%;" | <big>Enemy</big> |
! <big>Info</big> | ! <big>Info</big> | ||
|- | |- | ||
| − | | colspan="2" rowspan="1" | [[File:GMD_st1-2_dragon.png]] | + | | colspan="2" rowspan="1" | [[File:GMD_st1-2_dragon.png|center]] |
| style="text-align: left" | | | style="text-align: left" | | ||
'''Description:''' Its wings fire aimed twin bullets while the center fires magic bullets forward. | '''Description:''' Its wings fire aimed twin bullets while the center fires magic bullets forward. | ||
| Line 94: | Line 94: | ||
|} | |} | ||
| − | {| class="wikitable" style="background-color:#FFFFFF;" | + | {| class="wikitable" style="background-color:#FFFFFF; width: 100%" |
|- | |- | ||
| − | ! colspan="2" | <big>Enemy</big> | + | ! colspan="2" style="width: 18.4%;" | <big>Enemy</big> |
! <big>Info</big> | ! <big>Info</big> | ||
|- | |- | ||
| − | | colspan="2" rowspan="1" | [[File:GMD_st1_gobligan.png]] | + | | colspan="2" rowspan="1" | [[File:GMD_st1_gobligan.png|center]] |
| style="text-align: left" | | | style="text-align: left" | | ||
'''Description:''' Completely harmless to the player. | '''Description:''' Completely harmless to the player. | ||
| Line 115: | Line 115: | ||
|} | |} | ||
| − | {| class="wikitable" style="background-color:#FFFFFF;" | + | {| class="wikitable" style="background-color:#FFFFFF; width: 100%" |
|- | |- | ||
| − | ! colspan="2" | <big>Enemy</big> | + | ! colspan="2" style="width: 18.4%;" | <big>Enemy</big> |
! <big>Info</big> | ! <big>Info</big> | ||
|- | |- | ||
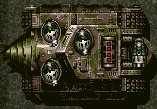
| − | | colspan="2" rowspan="1" | [[File:GMD_st1_drill.png]] | + | | colspan="2" rowspan="1" | [[File:GMD_st1_drill.png|center]] |
| style="text-align: left" | | | style="text-align: left" | | ||
'''Description:''' Appears from the ground, fires once if the player is far away enough. | '''Description:''' Appears from the ground, fires once if the player is far away enough. | ||
| Line 132: | Line 132: | ||
|} | |} | ||
| − | {| class="wikitable" style="background-color:#FFFFFF;" | + | {| class="wikitable" style="background-color:#FFFFFF; width: 100%" |
|- | |- | ||
| − | ! colspan="2" | <big>Enemy</big> | + | ! colspan="2" style="width: 18.4%;" | <big>Enemy</big> |
! <big>Info</big> | ! <big>Info</big> | ||
|- | |- | ||
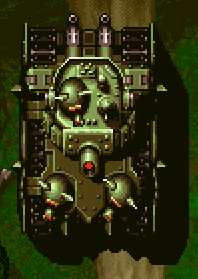
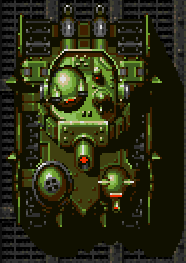
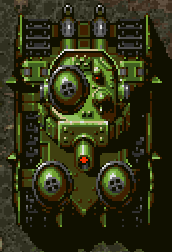
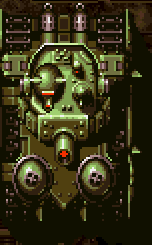
| − | | colspan="2" rowspan="1" | [[File:GMD_st1_large_tank.png]] | + | | colspan="2" rowspan="1" | [[File:GMD_st1_large_tank.png|center]] |
| style="text-align: left" | | | style="text-align: left" | | ||
'''Description:''' A large tank with several turrets to destroy. | '''Description:''' A large tank with several turrets to destroy. | ||
| Line 148: | Line 148: | ||
*'''Single turret:''' Food. | *'''Single turret:''' Food. | ||
*'''Main turret:''' Shield. | *'''Main turret:''' Shield. | ||
| − | *'''Spinning | + | *'''Spinning turrets underneath:''' Armor. |
*'''Body:''' Shield. | *'''Body:''' Shield. | ||
|- | |- | ||
|} | |} | ||
| − | {| class="wikitable" style="background-color:#FFFFFF;" | + | {| class="wikitable" style="background-color:#FFFFFF; width: 100%" |
|- | |- | ||
| − | ! colspan="2" | <big>Enemy</big> | + | ! colspan="2" style="width: 18.4%;" | <big>Enemy</big> |
! <big>Info</big> | ! <big>Info</big> | ||
|- | |- | ||
| − | | colspan="2" rowspan="1" | [[File:GMD_tank2.png]] | + | | colspan="2" rowspan="1" | [[File:GMD_tank2.png|center]] |
| style="text-align: left" | | | style="text-align: left" | | ||
'''Description:''' Its spinning turret fires bullets in several angles. | '''Description:''' Its spinning turret fires bullets in several angles. | ||
| Line 172: | Line 172: | ||
|} | |} | ||
| − | {| class="wikitable" style="background-color:#FFFFFF;" | + | {| class="wikitable" style="background-color:#FFFFFF; width: 100%" |
|- | |- | ||
| − | ! colspan="2" | <big>Enemy</big> | + | ! colspan="2" style="width: 18.4%;" | <big>Enemy</big> |
! <big>Info</big> | ! <big>Info</big> | ||
|- | |- | ||
| − | | colspan="2" rowspan="1" | [[File:GMD_missile_gobligan.png]] | + | | colspan="2" rowspan="1" | [[File:GMD_missile_gobligan.png|center]] |
| style="text-align: left" | | | style="text-align: left" | | ||
'''Description:''' Fires very slow bullets before releasing a barrage of aimed missiles. | '''Description:''' Fires very slow bullets before releasing a barrage of aimed missiles. | ||
| Line 189: | Line 189: | ||
|} | |} | ||
| − | {| class="wikitable" style="background-color:#FFFFFF;" | + | {| class="wikitable" style="background-color:#FFFFFF; width: 100%" |
|- | |- | ||
| − | ! colspan="2" | <big>Enemy</big> | + | ! colspan="2" style="width: 18.4%;" | <big>Enemy</big> |
! <big>Info</big> | ! <big>Info</big> | ||
|- | |- | ||
| − | | colspan="2" rowspan="1" | [[File:GMD_tank3.png]] | + | | colspan="2" rowspan="1" | [[File:GMD_tank3.png|center]] |
| style="text-align: left" | | | style="text-align: left" | | ||
'''Description:''' Aims at the player and fires twin bullets. | '''Description:''' Aims at the player and fires twin bullets. | ||
| Line 208: | Line 208: | ||
|} | |} | ||
| − | {| class="wikitable" style="background-color:#FFFFFF;" | + | {| class="wikitable" style="background-color:#FFFFFF; width: 100%" |
|- | |- | ||
| − | ! colspan="2" | <big>Enemy</big> | + | ! colspan="2" style="width: 18.4%;" | <big>Enemy</big> |
! <big>Info</big> | ! <big>Info</big> | ||
|- | |- | ||
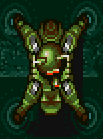
| − | | colspan="2" rowspan="1" | [[File:GMD_arms_gobligan.png]] | + | | colspan="2" rowspan="1" | [[File:GMD_arms_gobligan.png|center]] |
| style="text-align: left" | | | style="text-align: left" | | ||
'''Description:''' Performs a rocket punch. | '''Description:''' Performs a rocket punch. | ||
| Line 233: | Line 233: | ||
Phase 1= | Phase 1= | ||
| − | {| class="wikitable" style="background-color:#FFFFFF;" | + | {| class="wikitable" style="background-color:#FFFFFF; width: 100%" |
|- | |- | ||
| − | ! colspan="2" | <big>Enemy</big> | + | ! colspan="2" style="width: 18.4%;" | <big>Enemy</big> |
! <big>Info</big> | ! <big>Info</big> | ||
|- | |- | ||
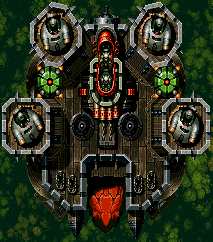
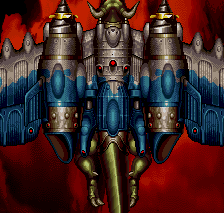
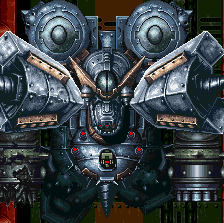
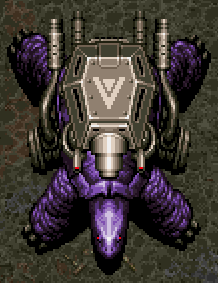
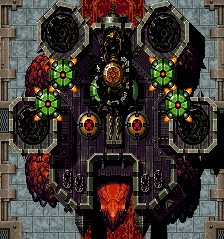
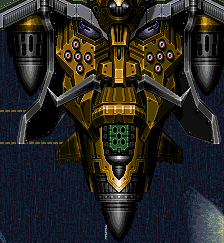
| − | | colspan="2" rowspan="1" | [[File:GMD_busturtle_1.png]] | + | | colspan="2" rowspan="1" | [[File:GMD_busturtle_1.png|center]] |
| style="text-align: left" | | | style="text-align: left" | | ||
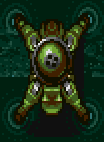
'''Appears in:''' Stage 1. | '''Appears in:''' Stage 1. | ||
| Line 248: | Line 248: | ||
*'''Small turrets:''' Food. | *'''Small turrets:''' Food. | ||
*'''Large magic turret:''' Accessory, '''Dragonfly.''' | *'''Large magic turret:''' Accessory, '''Dragonfly.''' | ||
| − | *'''Secret item requirements:''' <span style="color:blue">'''Blue polarity'''</span> '''+ empty bomb gauge.''' | + | **'''Secret item requirements:''' <span style="color:blue">'''Blue polarity'''</span> '''+ empty bomb gauge.''' |
*'''Drill on back:''' Ring, '''Fairy of Woods.''' | *'''Drill on back:''' Ring, '''Fairy of Woods.''' | ||
| − | *'''Secret item requirement: Level 5 charged shot or higher.''' | + | **'''Secret item requirement: Level 5 charged shot or higher.''' |
*'''Head:''' Treasure, '''Ruby.''' | *'''Head:''' Treasure, '''Ruby.''' | ||
| − | *'''Secret item requirements: Level 3 | + | **'''Secret item requirements: Level 3 shot and magic or higher + Level 5 charged shot or higher.''' |
|- | |- | ||
|} | |} | ||
| Line 260: | Line 260: | ||
Phase 2= | Phase 2= | ||
| − | {| class="wikitable" style="background-color:#FFFFFF;" | + | {| class="wikitable" style="background-color:#FFFFFF; width: 100%" |
|- | |- | ||
| − | ! colspan="2" | <big>Enemy</big> | + | ! colspan="2" style="width: 18.4%;" | <big>Enemy</big> |
! <big>Info</big> | ! <big>Info</big> | ||
|- | |- | ||
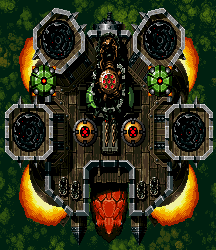
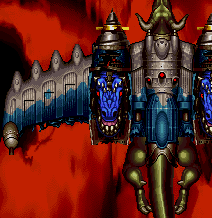
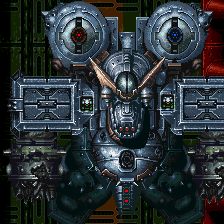
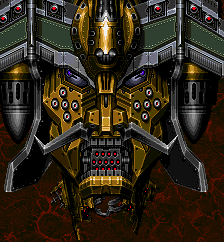
| − | | colspan="2" rowspan="1" | [[File:GMD_busturtle_2.png]] | + | | colspan="2" rowspan="1" | [[File:GMD_busturtle_2.png|center]] |
| style="text-align: left" | | | style="text-align: left" | | ||
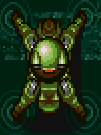
'''Appears in:''' Stage 1. | '''Appears in:''' Stage 1. | ||
| Line 275: | Line 275: | ||
*'''Green drones:''' Food. | *'''Green drones:''' Food. | ||
*'''Large magic turret:''' Accessory, '''Dragonfly.''' | *'''Large magic turret:''' Accessory, '''Dragonfly.''' | ||
| − | *'''Secret item requirements:''' <span style="color:blue">'''Blue polarity'''</span> '''+ empty bomb gauge.''' | + | **'''Secret item requirements:''' <span style="color:blue">'''Blue polarity'''</span> '''+ empty bomb gauge.''' |
*'''Head:''' Treasure, '''Ruby.''' | *'''Head:''' Treasure, '''Ruby.''' | ||
| − | *'''Secret item requirements: Level 3 | + | **'''Secret item requirements: Level 3 shot and magic or higher + Level 5 charged shot or higher.''' |
|- | |- | ||
|} | |} | ||
| Line 285: | Line 285: | ||
Phase 3= | Phase 3= | ||
| − | {| class="wikitable" style="background-color:#FFFFFF;" | + | {| class="wikitable" style="background-color:#FFFFFF; width: 100%" |
|- | |- | ||
| − | ! colspan="2" | <big>Enemy</big> | + | ! colspan="2" style="width: 18.4%;" | <big>Enemy</big> |
! <big>Info</big> | ! <big>Info</big> | ||
|- | |- | ||
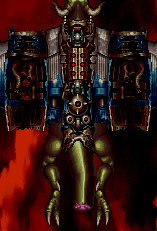
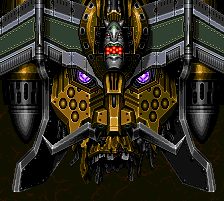
| − | | colspan="2" rowspan="1" | [[File:GMD_busturtle_3.png]] | + | | colspan="2" rowspan="1" | [[File:GMD_busturtle_3.png|center]] |
| style="text-align: left" | | | style="text-align: left" | | ||
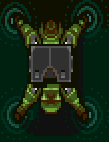
'''Appears in:''' Stage 1. | '''Appears in:''' Stage 1. | ||
| Line 301: | Line 301: | ||
*'''Yellow turrets:''' Accessory. | *'''Yellow turrets:''' Accessory. | ||
*'''Head:''' Treasure, '''Ruby.''' | *'''Head:''' Treasure, '''Ruby.''' | ||
| − | *'''Secret item requirements: Level 3 | + | **'''Secret item requirements: Level 3 shot and magic or higher + Level 5 charged shot or higher.''' |
|- | |- | ||
|} | |} | ||
| Line 311: | Line 311: | ||
==Stage 2 Enemies== | ==Stage 2 Enemies== | ||
| − | {| class="wikitable" style="background-color:#FFFFFF;" | + | {| class="wikitable" style="background-color:#FFFFFF; width: 100%" |
|- | |- | ||
| − | ! colspan="2" | <big>Enemy</big> | + | ! colspan="2" style="width: 18.4%;" | <big>Enemy</big> |
! <big>Info</big> | ! <big>Info</big> | ||
|- | |- | ||
| − | | colspan="2" rowspan="1" | [[File:GMD_jetfighter.png]] | + | | colspan="2" rowspan="1" | [[File:GMD_jetfighter.png|center]] |
| style="text-align: left" | | | style="text-align: left" | | ||
'''Description:''' Zako enemy, depending on the current rank it will fire 2-Way spreads or 3-Way spreads. | '''Description:''' Zako enemy, depending on the current rank it will fire 2-Way spreads or 3-Way spreads. | ||
| Line 328: | Line 328: | ||
|} | |} | ||
| − | {| class="wikitable" style="background-color:#FFFFFF;" | + | {| class="wikitable" style="background-color:#FFFFFF; width: 100%" |
|- | |- | ||
| − | ! colspan="2" | <big>Enemy</big> | + | ! colspan="2" style="width: 18.4%;" | <big>Enemy</big> |
! <big>Info</big> | ! <big>Info</big> | ||
|- | |- | ||
| − | | colspan="2" rowspan="1" | [[File:GMD_flying_tank1.png]] | + | | colspan="2" rowspan="1" | [[File:GMD_flying_tank1.png|center]] |
| style="text-align: left" | | | style="text-align: left" | | ||
'''Description:''' Aims at the player and fires single bullets. | '''Description:''' Aims at the player and fires single bullets. | ||
| Line 347: | Line 347: | ||
|} | |} | ||
| − | {| class="wikitable" style="background-color:#FFFFFF;" | + | {| class="wikitable" style="background-color:#FFFFFF; width: 100%" |
|- | |- | ||
| − | ! colspan="2" | <big>Enemy</big> | + | ! colspan="2" style="width: 18.4%;" | <big>Enemy</big> |
! <big>Info</big> | ! <big>Info</big> | ||
|- | |- | ||
| − | | colspan="2" rowspan="1" | [[File:GMD_gold_ship.png]] | + | | colspan="2" rowspan="1" | [[File:GMD_gold_ship.png|center]] |
| style="text-align: left" | | | style="text-align: left" | | ||
'''Description:''' Fires bullets aimed around and directly at the player. | '''Description:''' Fires bullets aimed around and directly at the player. | ||
| Line 366: | Line 366: | ||
|} | |} | ||
| − | {| class="wikitable" style="background-color:#FFFFFF;" | + | {| class="wikitable" style="background-color:#FFFFFF; width: 100%" |
|- | |- | ||
| − | ! colspan="2" | <big>Enemy</big> | + | ! colspan="2" style="width: 18.4%;" | <big>Enemy</big> |
! <big>Info</big> | ! <big>Info</big> | ||
|- | |- | ||
| − | | colspan="2" rowspan="1" | [[File:GMD_kamikaze_blade_disk.png]] | + | | colspan="2" rowspan="1" | [[File:GMD_kamikaze_blade_disk.png|center]] |
| style="text-align: left" | | | style="text-align: left" | | ||
'''Description:''' Tries to collide with the player, its turret might fire along the way. | '''Description:''' Tries to collide with the player, its turret might fire along the way. | ||
| Line 383: | Line 383: | ||
|} | |} | ||
| − | {| class="wikitable" style="background-color:#FFFFFF;" | + | {| class="wikitable" style="background-color:#FFFFFF; width: 100%" |
|- | |- | ||
| − | ! colspan="2" | <big>Enemy</big> | + | ! colspan="2" style="width: 18.4%;" | <big>Enemy</big> |
! <big>Info</big> | ! <big>Info</big> | ||
|- | |- | ||
| − | | colspan="2" rowspan="1" | [[File:GMD_blade_disk.png]] | + | | colspan="2" rowspan="1" | [[File:GMD_blade_disk.png|center]] |
| style="text-align: left" | | | style="text-align: left" | | ||
'''Description:''' Zako enemy. Its bullets can be sealed. | '''Description:''' Zako enemy. Its bullets can be sealed. | ||
| Line 400: | Line 400: | ||
|} | |} | ||
| − | {| class="wikitable" style="background-color:#FFFFFF;" | + | {| class="wikitable" style="background-color:#FFFFFF; width: 100%" |
|- | |- | ||
| − | ! colspan="2" | <big>Enemy</big> | + | ! colspan="2" style="width: 18.4%;" | <big>Enemy</big> |
! <big>Info</big> | ! <big>Info</big> | ||
|- | |- | ||
| − | | colspan="2" rowspan="1" | [[File:GMD_wizard.png]] | + | | colspan="2" rowspan="1" | [[File:GMD_wizard.png|center]] |
| style="text-align: left" | | | style="text-align: left" | | ||
'''Description:''' Fires 3-Way aimed magic bullets, can be sealed. | '''Description:''' Fires 3-Way aimed magic bullets, can be sealed. | ||
| Line 417: | Line 417: | ||
|} | |} | ||
| − | {| class="wikitable" style="background-color:#FFFFFF;" | + | {| class="wikitable" style="background-color:#FFFFFF; width: 100%" |
|- | |- | ||
| − | ! colspan="2" | <big>Enemy</big> | + | ! colspan="2" style="width: 18.4%;" | <big>Enemy</big> |
! <big>Info</big> | ! <big>Info</big> | ||
|- | |- | ||
| − | | colspan="2" rowspan="1" | [[File:GMD_yellow_plane.png]] | + | | colspan="2" rowspan="1" | [[File:GMD_yellow_plane.png|center]] |
| style="text-align: left" | | | style="text-align: left" | | ||
'''Description:''' Frequently used as a "filler" enemy after a big enemy has been taken out, can be lured off-screen by moving upwards while sealing its bullets. | '''Description:''' Frequently used as a "filler" enemy after a big enemy has been taken out, can be lured off-screen by moving upwards while sealing its bullets. | ||
| Line 434: | Line 434: | ||
|} | |} | ||
| − | {| class="wikitable" style="background-color:#FFFFFF;" | + | {| class="wikitable" style="background-color:#FFFFFF; width: 100%" |
|- | |- | ||
| − | ! colspan="2" | <big>Enemy</big> | + | ! colspan="2" style="width: 18.4%;" | <big>Enemy</big> |
! <big>Info</big> | ! <big>Info</big> | ||
|- | |- | ||
| − | | colspan="2" rowspan="1" | [[File:GMD_st1-2_dragon.png]] | + | | colspan="2" rowspan="1" | [[File:GMD_st1-2_dragon.png|center]] |
| style="text-align: left" | | | style="text-align: left" | | ||
'''Description:''' Its wings fire aimed twin bullets while the center fires magic bullets forward. | '''Description:''' Its wings fire aimed twin bullets while the center fires magic bullets forward. | ||
| Line 453: | Line 453: | ||
|} | |} | ||
| − | {| class="wikitable" style="background-color:#FFFFFF;" | + | {| class="wikitable" style="background-color:#FFFFFF; width: 100%" |
|- | |- | ||
| − | ! colspan="2" | <big>Enemy</big> | + | ! colspan="2" style="width: 18.4%;" | <big>Enemy</big> |
! <big>Info</big> | ! <big>Info</big> | ||
|- | |- | ||
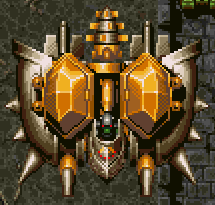
| − | | colspan="2" rowspan="1" | [[File:GMD_spiked_shield_ship.png]] | + | | colspan="2" rowspan="1" | [[File:GMD_spiked_shield_ship.png|center]] |
| style="text-align: left" | | | style="text-align: left" | | ||
'''Description:''' Fires several spreads. | '''Description:''' Fires several spreads. | ||
| Line 468: | Line 468: | ||
'''Drops:''' | '''Drops:''' | ||
*'''Cockpit:''' Armor | *'''Cockpit:''' Armor | ||
| − | *'''Spiked | + | *'''Spiked shields:''' Helmet. |
*'''Body:''' Armor. | *'''Body:''' Armor. | ||
|- | |- | ||
|} | |} | ||
| − | {| class="wikitable" style="background-color:#FFFFFF;" | + | {| class="wikitable" style="background-color:#FFFFFF; width: 100%" |
|- | |- | ||
| − | ! colspan="2" | <big>Enemy</big> | + | ! colspan="2" style="width: 18.4%;" | <big>Enemy</big> |
! <big>Info</big> | ! <big>Info</big> | ||
|- | |- | ||
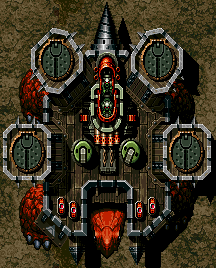
| − | | colspan="2" rowspan="1" | [[File:GMD_carrier.png]] | + | | colspan="2" rowspan="1" | [[File:GMD_carrier.png|center]] |
| style="text-align: left" | | | style="text-align: left" | | ||
'''Description''': A carrier ship with several destructible parts and enemies on top of it. | '''Description''': A carrier ship with several destructible parts and enemies on top of it. | ||
| Line 487: | Line 487: | ||
'''Drops:''' | '''Drops:''' | ||
| − | *'''Small | + | *'''Small turrets:''' Food. |
| − | *'''Missile | + | *'''Missile tanks:''' Accessory. |
| − | *'''Twin turret | + | *'''Twin turret tanks:''' Staff. |
| − | *'''Single turret | + | *'''Single turret tanks:''' Food. |
*'''Boosters:''' Staff. | *'''Boosters:''' Staff. | ||
*'''Side rows:''' Food. | *'''Side rows:''' Food. | ||
| Line 500: | Line 500: | ||
|} | |} | ||
| − | {| class="wikitable" style="background-color:#FFFFFF;" | + | {| class="wikitable" style="background-color:#FFFFFF; width: 100%" |
|- | |- | ||
| − | ! colspan="2" | <big>Enemy</big> | + | ! colspan="2" style="width: 18.4%;" | <big>Enemy</big> |
! <big>Info</big> | ! <big>Info</big> | ||
|- | |- | ||
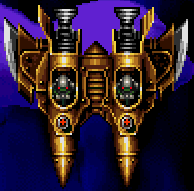
| − | | colspan="2" rowspan="1" | [[File:GMD_st2_midboss.png]] | + | | colspan="2" rowspan="1" | [[File:GMD_st2_midboss.png|center]] |
| style="text-align: left" | | | style="text-align: left" | | ||
'''Description:''' The mid-boss of Stage 2. The timer before it escapes is very short so try to destroy it as soon as possible. | '''Description:''' The mid-boss of Stage 2. The timer before it escapes is very short so try to destroy it as soon as possible. | ||
| Line 517: | Line 517: | ||
*'''Rear guns:''' Shoes. | *'''Rear guns:''' Shoes. | ||
*'''Body:''' Sword, '''Legend Sword.''' | *'''Body:''' Sword, '''Legend Sword.''' | ||
| − | *'''Secret item requirements: Opposite polarity + 4 or more bombs in stock.''' | + | **'''Secret item requirements: Opposite polarity + 4 or more bombs in stock.''' |
|- | |- | ||
|} | |} | ||
| − | {| class="wikitable" style="background-color:#FFFFFF;" | + | {| class="wikitable" style="background-color:#FFFFFF; width: 100%" |
|- | |- | ||
| − | ! colspan="2" | <big>Enemy</big> | + | ! colspan="2" style="width: 18.4%;" | <big>Enemy</big> |
! <big>Info</big> | ! <big>Info</big> | ||
|- | |- | ||
| − | | colspan="2" rowspan="1" | [[File:GMD_flying_tank2.png]] | + | | colspan="2" rowspan="1" | [[File:GMD_flying_tank2.png|center]] |
| style="text-align: left" | | | style="text-align: left" | | ||
'''Description:''' Aims at the player and fires twin bullets. | '''Description:''' Aims at the player and fires twin bullets. | ||
| Line 540: | Line 540: | ||
|} | |} | ||
| − | {| class="wikitable" style="background-color:#FFFFFF;" | + | {| class="wikitable" style="background-color:#FFFFFF; width: 100%" |
|- | |- | ||
| − | ! colspan="2" | <big>Enemy</big> | + | ! colspan="2" style="width: 18.4%;" | <big>Enemy</big> |
! <big>Info</big> | ! <big>Info</big> | ||
|- | |- | ||
| − | | colspan="2" rowspan="1" | [[File:GMD_flying_tank3.png]] | + | | colspan="2" rowspan="1" | [[File:GMD_flying_tank3.png|center]] |
| style="text-align: left" | | | style="text-align: left" | | ||
'''Description:''' Its spinning turret fires bullets in several angles. | '''Description:''' Its spinning turret fires bullets in several angles. | ||
| Line 559: | Line 559: | ||
|} | |} | ||
| − | {| class="wikitable" style="background-color:#FFFFFF;" | + | {| class="wikitable" style="background-color:#FFFFFF; width: 100%" |
|- | |- | ||
| − | ! colspan="2" | <big>Enemy</big> | + | ! colspan="2" style="width: 18.4%;" | <big>Enemy</big> |
! <big>Info</big> | ! <big>Info</big> | ||
|- | |- | ||
| − | | colspan="2" rowspan="1" | [[File:GMD_flying_gobligan.png]] | + | | colspan="2" rowspan="1" | [[File:GMD_flying_gobligan.png|center]] |
| style="text-align: left" | | | style="text-align: left" | | ||
'''Description:''' Dives down, its horizontal movement is based on the player's position. | '''Description:''' Dives down, its horizontal movement is based on the player's position. | ||
| Line 576: | Line 576: | ||
|} | |} | ||
| − | {| class="wikitable" style="background-color:#FFFFFF;" | + | {| class="wikitable" style="background-color:#FFFFFF; width: 100%" |
|- | |- | ||
| − | ! colspan="2" | <big>Enemy</big> | + | ! colspan="2" style="width: 18.4%;" | <big>Enemy</big> |
! <big>Info</big> | ! <big>Info</big> | ||
|- | |- | ||
| − | | colspan="2" rowspan="1" | [[File:GMD_missile_gobligan.png]] | + | | colspan="2" rowspan="1" | [[File:GMD_missile_gobligan.png|center]] |
| style="text-align: left" | | | style="text-align: left" | | ||
'''Description:''' Fires very slow bullets before releasing a barrage of aimed missiles. | '''Description:''' Fires very slow bullets before releasing a barrage of aimed missiles. | ||
| Line 593: | Line 593: | ||
|} | |} | ||
| − | {| class="wikitable" style="background-color:#FFFFFF;" | + | {| class="wikitable" style="background-color:#FFFFFF; width: 100%" |
|- | |- | ||
| − | ! colspan="2" | <big>Enemy</big> | + | ! colspan="2" style="width: 18.4%;" | <big>Enemy</big> |
! <big>Info</big> | ! <big>Info</big> | ||
|- | |- | ||
| − | | colspan="2" rowspan="1" | [[File:GMD_arms_gobligan.png]] | + | | colspan="2" rowspan="1" | [[File:GMD_arms_gobligan.png|center]] |
| style="text-align: left" | | | style="text-align: left" | | ||
'''Description:''' Performs a rocket punch. | '''Description:''' Performs a rocket punch. | ||
| Line 612: | Line 612: | ||
|} | |} | ||
| − | {| class="wikitable" style="background-color:#FFFFFF;" | + | {| class="wikitable" style="background-color:#FFFFFF; width: 100%" |
|- | |- | ||
| − | ! colspan="2" | <big>Enemy</big> | + | ! colspan="2" style="width: 18.4%;" | <big>Enemy</big> |
! <big>Info</big> | ! <big>Info</big> | ||
|- | |- | ||
| − | | colspan="2" rowspan="1" | [[File:GMD_homing_bullets_gobligan.png]] | + | | colspan="2" rowspan="1" | [[File:GMD_homing_bullets_gobligan.png|center]] |
| style="text-align: left" | | | style="text-align: left" | | ||
'''Description:''' Fires two homing bullets. | '''Description:''' Fires two homing bullets. | ||
| Line 635: | Line 635: | ||
Phase 1= | Phase 1= | ||
| − | {| class="wikitable" style="background-color:#FFFFFF;" | + | {| class="wikitable" style="background-color:#FFFFFF; width: 100%" |
|- | |- | ||
| − | ! colspan="2" | <big>Enemy</big> | + | ! colspan="2" style="width: 18.4%;" | <big>Enemy</big> |
! <big>Info</big> | ! <big>Info</big> | ||
|- | |- | ||
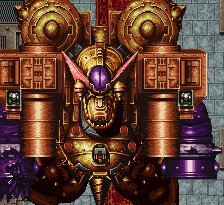
| − | | colspan="2" rowspan="1" | [[File:GMD_dration_1.png]] | + | | colspan="2" rowspan="1" | [[File:GMD_dration_1.png|center]] |
| style="text-align: left" | | | style="text-align: left" | | ||
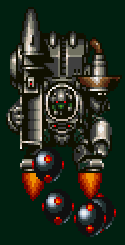
'''Appears in:''' Stage 2. | '''Appears in:''' Stage 2. | ||
| Line 652: | Line 652: | ||
*'''Jets:''' Food. | *'''Jets:''' Food. | ||
*'''Propellers:''' Sword, '''Fairy of Wind.''' | *'''Propellers:''' Sword, '''Fairy of Wind.''' | ||
| − | *'''Secret item requirements:''' <span style="color:red">'''Red polarity'''</span> '''+ level 5 charged shot or higher.''' | + | **'''Secret item requirements:''' <span style="color:red">'''Red polarity'''</span> '''+ level 5 charged shot or higher.''' |
*'''Body:''' Axe. | *'''Body:''' Axe. | ||
|- | |- | ||
| Line 661: | Line 661: | ||
Phase 2= | Phase 2= | ||
| − | {| class="wikitable" style="background-color:#FFFFFF;" | + | {| class="wikitable" style="background-color:#FFFFFF; width: 100%" |
|- | |- | ||
| − | ! colspan="2" | <big>Enemy</big> | + | ! colspan="2" style="width: 18.4%;" | <big>Enemy</big> |
! <big>Info</big> | ! <big>Info</big> | ||
|- | |- | ||
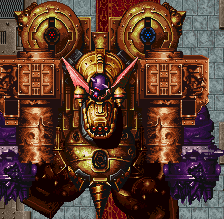
| − | | colspan="2" rowspan="1" | [[File:GMD_dration_2.png]] | + | | colspan="2" rowspan="1" | [[File:GMD_dration_2.png|center]] |
| style="text-align: left" | | | style="text-align: left" | | ||
'''Appears in:''' Stage 2. | '''Appears in:''' Stage 2. | ||
| Line 675: | Line 675: | ||
*'''Dragon heads:''' Sword. | *'''Dragon heads:''' Sword. | ||
*'''Propellers:''' Sword, '''Fairy of Wind.''' | *'''Propellers:''' Sword, '''Fairy of Wind.''' | ||
| − | *'''Secret item requirements:''' <span style="color:red">'''Red polarity'''</span> '''+ level 5 charged shot or higher.''' | + | **'''Secret item requirements:''' <span style="color:red">'''Red polarity'''</span> '''+ level 5 charged shot or higher.''' |
*'''Gun at the tip of the wings:''' Helmet. | *'''Gun at the tip of the wings:''' Helmet. | ||
*'''Base of gun:''' Axe. | *'''Base of gun:''' Axe. | ||
| Line 686: | Line 686: | ||
Phase 3= | Phase 3= | ||
| − | {| class="wikitable" style="background-color:#FFFFFF;" | + | {| class="wikitable" style="background-color:#FFFFFF; width: 100%" |
|- | |- | ||
| − | ! colspan="2" | <big>Enemy</big> | + | ! colspan="2" style="width: 18.4%;" | <big>Enemy</big> |
! <big>Info</big> | ! <big>Info</big> | ||
|- | |- | ||
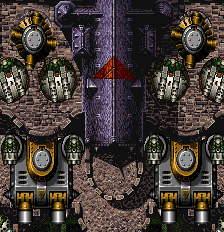
| − | | colspan="2" rowspan="1" | [[File:GMD_dration_3.png]] | + | | colspan="2" rowspan="1" | [[File:GMD_dration_3.png|center]] |
| style="text-align: left" | | | style="text-align: left" | | ||
'''Appears in:''' Stage 2. | '''Appears in:''' Stage 2. | ||
| Line 699: | Line 699: | ||
'''Drops:''' | '''Drops:''' | ||
*'''Core:''' Treasure, '''Emerald.''' | *'''Core:''' Treasure, '''Emerald.''' | ||
| − | *'''Secret item requirements: Level 5 charged shot or higher + 4 or more bombs in stock.''' | + | **'''Secret item requirements: Level 5 charged shot or higher + 4 or more bombs in stock.''' |
|- | |- | ||
|} | |} | ||
| Line 707: | Line 707: | ||
==Stage 3 Enemies== | ==Stage 3 Enemies== | ||
| − | {| class="wikitable" style="background-color:#FFFFFF;" | + | {| class="wikitable" style="background-color:#FFFFFF; width: 100%" |
|- | |- | ||
| − | ! colspan="2" | <big>Enemy</big> | + | ! colspan="2" style="width: 18.4%;" | <big>Enemy</big> |
! <big>Info</big> | ! <big>Info</big> | ||
|- | |- | ||
| − | | colspan="2" rowspan="1" | [[File:GMD_blade_disk.png]] | + | | colspan="2" rowspan="1" | [[File:GMD_blade_disk.png|center]] |
| style="text-align: left" | | | style="text-align: left" | | ||
'''Description:''' Zako enemy. Its bullets can be sealed. | '''Description:''' Zako enemy. Its bullets can be sealed. | ||
| Line 724: | Line 724: | ||
|} | |} | ||
| − | {| class="wikitable" style="background-color:#FFFFFF;" | + | {| class="wikitable" style="background-color:#FFFFFF; width: 100%" |
|- | |- | ||
| − | ! colspan="2" | <big>Enemy</big> | + | ! colspan="2" style="width: 18.4%;" | <big>Enemy</big> |
! <big>Info</big> | ! <big>Info</big> | ||
|- | |- | ||
| − | | colspan="2" rowspan="1" | [[File:GMD_flying_gobligan.png]] | + | | colspan="2" rowspan="1" | [[File:GMD_flying_gobligan.png|center]] |
| style="text-align: left" | | | style="text-align: left" | | ||
'''Description:''' Dives down, its horizontal movement is based on the player's position. | '''Description:''' Dives down, its horizontal movement is based on the player's position. | ||
| Line 741: | Line 741: | ||
|} | |} | ||
| − | {| class="wikitable" style="background-color:#FFFFFF;" | + | {| class="wikitable" style="background-color:#FFFFFF; width: 100%" |
|- | |- | ||
| − | ! colspan="2" | <big>Enemy</big> | + | ! colspan="2" style="width: 18.4%;" | <big>Enemy</big> |
! <big>Info</big> | ! <big>Info</big> | ||
|- | |- | ||
| − | | colspan="2" rowspan="1" | [[File:GMD_hover_turtle.png]] | + | | colspan="2" rowspan="1" | [[File:GMD_hover_turtle.png|center]] |
| style="text-align: left" | | | style="text-align: left" | | ||
'''Description:''' Its turrets fire overlapping bullets while the cannon fires small spreads. | '''Description:''' Its turrets fire overlapping bullets while the cannon fires small spreads. | ||
| Line 758: | Line 758: | ||
*'''Main cannon:''' Helmet. | *'''Main cannon:''' Helmet. | ||
*'''Body:''' Ring, '''Legend Armor.''' | *'''Body:''' Ring, '''Legend Armor.''' | ||
| − | *'''Secret item requirements: 4 or more bombs in stock + level 8 charged shot.''' | + | **'''Secret item requirements: 4 or more bombs in stock + level 8 charged shot.''' |
|- | |- | ||
|} | |} | ||
| − | {| class="wikitable" style="background-color:#FFFFFF;" | + | {| class="wikitable" style="background-color:#FFFFFF; width: 100%" |
|- | |- | ||
| − | ! colspan="2" | <big>Enemy</big> | + | ! colspan="2" style="width: 18.4%;" | <big>Enemy</big> |
! <big>Info</big> | ! <big>Info</big> | ||
|- | |- | ||
| − | | colspan="2" rowspan="1" | [[File:GMD_wizard.png]] | + | | colspan="2" rowspan="1" | [[File:GMD_wizard.png|center]] |
| style="text-align: left" | | | style="text-align: left" | | ||
'''Description:''' Fires 3-Way aimed magic bullets, can be sealed. | '''Description:''' Fires 3-Way aimed magic bullets, can be sealed. | ||
| Line 779: | Line 779: | ||
|} | |} | ||
| − | {| class="wikitable" style="background-color:#FFFFFF;" | + | {| class="wikitable" style="background-color:#FFFFFF; width: 100%" |
|- | |- | ||
| − | ! colspan="2" | <big>Enemy</big> | + | ! colspan="2" style="width: 18.4%;" | <big>Enemy</big> |
! <big>Info</big> | ! <big>Info</big> | ||
|- | |- | ||
| − | | colspan="2" rowspan="1" | [[File:GMD_yellow_plane.png]] | + | | colspan="2" rowspan="1" | [[File:GMD_yellow_plane.png|center]] |
| style="text-align: left" | | | style="text-align: left" | | ||
'''Description:''' Frequently used as a "filler" enemy after a big enemy has been taken out, can be lured off-screen by moving upwards while sealing its bullets. | '''Description:''' Frequently used as a "filler" enemy after a big enemy has been taken out, can be lured off-screen by moving upwards while sealing its bullets. | ||
| Line 796: | Line 796: | ||
|} | |} | ||
| − | {| class="wikitable" style="background-color:#FFFFFF;" | + | {| class="wikitable" style="background-color:#FFFFFF; width: 100%" |
|- | |- | ||
| − | ! colspan="2" | <big>Enemy</big> | + | ! colspan="2" style="width: 18.4%;" | <big>Enemy</big> |
! <big>Info</big> | ! <big>Info</big> | ||
|- | |- | ||
| − | | colspan="2" rowspan="1" | [[File:GMD_st3-6_dragon.png]] | + | | colspan="2" rowspan="1" | [[File:GMD_st3-6_dragon.png|center]] |
| style="text-align: left" | | | style="text-align: left" | | ||
'''Description:''' Its wings fire aimed and static bullets while the center fires 3-Way magic bullets. | '''Description:''' Its wings fire aimed and static bullets while the center fires 3-Way magic bullets. | ||
| Line 815: | Line 815: | ||
|} | |} | ||
| − | {| class="wikitable" style="background-color:#FFFFFF;" | + | {| class="wikitable" style="background-color:#FFFFFF; width: 100%" |
|- | |- | ||
| − | ! colspan="2" | <big>Enemy</big> | + | ! colspan="2" style="width: 18.4%;" | <big>Enemy</big> |
! <big>Info</big> | ! <big>Info</big> | ||
|- | |- | ||
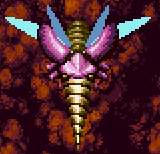
| − | | colspan="2" rowspan="1" | [[File:GMD_st3_large_drill.png]] | + | | colspan="2" rowspan="1" | [[File:GMD_st3_large_drill.png|center]] |
| style="text-align: left" | | | style="text-align: left" | | ||
'''Description:''' Starts firing fast spreads when low enough on the screen. This enemy is extremely resilient if you try to take it down with its own polarity, always use <span style="color:blue">'''blue'''</span>. | '''Description:''' Starts firing fast spreads when low enough on the screen. This enemy is extremely resilient if you try to take it down with its own polarity, always use <span style="color:blue">'''blue'''</span>. | ||
| Line 834: | Line 834: | ||
|} | |} | ||
| − | {| class="wikitable" style="background-color:#FFFFFF;" | + | {| class="wikitable" style="background-color:#FFFFFF; width: 100%" |
|- | |- | ||
| − | ! colspan="2" | <big>Enemy</big> | + | ! colspan="2" style="width: 18.4%;" | <big>Enemy</big> |
! <big>Info</big> | ! <big>Info</big> | ||
|- | |- | ||
| − | | colspan="2" rowspan="1" | [[File:GMD_tank3.png]] | + | | colspan="2" rowspan="1" | [[File:GMD_tank3.png|center]] |
| style="text-align: left" | | | style="text-align: left" | | ||
'''Description:''' Aims at the player and fires twin bullets. | '''Description:''' Aims at the player and fires twin bullets. | ||
| Line 853: | Line 853: | ||
|} | |} | ||
| − | {| class="wikitable" style="background-color:#FFFFFF;" | + | {| class="wikitable" style="background-color:#FFFFFF; width: 100%" |
|- | |- | ||
| − | ! colspan="2" | <big>Enemy</big> | + | ! colspan="2" style="width: 18.4%;" | <big>Enemy</big> |
! <big>Info</big> | ! <big>Info</big> | ||
|- | |- | ||
| − | | colspan="2" rowspan="1" | [[File:GMD_small_turret1.png]] | + | | colspan="2" rowspan="1" | [[File:GMD_small_turret1.png|center]] |
| style="text-align: left" | | | style="text-align: left" | | ||
'''Description:''' A very small turret that aims at the player and fires single bullets. | '''Description:''' A very small turret that aims at the player and fires single bullets. | ||
| Line 870: | Line 870: | ||
|} | |} | ||
| − | {| class="wikitable" style="background-color:#FFFFFF;" | + | {| class="wikitable" style="background-color:#FFFFFF; width: 100%" |
|- | |- | ||
| − | ! colspan="2" | <big>Enemy</big> | + | ! colspan="2" style="width: 18.4%;" | <big>Enemy</big> |
! <big>Info</big> | ! <big>Info</big> | ||
|- | |- | ||
| − | | colspan="2" rowspan="1" | [[File:GMD_tank1.png]] | + | | colspan="2" rowspan="1" | [[File:GMD_tank1.png|center]] |
| style="text-align: left" | | | style="text-align: left" | | ||
'''Description:''' Aims at the player and fires single bullets. | '''Description:''' Aims at the player and fires single bullets. | ||
| Line 889: | Line 889: | ||
|} | |} | ||
| − | {| class="wikitable" style="background-color:#FFFFFF;" | + | {| class="wikitable" style="background-color:#FFFFFF; width: 100%" |
|- | |- | ||
| − | ! colspan="2" | <big>Enemy</big> | + | ! colspan="2" style="width: 18.4%;" | <big>Enemy</big> |
! <big>Info</big> | ! <big>Info</big> | ||
|- | |- | ||
| − | | colspan="2" rowspan="1" | [[File:GMD_laser_cannon.png]] | + | | colspan="2" rowspan="1" | [[File:GMD_laser_cannon.png|center]] |
| style="text-align: left" | | | style="text-align: left" | | ||
'''Description:''' Locks-on to the player's position and fires a large laser. | '''Description:''' Locks-on to the player's position and fires a large laser. | ||
| Line 906: | Line 906: | ||
|} | |} | ||
| − | {| class="wikitable" style="background-color:#FFFFFF;" | + | {| class="wikitable" style="background-color:#FFFFFF; width: 100%" |
|- | |- | ||
| − | ! colspan="2" | <big>Enemy</big> | + | ! colspan="2" style="width: 18.4%;" | <big>Enemy</big> |
! <big>Info</big> | ! <big>Info</big> | ||
|- | |- | ||
| − | | colspan="2" rowspan="1" | [[File:GMD_magic_ship.png]] | + | | colspan="2" rowspan="1" | [[File:GMD_magic_ship.png|center]] |
| style="text-align: left" | | | style="text-align: left" | | ||
'''Description:''' Fires magic bullets in an enclosing pattern followed by a mixture of aimed and static patterns. | '''Description:''' Fires magic bullets in an enclosing pattern followed by a mixture of aimed and static patterns. | ||
| Line 923: | Line 923: | ||
|} | |} | ||
| − | {| class="wikitable" style="background-color:#FFFFFF;" | + | {| class="wikitable" style="background-color:#FFFFFF; width: 100%" |
|- | |- | ||
| − | ! colspan="2" | <big>Enemy</big> | + | ! colspan="2" style="width: 18.4%;" | <big>Enemy</big> |
! <big>Info</big> | ! <big>Info</big> | ||
|- | |- | ||
| − | | colspan="2" rowspan="1" | [[File:GMD_st3_dormant_dragon.png]] | + | | colspan="2" rowspan="1" | [[File:GMD_st3_dormant_dragon.png|center]] |
| style="text-align: left" | | | style="text-align: left" | | ||
'''Description:''' A dragon chilling amongst all the havoc, non-threatening. | '''Description:''' A dragon chilling amongst all the havoc, non-threatening. | ||
| Line 940: | Line 940: | ||
|} | |} | ||
| − | {| class="wikitable" style="background-color:#FFFFFF;" | + | {| class="wikitable" style="background-color:#FFFFFF; width: 100%" |
|- | |- | ||
| − | ! colspan="2" | <big>Enemy</big> | + | ! colspan="2" style="width: 18.4%;" | <big>Enemy</big> |
! <big>Info</big> | ! <big>Info</big> | ||
|- | |- | ||
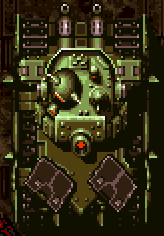
| − | | colspan="2" rowspan="1" | [[File:GMD_st3_large_tank.png]] | + | | colspan="2" rowspan="1" | [[File:GMD_st3_large_tank.png|center]] |
| style="text-align: left" | | | style="text-align: left" | | ||
'''Description:''' A large tank with several turrets to destroy. | '''Description:''' A large tank with several turrets to destroy. | ||
| Line 958: | Line 958: | ||
*'''Twin turret:''' Staff. | *'''Twin turret:''' Staff. | ||
*'''Main turret:''' Shield. | *'''Main turret:''' Shield. | ||
| − | *'''Spinning | + | *'''Spinning turrets underneath:''' Armor. |
*'''Body:''' Shield. | *'''Body:''' Shield. | ||
|- | |- | ||
|} | |} | ||
| − | {| class="wikitable" style="background-color:#FFFFFF;" | + | {| class="wikitable" style="background-color:#FFFFFF; width: 100%" |
|- | |- | ||
| − | ! colspan="2" | <big>Enemy</big> | + | ! colspan="2" style="width: 18.4%;" | <big>Enemy</big> |
! <big>Info</big> | ! <big>Info</big> | ||
|- | |- | ||
| − | | colspan="2" rowspan="1" | [[File:GMD_large_turret1.png]] | + | | colspan="2" rowspan="1" | [[File:GMD_large_turret1.png|center]] |
| style="text-align: left" | | | style="text-align: left" | | ||
'''Description:''' A large turret that aims at the player and fires single bullets. | '''Description:''' A large turret that aims at the player and fires single bullets. | ||
| Line 980: | Line 980: | ||
|} | |} | ||
| − | {| class="wikitable" style="background-color:#FFFFFF;" | + | {| class="wikitable" style="background-color:#FFFFFF; width: 100%" |
|- | |- | ||
| − | ! colspan="2" | <big>Enemy</big> | + | ! colspan="2" style="width: 18.4%;" | <big>Enemy</big> |
! <big>Info</big> | ! <big>Info</big> | ||
|- | |- | ||
| − | | colspan="2" rowspan="1" | [[File:GMD_large_turret2.png]] | + | | colspan="2" rowspan="1" | [[File:GMD_large_turret2.png|center]] |
| style="text-align: left" | | | style="text-align: left" | | ||
'''Description:''' A large turret that aims at the player and fires twin bullets. | '''Description:''' A large turret that aims at the player and fires twin bullets. | ||
| Line 997: | Line 997: | ||
|} | |} | ||
| − | {| class="wikitable" style="background-color:#FFFFFF;" | + | {| class="wikitable" style="background-color:#FFFFFF; width: 100%" |
|- | |- | ||
| − | ! colspan="2" | <big>Enemy</big> | + | ! colspan="2" style="width: 18.4%;" | <big>Enemy</big> |
! <big>Info</big> | ! <big>Info</big> | ||
|- | |- | ||
| − | | colspan="2" rowspan="1" | [[File:GMD_st3_midboss.png]] | + | | colspan="2" rowspan="1" | [[File:GMD_st3_midboss.png|center]] |
| style="text-align: left" | | | style="text-align: left" | | ||
'''Description:''' The mid-boss of Stage 3. Has quite a lot of destructible parts but none of them are particularly threatening. Most importantly, this serves as the last opportunity to finish item sets such as the Staff, Accessory, Armor and Helmet. | '''Description:''' The mid-boss of Stage 3. Has quite a lot of destructible parts but none of them are particularly threatening. Most importantly, this serves as the last opportunity to finish item sets such as the Staff, Accessory, Armor and Helmet. | ||
| Line 1,015: | Line 1,015: | ||
**'''Body:''' Accessory. | **'''Body:''' Accessory. | ||
*'''Doors:''' Food. | *'''Doors:''' Food. | ||
| − | *'''Enclosing | + | *'''Enclosing turrets:''' Food. |
*'''Small turrets:''' Food. | *'''Small turrets:''' Food. | ||
| − | *'''Large spinning | + | *'''Large spinning turrets:''' Ring. |
*'''Cockpit guns:''' Armor. | *'''Cockpit guns:''' Armor. | ||
*'''Cockpit:''' Shield. | *'''Cockpit:''' Shield. | ||
| Line 1,030: | Line 1,030: | ||
Phase 1= | Phase 1= | ||
| − | {| class="wikitable" style="background-color:#FFFFFF;" | + | {| class="wikitable" style="background-color:#FFFFFF; width: 100%" |
|- | |- | ||
| − | ! colspan="2" | <big>Enemy</big> | + | ! colspan="2" style="width: 18.4%;" | <big>Enemy</big> |
! <big>Info</big> | ! <big>Info</big> | ||
|- | |- | ||
| − | | colspan="2" rowspan="1" | [[File:GMD_dribling_1.png]] | + | | colspan="2" rowspan="1" | [[File:GMD_dribling_1.png|center]] |
| style="text-align: left" | | | style="text-align: left" | | ||
'''Appears in:''' Stage 3. | '''Appears in:''' Stage 3. | ||
| Line 1,046: | Line 1,046: | ||
*'''Red guns in chest:''' Food. | *'''Red guns in chest:''' Food. | ||
*'''Chest turret:''' Accessory, '''Fairy of Earth.''' | *'''Chest turret:''' Accessory, '''Fairy of Earth.''' | ||
| − | *'''Secret item requirement: Level 5 charged shot or higher.''' | + | **'''Secret item requirement: Level 5 charged shot or higher.''' |
*'''Head:''' Treasure, '''Crystal.''' | *'''Head:''' Treasure, '''Crystal.''' | ||
| − | *'''Secret item requirements: Level 5 charged shot or higher + 4 or more bombs in stock''' | + | **'''Secret item requirements: Level 5 charged shot or higher + 4 or more bombs in stock''' |
|- | |- | ||
|} | |} | ||
| Line 1,056: | Line 1,056: | ||
Phase 2= | Phase 2= | ||
| − | {| class="wikitable" style="background-color:#FFFFFF;" | + | {| class="wikitable" style="background-color:#FFFFFF; width: 100%" |
|- | |- | ||
| − | ! colspan="2" | <big>Enemy</big> | + | ! colspan="2" style="width: 18.4%;" | <big>Enemy</big> |
! <big>Info</big> | ! <big>Info</big> | ||
|- | |- | ||
| − | | colspan="2" rowspan="1" | [[File:GMD_dribling_2.png]] | + | | colspan="2" rowspan="1" | [[File:GMD_dribling_2.png|center]] |
| style="text-align: left" | | | style="text-align: left" | | ||
'''Appears in:''' Stage 3. | '''Appears in:''' Stage 3. | ||
| Line 1,071: | Line 1,071: | ||
*'''Rear magic guns:''' Food. | *'''Rear magic guns:''' Food. | ||
*'''Head:''' Treasure, '''Crystal.''' | *'''Head:''' Treasure, '''Crystal.''' | ||
| − | *'''Secret item requirements: Level 5 charged shot or higher + 4 or more bombs in stock''' | + | **'''Secret item requirements: Level 5 charged shot or higher + 4 or more bombs in stock''' |
|- | |- | ||
|} | |} | ||
| Line 1,079: | Line 1,079: | ||
==Stage 4 Enemies== | ==Stage 4 Enemies== | ||
| − | {| class="wikitable" style="background-color:#FFFFFF;" | + | {| class="wikitable" style="background-color:#FFFFFF; width: 100%" |
|- | |- | ||
| − | ! colspan="2" | <big>Enemy</big> | + | ! colspan="2" style="width: 18.4%;" | <big>Enemy</big> |
! <big>Info</big> | ! <big>Info</big> | ||
|- | |- | ||
| − | | colspan="2" rowspan="1" | [[File:GMD_blade_disk.png]] | + | | colspan="2" rowspan="1" | [[File:GMD_blade_disk.png|center]] |
| style="text-align: left" | | | style="text-align: left" | | ||
'''Description:''' Zako enemy. Its bullets can be sealed. | '''Description:''' Zako enemy. Its bullets can be sealed. | ||
| Line 1,096: | Line 1,096: | ||
|} | |} | ||
| − | {| class="wikitable" style="background-color:#FFFFFF;" | + | {| class="wikitable" style="background-color:#FFFFFF; width: 100%" |
|- | |- | ||
| − | ! colspan="2" | <big>Enemy</big> | + | ! colspan="2" style="width: 18.4%;" | <big>Enemy</big> |
! <big>Info</big> | ! <big>Info</big> | ||
|- | |- | ||
| − | | colspan="2" rowspan="1" | [[File:GMD_drill_bug.png]] | + | | colspan="2" rowspan="1" | [[File:GMD_drill_bug.png|center]] |
| style="text-align: left" | | | style="text-align: left" | | ||
'''Description:''' Flies down and launches its drill along the way, the drill will release a large spread of bullets when destroyed. | '''Description:''' Flies down and launches its drill along the way, the drill will release a large spread of bullets when destroyed. | ||
| Line 1,115: | Line 1,115: | ||
|} | |} | ||
| − | {| class="wikitable" style="background-color:#FFFFFF;" | + | {| class="wikitable" style="background-color:#FFFFFF; width: 100%" |
|- | |- | ||
| − | ! colspan="2" | <big>Enemy</big> | + | ! colspan="2" style="width: 18.4%;" | <big>Enemy</big> |
! <big>Info</big> | ! <big>Info</big> | ||
|- | |- | ||
| − | | colspan="2" rowspan="1" | [[File:GMD_st4_treasure_chest.png]] | + | | colspan="2" rowspan="1" | [[File:GMD_st4_treasure_chest.png|center]] |
| style="text-align: left" | | | style="text-align: left" | | ||
'''Description:''' Drops a large coin power up when destroyed normally. Non-threatening enemy, but essential for scoring. | '''Description:''' Drops a large coin power up when destroyed normally. Non-threatening enemy, but essential for scoring. | ||
| Line 1,134: | Line 1,134: | ||
|} | |} | ||
| − | {| class="wikitable" style="background-color:#FFFFFF;" | + | {| class="wikitable" style="background-color:#FFFFFF; width: 100%" |
|- | |- | ||
| − | ! colspan="2" | <big>Enemy</big> | + | ! colspan="2" style="width: 18.4%;" | <big>Enemy</big> |
! <big>Info</big> | ! <big>Info</big> | ||
|- | |- | ||
| − | | colspan="2" rowspan="1" | [[File:GMD_st4_mimic.png]] | + | | colspan="2" rowspan="1" | [[File:GMD_st4_mimic.png|center]] |
| style="text-align: left" | | | style="text-align: left" | | ||
'''Description:''' Living creature inside a treasure chest, remains dormant until being attacked, The sealing range is fairly generous and it can't shoot upwards, use that to your advantage. | '''Description:''' Living creature inside a treasure chest, remains dormant until being attacked, The sealing range is fairly generous and it can't shoot upwards, use that to your advantage. | ||
| Line 1,153: | Line 1,153: | ||
|} | |} | ||
| − | {| class="wikitable" style="background-color:#FFFFFF;" | + | {| class="wikitable" style="background-color:#FFFFFF; width: 100%" |
|- | |- | ||
| − | ! colspan="2" | <big>Enemy</big> | + | ! colspan="2" style="width: 18.4%;" | <big>Enemy</big> |
! <big>Info</big> | ! <big>Info</big> | ||
|- | |- | ||
| − | | colspan="2" rowspan="1" | [[File:GMD_tank1.png]] | + | | colspan="2" rowspan="1" | [[File:GMD_tank1.png|center]] |
| style="text-align: left" | | | style="text-align: left" | | ||
'''Description:''' Aims at the player and fires single bullets. | '''Description:''' Aims at the player and fires single bullets. | ||
| Line 1,172: | Line 1,172: | ||
|} | |} | ||
| − | {| class="wikitable" style="background-color:#FFFFFF;" | + | {| class="wikitable" style="background-color:#FFFFFF; width: 100%" |
|- | |- | ||
| − | ! colspan="2" | <big>Enemy</big> | + | ! colspan="2" style="width: 18.4%;" | <big>Enemy</big> |
! <big>Info</big> | ! <big>Info</big> | ||
|- | |- | ||
| − | | colspan="2" rowspan="1" | [[File:GMD_tank3.png]] | + | | colspan="2" rowspan="1" | [[File:GMD_tank3.png|center]] |
| style="text-align: left" | | | style="text-align: left" | | ||
'''Description:''' Aims at the player and fires twin bullets. | '''Description:''' Aims at the player and fires twin bullets. | ||
| Line 1,191: | Line 1,191: | ||
|} | |} | ||
| − | {| class="wikitable" style="background-color:#FFFFFF;" | + | {| class="wikitable" style="background-color:#FFFFFF; width: 100%" |
|- | |- | ||
| − | ! colspan="2" | <big>Enemy</big> | + | ! colspan="2" style="width: 18.4%;" | <big>Enemy</big> |
! <big>Info</big> | ! <big>Info</big> | ||
|- | |- | ||
| − | | colspan="2" rowspan="1" | [[File:GMD_large_shielded_ship.png]] | + | | colspan="2" rowspan="1" | [[File:GMD_large_shielded_ship.png|center]] |
| style="text-align: left" | | | style="text-align: left" | | ||
'''Description:''' Large ship with a considerable amount of HP. Fires very dense spread, dispose of as soon as possible. | '''Description:''' Large ship with a considerable amount of HP. Fires very dense spread, dispose of as soon as possible. | ||
| Line 1,213: | Line 1,213: | ||
|} | |} | ||
| − | {| class="wikitable" style="background-color:#FFFFFF;" | + | {| class="wikitable" style="background-color:#FFFFFF; width: 100%" |
|- | |- | ||
| − | ! colspan="2" | <big>Enemy</big> | + | ! colspan="2" style="width: 18.4%;" | <big>Enemy</big> |
! <big>Info</big> | ! <big>Info</big> | ||
|- | |- | ||
| − | | colspan="2" rowspan="1" | [[File:GMD_wizard.png]] | + | | colspan="2" rowspan="1" | [[File:GMD_wizard.png|center]] |
| style="text-align: left" | | | style="text-align: left" | | ||
'''Description:''' Fires 3-Way aimed magic bullets, can be sealed. | '''Description:''' Fires 3-Way aimed magic bullets, can be sealed. | ||
| Line 1,230: | Line 1,230: | ||
|} | |} | ||
| − | {| class="wikitable" style="background-color:#FFFFFF;" | + | {| class="wikitable" style="background-color:#FFFFFF; width: 100%" |
|- | |- | ||
| − | ! colspan="2" | <big>Enemy</big> | + | ! colspan="2" style="width: 18.4%;" | <big>Enemy</big> |
! <big>Info</big> | ! <big>Info</big> | ||
|- | |- | ||
| − | | colspan="2" rowspan="1" | [[File:GMD_tank2.png]] | + | | colspan="2" rowspan="1" | [[File:GMD_tank2.png|center]] |
| style="text-align: left" | | | style="text-align: left" | | ||
'''Description:''' Its spinning turret fires bullets in several angles. | '''Description:''' Its spinning turret fires bullets in several angles. | ||
| Line 1,249: | Line 1,249: | ||
|} | |} | ||
| − | {| class="wikitable" style="background-color:#FFFFFF;" | + | {| class="wikitable" style="background-color:#FFFFFF; width: 100%" |
|- | |- | ||
| − | ! colspan="2" | <big>Enemy</big> | + | ! colspan="2" style="width: 18.4%;" | <big>Enemy</big> |
! <big>Info</big> | ! <big>Info</big> | ||
|- | |- | ||
| − | | colspan="2" rowspan="1" | [[File:GMD_cannon_turtle.png]] | + | | colspan="2" rowspan="1" | [[File:GMD_cannon_turtle.png|center]] |
| style="text-align: left" | | | style="text-align: left" | | ||
'''Description:''' Its turrets fire overlapping bullets while the cannon fires a very fast line of bullets. | '''Description:''' Its turrets fire overlapping bullets while the cannon fires a very fast line of bullets. | ||
| Line 1,266: | Line 1,266: | ||
*'''Cannon:''' Helmet. | *'''Cannon:''' Helmet. | ||
*'''Body:''' Treasure, '''Legend Boots.''' | *'''Body:''' Treasure, '''Legend Boots.''' | ||
| − | '''Secret item requirements: 4 or more bombs in stock + level 8 charged shot.''' | + | **'''Secret item requirements: 4 or more bombs in stock + level 8 charged shot.''' |
|- | |- | ||
|} | |} | ||
| − | {| class="wikitable" style="background-color:#FFFFFF;" | + | {| class="wikitable" style="background-color:#FFFFFF; width: 100%" |
|- | |- | ||
| − | ! colspan="2" | <big>Enemy</big> | + | ! colspan="2" style="width: 18.4%;" | <big>Enemy</big> |
! <big>Info</big> | ! <big>Info</big> | ||
|- | |- | ||
| − | | colspan="2" rowspan="1" | [[File:GMD_yellow_plane.png]] | + | | colspan="2" rowspan="1" | [[File:GMD_yellow_plane.png|center]] |
| style="text-align: left" | | | style="text-align: left" | | ||
'''Description:''' Frequently used as a "filler" enemy after a big enemy has been taken out, can be lured off-screen by moving upwards while sealing its bullets. | '''Description:''' Frequently used as a "filler" enemy after a big enemy has been taken out, can be lured off-screen by moving upwards while sealing its bullets. | ||
| Line 1,287: | Line 1,287: | ||
|} | |} | ||
| − | {| class="wikitable" style="background-color:#FFFFFF;" | + | {| class="wikitable" style="background-color:#FFFFFF; width: 100%" |
|- | |- | ||
| − | ! colspan="2" | <big>Enemy</big> | + | ! colspan="2" style="width: 18.4%;" | <big>Enemy</big> |
! <big>Info</big> | ! <big>Info</big> | ||
|- | |- | ||
| − | | colspan="2" rowspan="1" | [[File:GMD_st4_drill_truck.png]] | + | | colspan="2" rowspan="1" | [[File:GMD_st4_drill_truck.png|center]] |
| style="text-align: left" | | | style="text-align: left" | | ||
'''Description:''' A truck with a lot of turrets blocking the path, despite the looks it has low HP. | '''Description:''' A truck with a lot of turrets blocking the path, despite the looks it has low HP. | ||
| Line 1,305: | Line 1,305: | ||
*'''Turret on back:''' Staff. | *'''Turret on back:''' Staff. | ||
*'''Drill:''' Treasure, '''Bamboo.''' | *'''Drill:''' Treasure, '''Bamboo.''' | ||
| − | *'''Secret item requirement: Empty bomb gauge.''' | + | **'''Secret item requirement: Empty bomb gauge.''' |
*'''Body:''' Treasure. | *'''Body:''' Treasure. | ||
|- | |- | ||
|} | |} | ||
| − | {| class="wikitable" style="background-color:#FFFFFF;" | + | {| class="wikitable" style="background-color:#FFFFFF; width: 100%" |
|- | |- | ||
| − | ! colspan="2" | <big>Enemy</big> | + | ! colspan="2" style="width: 18.4%;" | <big>Enemy</big> |
! <big>Info</big> | ! <big>Info</big> | ||
|- | |- | ||
| − | | colspan="2" rowspan="1" | [[File:GMD_magic_ship.png]] | + | | colspan="2" rowspan="1" | [[File:GMD_magic_ship.png|center]] |
| style="text-align: left" | | | style="text-align: left" | | ||
'''Description:''' Fires magic bullets in an enclosing pattern followed by a mixture of aimed and static patterns. | '''Description:''' Fires magic bullets in an enclosing pattern followed by a mixture of aimed and static patterns. | ||
| Line 1,327: | Line 1,327: | ||
|} | |} | ||
| − | {| class="wikitable" style="background-color:#FFFFFF;" | + | {| class="wikitable" style="background-color:#FFFFFF; width: 100%" |
|- | |- | ||
| − | ! colspan="2" | <big>Enemy</big> | + | ! colspan="2" style="width: 18.4%;" | <big>Enemy</big> |
! <big>Info</big> | ! <big>Info</big> | ||
|- | |- | ||
| − | | colspan="2" rowspan="1" | [[File:GMD_st4_large_tank.png]] | + | | colspan="2" rowspan="1" | [[File:GMD_st4_large_tank.png|center]] |
| style="text-align: left" | | | style="text-align: left" | | ||
'''Description:''' A large tank with several turrets to destroy. | '''Description:''' A large tank with several turrets to destroy. | ||
| Line 1,341: | Line 1,341: | ||
'''Drops:''' | '''Drops:''' | ||
| − | *'''Spinning | + | *'''Spinning turrets:''' Accessory. |
*'''Main turret:''' Shield. | *'''Main turret:''' Shield. | ||
| − | *'''Spinning | + | *'''Spinning turrets underneath:''' Armor. |
*'''Body:''' Shield. | *'''Body:''' Shield. | ||
|- | |- | ||
|} | |} | ||
| − | {| class="wikitable" style="background-color:#FFFFFF;" | + | {| class="wikitable" style="background-color:#FFFFFF; width: 100%" |
|- | |- | ||
| − | ! colspan="2" | <big>Enemy</big> | + | ! colspan="2" style="width: 18.4%;" | <big>Enemy</big> |
! <big>Info</big> | ! <big>Info</big> | ||
|- | |- | ||
| − | | colspan="2" rowspan="1" | [[File:GMD_tank4.png]] | + | | colspan="2" rowspan="1" | [[File:GMD_tank4.png|center]] |
| style="text-align: left" | | | style="text-align: left" | | ||
'''Description:''' Aims at the player and fires missiles. | '''Description:''' Aims at the player and fires missiles. | ||
| Line 1,367: | Line 1,367: | ||
|} | |} | ||
| − | {| class="wikitable" style="background-color:#FFFFFF;" | + | {| class="wikitable" style="background-color:#FFFFFF; width: 100%" |
|- | |- | ||
| − | ! colspan="2" | <big>Enemy</big> | + | ! colspan="2" style="width: 18.4%;" | <big>Enemy</big> |
! <big>Info</big> | ! <big>Info</big> | ||
|- | |- | ||
| − | | colspan="2" rowspan="1" | [[File:GMD_beholder.png]] | + | | colspan="2" rowspan="1" | [[File:GMD_beholder.png|center]] |
| style="text-align: left" | | | style="text-align: left" | | ||
'''Description:''' Fires bullets in an '''[[Help:Dodging_strategy#Aimed_even|enclosing pattern]]''' and creates clones of itself. | '''Description:''' Fires bullets in an '''[[Help:Dodging_strategy#Aimed_even|enclosing pattern]]''' and creates clones of itself. | ||
| Line 1,384: | Line 1,384: | ||
|} | |} | ||
| − | {| class="wikitable" style="background-color:#FFFFFF;" | + | {| class="wikitable" style="background-color:#FFFFFF; width: 100%" |
|- | |- | ||
| − | ! colspan="2" | <big>Enemy</big> | + | ! colspan="2" style="width: 18.4%;" | <big>Enemy</big> |
! <big>Info</big> | ! <big>Info</big> | ||
|- | |- | ||
| − | | colspan="2" rowspan="1" | [[File:GMD_beholder_clone.png]] | + | | colspan="2" rowspan="1" | [[File:GMD_beholder_clone.png|center]] |
| style="text-align: left" | | | style="text-align: left" | | ||
'''Description:''' Unlike the original beholder this one doesn't attack and leaves shortly after, releases magic bullets when destroyed. | '''Description:''' Unlike the original beholder this one doesn't attack and leaves shortly after, releases magic bullets when destroyed. | ||
| Line 1,401: | Line 1,401: | ||
|} | |} | ||
| − | {| class="wikitable" style="background-color:#FFFFFF;" | + | {| class="wikitable" style="background-color:#FFFFFF; width: 100%" |
|- | |- | ||
| − | ! colspan="2" | <big>Enemy</big> | + | ! colspan="2" style="width: 18.4%;" | <big>Enemy</big> |
! <big>Info</big> | ! <big>Info</big> | ||
|- | |- | ||
| − | | colspan="2" rowspan="1" | [[File:GMD_spiked_shield_ship.png]] | + | | colspan="2" rowspan="1" | [[File:GMD_spiked_shield_ship.png|center]] |
| style="text-align: left" | | | style="text-align: left" | | ||
'''Description:''' Fires several spreads. | '''Description:''' Fires several spreads. | ||
| Line 1,416: | Line 1,416: | ||
'''Drops:''' | '''Drops:''' | ||
*'''Cockpit:''' Armor | *'''Cockpit:''' Armor | ||
| − | *'''Spiked | + | *'''Spiked shields:''' Helmet. |
*'''Body:''' Armor. | *'''Body:''' Armor. | ||
|- | |- | ||
|} | |} | ||
| − | {| class="wikitable" style="background-color:#FFFFFF;" | + | {| class="wikitable" style="background-color:#FFFFFF; width: 100%" |
|- | |- | ||
| − | ! colspan="2" | <big>Enemy</big> | + | ! colspan="2" style="width: 18.4%;" | <big>Enemy</big> |
! <big>Info</big> | ! <big>Info</big> | ||
|- | |- | ||
| − | | colspan="2" rowspan="1" | [[File:GMD_water_tank1.png]] | + | | colspan="2" rowspan="1" | [[File:GMD_water_tank1.png|center]] |
| style="text-align: left" | | | style="text-align: left" | | ||
'''Description:''' Aims at the player and fires single bullets. | '''Description:''' Aims at the player and fires single bullets. | ||
| Line 1,440: | Line 1,440: | ||
|} | |} | ||
| − | {| class="wikitable" style="background-color:#FFFFFF;" | + | {| class="wikitable" style="background-color:#FFFFFF; width: 100%" |
|- | |- | ||
| − | ! colspan="2" | <big>Enemy</big> | + | ! colspan="2" style="width: 18.4%;" | <big>Enemy</big> |
! <big>Info</big> | ! <big>Info</big> | ||
|- | |- | ||
| − | | colspan="2" rowspan="1" | [[File:GMD_st4_serpent.png]] | + | | colspan="2" rowspan="1" | [[File:GMD_st4_serpent.png|center]] |
| style="text-align: left" | | | style="text-align: left" | | ||
'''Description:''' Fires a laser. | '''Description:''' Fires a laser. | ||
| Line 1,459: | Line 1,459: | ||
|} | |} | ||
| − | {| class="wikitable" style="background-color:#FFFFFF;" | + | {| class="wikitable" style="background-color:#FFFFFF; width: 100%" |
|- | |- | ||
| − | ! colspan="2" | <big>Enemy</big> | + | ! colspan="2" style="width: 18.4%;" | <big>Enemy</big> |
! <big>Info</big> | ! <big>Info</big> | ||
|- | |- | ||
| − | | colspan="2" rowspan="1" | [[File:GMD_water_tank2.png]] | + | | colspan="2" rowspan="1" | [[File:GMD_water_tank2.png|center]] |
| style="text-align: left" | | | style="text-align: left" | | ||
'''Description:''' Its spinning turret fires bullets in several angles. | '''Description:''' Its spinning turret fires bullets in several angles. | ||
| Line 1,478: | Line 1,478: | ||
|} | |} | ||
| − | {| class="wikitable" style="background-color:#FFFFFF;" | + | {| class="wikitable" style="background-color:#FFFFFF; width: 100%" |
|- | |- | ||
| − | ! colspan="2" | <big>Enemy</big> | + | ! colspan="2" style="width: 18.4%;" | <big>Enemy</big> |
! <big>Info</big> | ! <big>Info</big> | ||
|- | |- | ||
| − | | colspan="2" rowspan="1" | [[File:GMD_water_tank3.png]] | + | | colspan="2" rowspan="1" | [[File:GMD_water_tank3.png|center]] |
| style="text-align: left" | | | style="text-align: left" | | ||
'''Description:''' Aims at the player and fires twin bullets. | '''Description:''' Aims at the player and fires twin bullets. | ||
| Line 1,497: | Line 1,497: | ||
|} | |} | ||
| − | {| class="wikitable" style="background-color:#FFFFFF;" | + | {| class="wikitable" style="background-color:#FFFFFF; width: 100%" |
|- | |- | ||
| − | ! colspan="2" | <big>Enemy</big> | + | ! colspan="2" style="width: 18.4%;" | <big>Enemy</big> |
! <big>Info</big> | ! <big>Info</big> | ||
|- | |- | ||
| − | | colspan="2" rowspan="1" | [[File:GMD_bombs_gobligan.png]] | + | | colspan="2" rowspan="1" | [[File:GMD_bombs_gobligan.png|center]] |
| style="text-align: left" | | | style="text-align: left" | | ||
'''Description:''' Drops several bombs and leaves, the bombs will explode on their own if not destroyed for a while. | '''Description:''' Drops several bombs and leaves, the bombs will explode on their own if not destroyed for a while. | ||
| Line 1,514: | Line 1,514: | ||
|} | |} | ||
| − | {| class="wikitable" style="background-color:#FFFFFF;" | + | {| class="wikitable" style="background-color:#FFFFFF; width: 100%" |
|- | |- | ||
| − | ! colspan="2" | <big>Enemy</big> | + | ! colspan="2" style="width: 18.4%;" | <big>Enemy</big> |
! <big>Info</big> | ! <big>Info</big> | ||
|- | |- | ||
| − | | colspan="2" rowspan="1" | [[File:GMD_homing_bullets_gobligan.png]] | + | | colspan="2" rowspan="1" | [[File:GMD_homing_bullets_gobligan.png|center]] |
| style="text-align: left" | | | style="text-align: left" | | ||
'''Description:''' Fires two homing bullets. | '''Description:''' Fires two homing bullets. | ||
| Line 1,531: | Line 1,531: | ||
|} | |} | ||
| − | {| class="wikitable" style="background-color:#FFFFFF;" | + | {| class="wikitable" style="background-color:#FFFFFF; width: 100%" |
|- | |- | ||
| − | ! colspan="2" | <big>Enemy</big> | + | ! colspan="2" style="width: 18.4%;" | <big>Enemy</big> |
! <big>Info</big> | ! <big>Info</big> | ||
|- | |- | ||
| − | | colspan="2" rowspan="1" | [[File:GMD_water_tank4.png]] | + | | colspan="2" rowspan="1" | [[File:GMD_water_tank4.png|center]] |
| style="text-align: left" | | | style="text-align: left" | | ||
'''Description:''' Aims at the player and fires missiles. | '''Description:''' Aims at the player and fires missiles. | ||
| Line 1,550: | Line 1,550: | ||
|} | |} | ||
| − | {| class="wikitable" style="background-color:#FFFFFF;" | + | {| class="wikitable" style="background-color:#FFFFFF; width: 100%" |
|- | |- | ||
| − | ! colspan="2" | <big>Enemy</big> | + | ! colspan="2" style="width: 18.4%;" | <big>Enemy</big> |
! <big>Info</big> | ! <big>Info</big> | ||
|- | |- | ||
| − | | colspan="2" rowspan="1" | [[File:GMD_hover_turtle.png]] | + | | colspan="2" rowspan="1" | [[File:GMD_hover_turtle.png|center]] |
| style="text-align: left" | | | style="text-align: left" | | ||
'''Description:''' Its turrets fire overlapping bullets while the cannon fires small spreads. | '''Description:''' Its turrets fire overlapping bullets while the cannon fires small spreads. | ||
| Line 1,567: | Line 1,567: | ||
*'''Main cannon:''' Helmet. | *'''Main cannon:''' Helmet. | ||
*'''Body:''' Ring, '''Legend Armor.''' | *'''Body:''' Ring, '''Legend Armor.''' | ||
| − | *'''Secret item requirements: 4 or more bombs in stock + level 8 charged shot.''' | + | **'''Secret item requirements: 4 or more bombs in stock + level 8 charged shot.''' |
|- | |- | ||
|} | |} | ||
| − | {| class="wikitable" style="background-color:#FFFFFF;" | + | {| class="wikitable" style="background-color:#FFFFFF; width: 100%" |
|- | |- | ||
| − | ! colspan="2" | <big>Enemy</big> | + | ! colspan="2" style="width: 18.4%;" | <big>Enemy</big> |
! <big>Info</big> | ! <big>Info</big> | ||
|- | |- | ||
| − | | colspan="2" rowspan="1" | [[File:GMD_st4-5_gobligan.png]] | + | | colspan="2" rowspan="1" | [[File:GMD_st4-5_gobligan.png|center]] |
| style="text-align: left" | | | style="text-align: left" | | ||
'''Description:''' Completely harmless to the player. | '''Description:''' Completely harmless to the player. | ||
| Line 1,594: | Line 1,594: | ||
Phase 1= | Phase 1= | ||
| − | {| class="wikitable" style="background-color:#FFFFFF;" | + | {| class="wikitable" style="background-color:#FFFFFF; width: 100%" |
|- | |- | ||
| − | ! colspan="2" | <big>Enemy</big> | + | ! colspan="2" style="width: 18.4%;" | <big>Enemy</big> |
! <big>Info</big> | ! <big>Info</big> | ||
|- | |- | ||
| − | | colspan="2" rowspan="1" | [[File:GMD_cypider_1.png]] | + | | colspan="2" rowspan="1" | [[File:GMD_cypider_1.png|center]] |
| style="text-align: left" | | | style="text-align: left" | | ||
'''Appears in:''' Stage 4. | '''Appears in:''' Stage 4. | ||
| Line 1,611: | Line 1,611: | ||
*'''Slow bullets gun:''' Staff. | *'''Slow bullets gun:''' Staff. | ||
*'''Abdomen:''' Staff, '''Fairy of Water.''' | *'''Abdomen:''' Staff, '''Fairy of Water.''' | ||
| − | *'''Secret item requirements:''' <span style="color:red">'''Red polarity'''</span> '''+ level 5 charged shot or higher.''' | + | **'''Secret item requirements:''' <span style="color:red">'''Red polarity'''</span> '''+ level 5 charged shot or higher.''' |
*'''Small spiders:''' Food. | *'''Small spiders:''' Food. | ||
*'''First layer of head''': Helmet. | *'''First layer of head''': Helmet. | ||
| Line 1,621: | Line 1,621: | ||
Phase 2= | Phase 2= | ||
| − | {| class="wikitable" style="background-color:#FFFFFF;" | + | {| class="wikitable" style="background-color:#FFFFFF; width: 100%" |
|- | |- | ||
| − | ! colspan="2" | <big>Enemy</big> | + | ! colspan="2" style="width: 18.4%;" | <big>Enemy</big> |
! <big>Info</big> | ! <big>Info</big> | ||
|- | |- | ||
| − | | colspan="2" rowspan="1" | [[File:GMD_cypider_2.png]] | + | | colspan="2" rowspan="1" | [[File:GMD_cypider_2.png|center]] |
| style="text-align: left" | | | style="text-align: left" | | ||
'''Appears in:''' Stage 4. | '''Appears in:''' Stage 4. | ||
| Line 1,639: | Line 1,639: | ||
*'''Small spiders:''' Food. | *'''Small spiders:''' Food. | ||
*'''Head:''' Treasure, '''Pearl.''' | *'''Head:''' Treasure, '''Pearl.''' | ||
| − | *'''Secret item requirements: Empty magic meter + 4 or more bombs in stock.''' | + | **'''Secret item requirements: Empty magic meter + 4 or more bombs in stock.''' |
|- | |- | ||
|} | |} | ||
| Line 1,647: | Line 1,647: | ||
==Stage 5 Enemies== | ==Stage 5 Enemies== | ||
| − | {| class="wikitable" style="background-color:#FFFFFF;" | + | {| class="wikitable" style="background-color:#FFFFFF; width: 100%" |
|- | |- | ||
| − | ! colspan="2" | <big>Enemy</big> | + | ! colspan="2" style="width: 18.4%;" | <big>Enemy</big> |
! <big>Info</big> | ! <big>Info</big> | ||
|- | |- | ||
| − | | colspan="2" rowspan="1" | [[File:GMD_st5_train.png]] | + | | colspan="2" rowspan="1" | [[File:GMD_st5_train.png|center]] |
| style="text-align: left" | | | style="text-align: left" | | ||
'''Description:''' Train carrying a wagon with many turrets and tanks listed below. | '''Description:''' Train carrying a wagon with many turrets and tanks listed below. | ||
| Line 1,664: | Line 1,664: | ||
|} | |} | ||
| − | {| class="wikitable" style="background-color:#FFFFFF;" | + | {| class="wikitable" style="background-color:#FFFFFF; width: 100%" |
|- | |- | ||
| − | ! colspan="2" | <big>Enemy</big> | + | ! colspan="2" style="width: 18.4%;" | <big>Enemy</big> |
! <big>Info</big> | ! <big>Info</big> | ||
|- | |- | ||
| − | | colspan="2" rowspan="1" | [[File:GMD_blade_disk.png]] | + | | colspan="2" rowspan="1" | [[File:GMD_blade_disk.png|center]] |
| style="text-align: left" | | | style="text-align: left" | | ||
'''Description:''' Zako enemy. Its bullets can be sealed. | '''Description:''' Zako enemy. Its bullets can be sealed. | ||
| Line 1,681: | Line 1,681: | ||
|} | |} | ||
| − | {| class="wikitable" style="background-color:#FFFFFF;" | + | {| class="wikitable" style="background-color:#FFFFFF; width: 100%" |
|- | |- | ||
| − | ! colspan="2" | <big>Enemy</big> | + | ! colspan="2" style="width: 18.4%;" | <big>Enemy</big> |
! <big>Info</big> | ! <big>Info</big> | ||
|- | |- | ||
| − | | colspan="2" rowspan="1" | [[File:GMD_tank1.png]] | + | | colspan="2" rowspan="1" | [[File:GMD_tank1.png|center]] |
| style="text-align: left" | | | style="text-align: left" | | ||
'''Description:''' Aims at the player and fires single bullets. | '''Description:''' Aims at the player and fires single bullets. | ||
| Line 1,700: | Line 1,700: | ||
|} | |} | ||
| − | {| class="wikitable" style="background-color:#FFFFFF;" | + | {| class="wikitable" style="background-color:#FFFFFF; width: 100%" |
|- | |- | ||
| − | ! colspan="2" | <big>Enemy</big> | + | ! colspan="2" style="width: 18.4%;" | <big>Enemy</big> |
! <big>Info</big> | ! <big>Info</big> | ||
|- | |- | ||
| − | | colspan="2" rowspan="1" | [[File:GMD_tank3.png]] | + | | colspan="2" rowspan="1" | [[File:GMD_tank3.png|center]] |
| style="text-align: left" | | | style="text-align: left" | | ||
'''Description:''' Aims at the player and fires twin bullets. | '''Description:''' Aims at the player and fires twin bullets. | ||
| Line 1,719: | Line 1,719: | ||
|} | |} | ||
| − | {| class="wikitable" style="background-color:#FFFFFF;" | + | {| class="wikitable" style="background-color:#FFFFFF; width: 100%" |
|- | |- | ||
| − | ! colspan="2" | <big>Enemy</big> | + | ! colspan="2" style="width: 18.4%;" | <big>Enemy</big> |
! <big>Info</big> | ! <big>Info</big> | ||
|- | |- | ||
| − | | colspan="2" rowspan="1" | [[File:GMD_tank2.png]] | + | | colspan="2" rowspan="1" | [[File:GMD_tank2.png|center]] |
| style="text-align: left" | | | style="text-align: left" | | ||
'''Description:''' Its spinning turret fires bullets in several angles. | '''Description:''' Its spinning turret fires bullets in several angles. | ||
| Line 1,738: | Line 1,738: | ||
|} | |} | ||
| − | {| class="wikitable" style="background-color:#FFFFFF;" | + | {| class="wikitable" style="background-color:#FFFFFF; width: 100%" |
|- | |- | ||
| − | ! colspan="2" | <big>Enemy</big> | + | ! colspan="2" style="width: 18.4%;" | <big>Enemy</big> |
! <big>Info</big> | ! <big>Info</big> | ||
|- | |- | ||
| − | | colspan="2" rowspan="1" | [[File:GMD_tank4.png]] | + | | colspan="2" rowspan="1" | [[File:GMD_tank4.png|center]] |
| style="text-align: left" | | | style="text-align: left" | | ||
'''Description:''' Aims at the player and fires missiles. | '''Description:''' Aims at the player and fires missiles. | ||
| Line 1,757: | Line 1,757: | ||
|} | |} | ||
| − | {| class="wikitable" style="background-color:#FFFFFF;" | + | {| class="wikitable" style="background-color:#FFFFFF; width: 100%" |
|- | |- | ||
| − | ! colspan="2" | <big>Enemy</big> | + | ! colspan="2" style="width: 18.4%;" | <big>Enemy</big> |
! <big>Info</big> | ! <big>Info</big> | ||
|- | |- | ||
| − | | colspan="2" rowspan="1" | [[File:GMD_large_turret2.png]] | + | | colspan="2" rowspan="1" | [[File:GMD_large_turret2.png|center]] |
| style="text-align: left" | | | style="text-align: left" | | ||
'''Description:''' A large turret that aims at the player and fires twin bullets. | '''Description:''' A large turret that aims at the player and fires twin bullets. | ||
| Line 1,774: | Line 1,774: | ||
|} | |} | ||
| − | {| class="wikitable" style="background-color:#FFFFFF;" | + | {| class="wikitable" style="background-color:#FFFFFF; width: 100%" |
|- | |- | ||
| − | ! colspan="2" | <big>Enemy</big> | + | ! colspan="2" style="width: 18.4%;" | <big>Enemy</big> |
! <big>Info</big> | ! <big>Info</big> | ||
|- | |- | ||
| − | | colspan="2" rowspan="1" | [[File:GMD_flying_gobligan.png]] | + | | colspan="2" rowspan="1" | [[File:GMD_flying_gobligan.png|center]] |
| style="text-align: left" | | | style="text-align: left" | | ||
'''Description:''' Dives down, its horizontal movement is based on the player's position. | '''Description:''' Dives down, its horizontal movement is based on the player's position. | ||
| Line 1,791: | Line 1,791: | ||
|} | |} | ||
| − | {| class="wikitable" style="background-color:#FFFFFF;" | + | {| class="wikitable" style="background-color:#FFFFFF; width: 100%" |
|- | |- | ||
| − | ! colspan="2" | <big>Enemy</big> | + | ! colspan="2" style="width: 18.4%;" | <big>Enemy</big> |
! <big>Info</big> | ! <big>Info</big> | ||
|- | |- | ||
| − | | colspan="2" rowspan="1" | [[File:GMD_wizard.png]] | + | | colspan="2" rowspan="1" | [[File:GMD_wizard.png|center]] |
| style="text-align: left" | | | style="text-align: left" | | ||
'''Description:''' Fires 3-Way aimed magic bullets, can be sealed. | '''Description:''' Fires 3-Way aimed magic bullets, can be sealed. | ||
| Line 1,808: | Line 1,808: | ||
|} | |} | ||
| − | {| class="wikitable" style="background-color:#FFFFFF;" | + | {| class="wikitable" style="background-color:#FFFFFF; width: 100%" |
|- | |- | ||
| − | ! colspan="2" | <big>Enemy</big> | + | ! colspan="2" style="width: 18.4%;" | <big>Enemy</big> |
! <big>Info</big> | ! <big>Info</big> | ||
|- | |- | ||
| − | | colspan="2" rowspan="1" | [[File:GMD_small_turret2.png]] | + | | colspan="2" rowspan="1" | [[File:GMD_small_turret2.png|center]] |
| style="text-align: left" | | | style="text-align: left" | | ||
'''Description:''' A small turrets that aims at the player. Despite the weak appearance, it fires a fast 5-way shot. | '''Description:''' A small turrets that aims at the player. Despite the weak appearance, it fires a fast 5-way shot. | ||
| Line 1,825: | Line 1,825: | ||
|} | |} | ||
| − | {| class="wikitable" style="background-color:#FFFFFF;" | + | {| class="wikitable" style="background-color:#FFFFFF; width: 100%" |
|- | |- | ||
| − | ! colspan="2" | <big>Enemy</big> | + | ! colspan="2" style="width: 18.4%;" | <big>Enemy</big> |
! <big>Info</big> | ! <big>Info</big> | ||
|- | |- | ||
| − | | colspan="2" rowspan="1" | [[File:GMD_small_turret1.png]] | + | | colspan="2" rowspan="1" | [[File:GMD_small_turret1.png|center]] |
| style="text-align: left" | | | style="text-align: left" | | ||
'''Description:''' A very small turret that aims at the player and fires single bullets. | '''Description:''' A very small turret that aims at the player and fires single bullets. | ||
| Line 1,842: | Line 1,842: | ||
|} | |} | ||
| − | {| class="wikitable" style="background-color:#FFFFFF;" | + | {| class="wikitable" style="background-color:#FFFFFF; width: 100%" |
|- | |- | ||
| − | ! colspan="2" | <big>Enemy</big> | + | ! colspan="2" style="width: 18.4%;" | <big>Enemy</big> |
! <big>Info</big> | ! <big>Info</big> | ||
|- | |- | ||
| − | | colspan="2" rowspan="1" | [[File:GMD_large_turret1.png]] | + | | colspan="2" rowspan="1" | [[File:GMD_large_turret1.png|center]] |
| style="text-align: left" | | | style="text-align: left" | | ||
'''Description:''' A large turret that aims at the player and fires single bullets. | '''Description:''' A large turret that aims at the player and fires single bullets. | ||
| Line 1,859: | Line 1,859: | ||
|} | |} | ||
| − | {| class="wikitable" style="background-color:#FFFFFF;" | + | {| class="wikitable" style="background-color:#FFFFFF; width: 100%" |
|- | |- | ||
| − | ! colspan="2" | <big>Enemy</big> | + | ! colspan="2" style="width: 18.4%;" | <big>Enemy</big> |
! <big>Info</big> | ! <big>Info</big> | ||
|- | |- | ||
| − | | colspan="2" rowspan="1" | [[File:GMD_st5_large_tank_1.png]] | + | | colspan="2" rowspan="1" | [[File:GMD_st5_large_tank_1.png|center]] |
| style="text-align: left" | | | style="text-align: left" | | ||
'''Description:''' A large tank with several turrets to destroy. | '''Description:''' A large tank with several turrets to destroy. | ||
| Line 1,873: | Line 1,873: | ||
'''Drops: | '''Drops: | ||
| − | *'''Single | + | *'''Single turrets:''' Food. |
*'''Twin turret:''' Staff. | *'''Twin turret:''' Staff. | ||
*'''Main turret:''' Shield. | *'''Main turret:''' Shield. | ||
| − | *'''Spinning | + | *'''Spinning turrets underneath:''' Armor. |
*'''Body:''' Shield. | *'''Body:''' Shield. | ||
|- | |- | ||
|} | |} | ||
| − | {| class="wikitable" style="background-color:#FFFFFF;" | + | {| class="wikitable" style="background-color:#FFFFFF; width: 100%" |
|- | |- | ||
| − | ! colspan="2" | <big>Enemy</big> | + | ! colspan="2" style="width: 18.4%;" | <big>Enemy</big> |
! <big>Info</big> | ! <big>Info</big> | ||
|- | |- | ||
| − | | colspan="2" rowspan="1" | [[File:GMD_gold_ship.png]] | + | | colspan="2" rowspan="1" | [[File:GMD_gold_ship.png|center]] |
| style="text-align: left" | | | style="text-align: left" | | ||
'''Description:''' Fires bullets aimed around and directly at the player. | '''Description:''' Fires bullets aimed around and directly at the player. | ||
| Line 1,900: | Line 1,900: | ||
|} | |} | ||
| − | {| class="wikitable" style="background-color:#FFFFFF;" | + | {| class="wikitable" style="background-color:#FFFFFF; width: 100%" |
|- | |- | ||
| − | ! colspan="2" | <big>Enemy</big> | + | ! colspan="2" style="width: 18.4%;" | <big>Enemy</big> |
! <big>Info</big> | ! <big>Info</big> | ||
|- | |- | ||
| − | | colspan="2" rowspan="1" | [[File:GMD_laser_cannon.png]] | + | | colspan="2" rowspan="1" | [[File:GMD_laser_cannon.png|center]] |
| style="text-align: left" | | | style="text-align: left" | | ||
'''Description:''' Locks-on to the player's position and fires a large laser. | '''Description:''' Locks-on to the player's position and fires a large laser. | ||
| Line 1,917: | Line 1,917: | ||
|} | |} | ||
| − | {| class="wikitable" style="background-color:#FFFFFF;" | + | {| class="wikitable" style="background-color:#FFFFFF; width: 100%" |
|- | |- | ||
| − | ! colspan="2" | <big>Enemy</big> | + | ! colspan="2" style="width: 18.4%;" | <big>Enemy</big> |
! <big>Info</big> | ! <big>Info</big> | ||
|- | |- | ||
| − | | colspan="2" rowspan="1" | [[File:GMD_st5_containers_and_barrels.png]] | + | | colspan="2" rowspan="1" | [[File:GMD_st5_containers_and_barrels.png|center]] |
| style="text-align: left" | | | style="text-align: left" | | ||
'''Description:''' Stage decoration. | '''Description:''' Stage decoration. | ||
| Line 1,934: | Line 1,934: | ||
|} | |} | ||
| − | {| class="wikitable" style="background-color:#FFFFFF;" | + | {| class="wikitable" style="background-color:#FFFFFF; width: 100%" |
|- | |- | ||
| − | ! colspan="2" | <big>Enemy</big> | + | ! colspan="2" style="width: 18.4%;" | <big>Enemy</big> |
! <big>Info</big> | ! <big>Info</big> | ||
|- | |- | ||
| − | | colspan="2" rowspan="1" | [[File:GMD_st5_snail.png]] | + | | colspan="2" rowspan="1" | [[File:GMD_st5_snail.png|center]] |
| style="text-align: left" | | | style="text-align: left" | | ||
'''Description''' Slow-moving but fires several fast aimed bullets. | '''Description''' Slow-moving but fires several fast aimed bullets. | ||
| Line 1,953: | Line 1,953: | ||
|} | |} | ||
| − | {| class="wikitable" style="background-color:#FFFFFF;" | + | {| class="wikitable" style="background-color:#FFFFFF; width: 100%" |
|- | |- | ||
| − | ! colspan="2" | <big>Enemy</big> | + | ! colspan="2" style="width: 18.4%;" | <big>Enemy</big> |
! <big>Info</big> | ! <big>Info</big> | ||
|- | |- | ||
| − | | colspan="2" rowspan="1" | [[File:GMD_cannon_turtle.png]] | + | | colspan="2" rowspan="1" | [[File:GMD_cannon_turtle.png|center]] |
| style="text-align: left" | | | style="text-align: left" | | ||
'''Description:''' Its turrets fire overlapping bullets while the cannon fires a very fast line of bullets. | '''Description:''' Its turrets fire overlapping bullets while the cannon fires a very fast line of bullets. | ||
| Line 1,970: | Line 1,970: | ||
*'''Cannon:''' Helmet. | *'''Cannon:''' Helmet. | ||
*'''Body:''' Treasure, '''Legend Boots.''' | *'''Body:''' Treasure, '''Legend Boots.''' | ||
| − | '''Secret item requirements: 4 or more bombs in stock + level 8 charged shot.''' | + | **'''Secret item requirements: 4 or more bombs in stock + level 8 charged shot.''' |
|- | |- | ||
|} | |} | ||
| − | {| class="wikitable" style="background-color:#FFFFFF;" | + | {| class="wikitable" style="background-color:#FFFFFF; width: 100%" |
|- | |- | ||
| − | ! colspan="2" | <big>Enemy</big> | + | ! colspan="2" style="width: 18.4%;" | <big>Enemy</big> |
! <big>Info</big> | ! <big>Info</big> | ||
|- | |- | ||
| − | | colspan="2" rowspan="1" | [[File:GMD_st5_drills_and_tanks.png]] | + | | colspan="2" rowspan="1" | [[File:GMD_st5_drills_and_tanks.png|center]] |
| style="text-align: left" | | | style="text-align: left" | | ||
'''Description:''' Stage decoration. | '''Description:''' Stage decoration. | ||
| Line 1,991: | Line 1,991: | ||
|} | |} | ||
| − | {| class="wikitable" style="background-color:#FFFFFF;" | + | {| class="wikitable" style="background-color:#FFFFFF; width: 100%" |
|- | |- | ||
| − | ! colspan="2" | <big>Enemy</big> | + | ! colspan="2" style="width: 18.4%;" | <big>Enemy</big> |
! <big>Info</big> | ! <big>Info</big> | ||
|- | |- | ||
| − | | colspan="2" rowspan="1" | [[File:GMD_st5_dormant_busturtle.png]] | + | | colspan="2" rowspan="1" | [[File:GMD_st5_dormant_busturtle.png|center]] |
| style="text-align: left" | | | style="text-align: left" | | ||
'''Description:''' An inactive version of Busturtle, only the twin turrets can attack. | '''Description:''' An inactive version of Busturtle, only the twin turrets can attack. | ||
| Line 2,005: | Line 2,005: | ||
'''Drops:''' | '''Drops:''' | ||
| − | *'''Large twin | + | *'''Large twin turrets:''' Ring. |
*'''Head:''' Armor. | *'''Head:''' Armor. | ||
|- | |- | ||
|} | |} | ||
| − | {| class="wikitable" style="background-color:#FFFFFF;" | + | {| class="wikitable" style="background-color:#FFFFFF; width: 100%" |
|- | |- | ||
| − | ! colspan="2" | <big>Enemy</big> | + | ! colspan="2" style="width: 18.4%;" | <big>Enemy</big> |
! <big>Info</big> | ! <big>Info</big> | ||
|- | |- | ||
| − | | colspan="2" rowspan="1" | [[File:GMD_st1_large_tank.png]] | + | | colspan="2" rowspan="1" | [[File:GMD_st1_large_tank.png|center]] |
| style="text-align: left" | | | style="text-align: left" | | ||
'''Description:''' A large tank with several turrets to destroy. | '''Description:''' A large tank with several turrets to destroy. | ||
| Line 2,024: | Line 2,024: | ||
'''Drops:''' | '''Drops:''' | ||
| − | *'''Single | + | *'''Single turrets:''' Food. |
*'''Main turret:''' Shield. | *'''Main turret:''' Shield. | ||
| − | *'''Spinning | + | *'''Spinning turrets underneath:''' Armor. |
*'''Body:''' Shield. | *'''Body:''' Shield. | ||
|- | |- | ||
|} | |} | ||
| − | {| class="wikitable" style="background-color:#FFFFFF;" | + | {| class="wikitable" style="background-color:#FFFFFF; width: 100%" |
|- | |- | ||
| − | ! colspan="2" | <big>Enemy</big> | + | ! colspan="2" style="width: 18.4%;" | <big>Enemy</big> |
! <big>Info</big> | ! <big>Info</big> | ||
|- | |- | ||
| − | | colspan="2" rowspan="1" | [[File:GMD_st5_gray_ship.png]] | + | | colspan="2" rowspan="1" | [[File:GMD_st5_gray_ship.png|center]] |
| style="text-align: left" | | | style="text-align: left" | | ||
'''Description:''' Stationary ship. The last 4 ones will shoot very fast bullets when you're nearby, destroy as quick as you can. | '''Description:''' Stationary ship. The last 4 ones will shoot very fast bullets when you're nearby, destroy as quick as you can. | ||
| Line 2,050: | Line 2,050: | ||
|} | |} | ||
| − | {| class="wikitable" style="background-color:#FFFFFF;" | + | {| class="wikitable" style="background-color:#FFFFFF; width: 100%" |
|- | |- | ||
| − | ! colspan="2" | <big>Enemy</big> | + | ! colspan="2" style="width: 18.4%;" | <big>Enemy</big> |
! <big>Info</big> | ! <big>Info</big> | ||
|- | |- | ||
| − | | colspan="2" rowspan="1" | [[File:GMD_st4-5_gobligan.png]] | + | | colspan="2" rowspan="1" | [[File:GMD_st4-5_gobligan.png|center]] |
| style="text-align: left" | | | style="text-align: left" | | ||
'''Description:''' Completely harmless to the player. | '''Description:''' Completely harmless to the player. | ||
| Line 2,067: | Line 2,067: | ||
|} | |} | ||
| − | {| class="wikitable" style="background-color:#FFFFFF;" | + | {| class="wikitable" style="background-color:#FFFFFF; width: 100%" |
|- | |- | ||
| − | ! colspan="2" | <big>Enemy</big> | + | ! colspan="2" style="width: 18.4%;" | <big>Enemy</big> |
! <big>Info</big> | ! <big>Info</big> | ||
|- | |- | ||
| − | | colspan="2" rowspan="1" | [[File:GMD_st5_large_tank_2.png]] | + | | colspan="2" rowspan="1" | [[File:GMD_st5_large_tank_2.png|center]] |
| style="text-align: left" | | | style="text-align: left" | | ||
'''Description:''' A large tank with several turrets to destroy. | '''Description:''' A large tank with several turrets to destroy. | ||
| Line 2,081: | Line 2,081: | ||
'''Drops:''' | '''Drops:''' | ||
| − | *'''Spinning | + | *'''Spinning turrets:''' Accessory. |
*'''Single turret:''' Food. | *'''Single turret:''' Food. | ||
*'''Main turret:''' Shield. | *'''Main turret:''' Shield. | ||
| − | *'''Spinning | + | *'''Spinning turrets underneath:''' Armor. |
*'''Body:''' Shield. | *'''Body:''' Shield. | ||
|- | |- | ||
|} | |} | ||
| − | {| class="wikitable" style="background-color:#FFFFFF;" | + | {| class="wikitable" style="background-color:#FFFFFF; width: 100%" |
|- | |- | ||
| − | ! colspan="2" | <big>Enemy</big> | + | ! colspan="2" style="width: 18.4%;" | <big>Enemy</big> |
! <big>Info</big> | ! <big>Info</big> | ||
|- | |- | ||
| − | | colspan="2" rowspan="1" | [[File:GMD_st5_large_tank_3.png]] | + | | colspan="2" rowspan="1" | [[File:GMD_st5_large_tank_3.png|center]] |
| style="text-align: left" | | | style="text-align: left" | | ||
'''Description:''' A large tank with several turrets to destroy. | '''Description:''' A large tank with several turrets to destroy. | ||
| Line 2,103: | Line 2,103: | ||
'''Drops:''' | '''Drops:''' | ||
| − | *'''Missile | + | *'''Missile launchers:''' Accessory. |
*'''Single turret:''' Food. | *'''Single turret:''' Food. | ||
*'''Main turret:''' Shield. | *'''Main turret:''' Shield. | ||
| − | *'''Spinning | + | *'''Spinning turrets underneath:''' Armor. |
*'''Body:''' Shield. | *'''Body:''' Shield. | ||
|- | |- | ||
|} | |} | ||
| − | {| class="wikitable" style="background-color:#FFFFFF;" | + | {| class="wikitable" style="background-color:#FFFFFF; width: 100%" |
|- | |- | ||
| − | ! colspan="2" | <big>Enemy</big> | + | ! colspan="2" style="width: 18.4%;" | <big>Enemy</big> |
! <big>Info</big> | ! <big>Info</big> | ||
|- | |- | ||
| − | | colspan="2" rowspan="1" | [[File:GMD_st5_large_tank_1.png]] | + | | colspan="2" rowspan="1" | [[File:GMD_st5_large_tank_1.png|center]] |
| style="text-align: left" | | | style="text-align: left" | | ||
| − | '''Description:''' A large tank with several turrets to destroy. | + | '''Description:''' A large<br> |
| + | tank with several turrets to destroy. | ||
'''Appears in:''' Stage 1, 2, 3, 4 and 5. | '''Appears in:''' Stage 1, 2, 3, 4 and 5. | ||
| Line 2,125: | Line 2,126: | ||
'''Drops: | '''Drops: | ||
| − | *'''Single | + | *'''Single turrets:''' Food. |
*'''Twin turret:''' Staff. | *'''Twin turret:''' Staff. | ||
*'''Main turret:''' Shield. | *'''Main turret:''' Shield. | ||
| − | *'''Spinning | + | *'''Spinning turrets underneath:''' Armor. |
*'''Body:''' Shield. | *'''Body:''' Shield. | ||
|- | |- | ||
|} | |} | ||
| − | {| class="wikitable" style="background-color:#FFFFFF;" | + | {| class="wikitable" style="background-color:#FFFFFF; width: 100%" |
|- | |- | ||
| − | ! colspan="2" | <big>Enemy</big> | + | ! colspan="2" style="width: 18.4%;" | <big>Enemy</big> |
! <big>Info</big> | ! <big>Info</big> | ||
|- | |- | ||
| − | | colspan="2" rowspan="1" | [[File:GMD_st5_cage.png]] | + | | colspan="2" rowspan="1" | [[File:GMD_st5_cage.png|center]] |
| style="text-align: left" | | | style="text-align: left" | | ||
'''Description:''' Stage decoration. Breaking it will let all the baby dragons inside free. | '''Description:''' Stage decoration. Breaking it will let all the baby dragons inside free. | ||
| Line 2,150: | Line 2,151: | ||
|} | |} | ||
| − | {| class="wikitable" style="background-color:#FFFFFF;" | + | {| class="wikitable" style="background-color:#FFFFFF; width: 100%" |
|- | |- | ||
| − | ! colspan="2" | <big>Enemy</big> | + | ! colspan="2" style="width: 18.4%;" | <big>Enemy</big> |
! <big>Info</big> | ! <big>Info</big> | ||
|- | |- | ||
| − | | colspan="2" rowspan="1" | [[File:GMD_baby_dragon.png]] | + | | colspan="2" rowspan="1" | [[File:GMD_baby_dragon.png|center]] |
| style="text-align: left" | | | style="text-align: left" | | ||
'''Description:''' Breathes fire. | '''Description:''' Breathes fire. | ||
| Line 2,167: | Line 2,168: | ||
|} | |} | ||
| − | {| class="wikitable" style="background-color:#FFFFFF;" | + | {| class="wikitable" style="background-color:#FFFFFF; width: 100%" |
|- | |- | ||
| − | ! colspan="2" | <big>Enemy</big> | + | ! colspan="2" style="width: 18.4%;" | <big>Enemy</big> |
! <big>Info</big> | ! <big>Info</big> | ||
|- | |- | ||
| − | | colspan="2" rowspan="1" | [[File:GMD_bombs_gobligan.png]] | + | | colspan="2" rowspan="1" | [[File:GMD_bombs_gobligan.png|center]] |
| style="text-align: left" | | | style="text-align: left" | | ||
'''Description:''' Drops several bombs and leaves, the bombs will explode on their own if not destroyed for a while. | '''Description:''' Drops several bombs and leaves, the bombs will explode on their own if not destroyed for a while. | ||
| Line 2,184: | Line 2,185: | ||
|} | |} | ||
| − | {| class="wikitable" style="background-color:#FFFFFF;" | + | {| class="wikitable" style="background-color:#FFFFFF; width: 100%" |
|- | |- | ||
| − | ! colspan="2" | <big>Enemy</big> | + | ! colspan="2" style="width: 18.4%;" | <big>Enemy</big> |
! <big>Info</big> | ! <big>Info</big> | ||
|- | |- | ||
| − | | colspan="2" rowspan="1" | [[File:GMD_homing_bullets_gobligan.png]] | + | | colspan="2" rowspan="1" | [[File:GMD_homing_bullets_gobligan.png|center]] |
| style="text-align: left" | | | style="text-align: left" | | ||
'''Description:''' Fires two homing bullets. | '''Description:''' Fires two homing bullets. | ||
| Line 2,201: | Line 2,202: | ||
|} | |} | ||
| − | {| class="wikitable" style="background-color:#FFFFFF;" | + | {| class="wikitable" style="background-color:#FFFFFF; width: 100%" |
|- | |- | ||
| − | ! colspan="2" | <big>Enemy</big> | + | ! colspan="2" style="width: 18.4%;" | <big>Enemy</big> |
! <big>Info</big> | ! <big>Info</big> | ||
|- | |- | ||
| − | | colspan="2" rowspan="1" | [[File:GMD_stealth_bomber_A.png]] | + | | colspan="2" rowspan="1" | [[File:GMD_stealth_bomber_A.png|center]] |
| style="text-align: left" | | | style="text-align: left" | | ||
'''Description:''' A different version of the stage 2 mid-boss. Has higher HP and more dangerous attacks. | '''Description:''' A different version of the stage 2 mid-boss. Has higher HP and more dangerous attacks. | ||
| Line 2,218: | Line 2,219: | ||
*'''Rear guns:''' Shoes. | *'''Rear guns:''' Shoes. | ||
*'''Body:''' Sword, '''Legend Sword.''' | *'''Body:''' Sword, '''Legend Sword.''' | ||
| − | *'''Secret item requirements:''' <span style="color:blue">'''Blue polarity'''</span> '''+ 4 or more bombs in stock.''' | + | **'''Secret item requirements:''' <span style="color:blue">'''Blue polarity'''</span> '''+ 4 or more bombs in stock.''' |
|- | |- | ||
|} | |} | ||
| − | {| class="wikitable" style="background-color:#FFFFFF;" | + | {| class="wikitable" style="background-color:#FFFFFF; width: 100%" |
|- | |- | ||
| − | ! colspan="2" | <big>Enemy</big> | + | ! colspan="2" style="width: 18.4%;" | <big>Enemy</big> |
! <big>Info</big> | ! <big>Info</big> | ||
|- | |- | ||
| − | | colspan="2" rowspan="1" | [[File:GMD_stealtth_bomber_B.png]] | + | | colspan="2" rowspan="1" | [[File:GMD_stealtth_bomber_B.png|center]] |
| style="text-align: left" | | | style="text-align: left" | | ||
'''Description:''' A different version of the stage 2 mid-boss. Has higher HP and more dangerous attacks. | '''Description:''' A different version of the stage 2 mid-boss. Has higher HP and more dangerous attacks. | ||
| Line 2,239: | Line 2,240: | ||
*'''Rear guns:''' Shoes. | *'''Rear guns:''' Shoes. | ||
*'''Body:''' Sword, '''Legend Sword.''' | *'''Body:''' Sword, '''Legend Sword.''' | ||
| − | *'''Secret item requirements:''' <span style="color:red">'''Red polarity'''</span> '''+ 4 or more bombs in stock.''' | + | **'''Secret item requirements:''' <span style="color:red">'''Red polarity'''</span> '''+ 4 or more bombs in stock.''' |
|- | |- | ||
|} | |} | ||
| Line 2,249: | Line 2,250: | ||
Phase 1= | Phase 1= | ||
| − | {| class="wikitable" style="background-color:#FFFFFF;" | + | {| class="wikitable" style="background-color:#FFFFFF; width: 100%" |
|- | |- | ||
| − | ! colspan="2" | <big>Enemy</big> | + | ! colspan="2" style="width: 18.4%;" | <big>Enemy</big> |
! <big>Info</big> | ! <big>Info</big> | ||
|- | |- | ||
| − | | colspan="2" rowspan="1" | [[File:GMD_infernon_1.png]] | + | | colspan="2" rowspan="1" | [[File:GMD_infernon_1.png|center]] |
| style="text-align: left" | | | style="text-align: left" | | ||
'''Appears in:''' Stage 5. | '''Appears in:''' Stage 5. | ||
| Line 2,270: | Line 2,271: | ||
Phase 2= | Phase 2= | ||
| − | {| class="wikitable" style="background-color:#FFFFFF;" | + | {| class="wikitable" style="background-color:#FFFFFF; width: 100%" |
|- | |- | ||
| − | ! colspan="2" | <big>Enemy</big> | + | ! colspan="2" style="width: 18.4%;" | <big>Enemy</big> |
! <big>Info</big> | ! <big>Info</big> | ||
|- | |- | ||
| − | | colspan="2" rowspan="1" | [[File:GMD_infernon_2.png]] | + | | colspan="2" rowspan="1" | [[File:GMD_infernon_2.png|center]] |
| style="text-align: left" | | | style="text-align: left" | | ||
'''Appears in:''' Stage 5. | '''Appears in:''' Stage 5. | ||
| Line 2,294: | Line 2,295: | ||
Phase 3= | Phase 3= | ||
| − | {| class="wikitable" style="background-color:#FFFFFF;" | + | {| class="wikitable" style="background-color:#FFFFFF; width: 100%" |
|- | |- | ||
| − | ! colspan="2" | <big>Enemy</big> | + | ! colspan="2" style="width: 18.4%;" | <big>Enemy</big> |
! <big>Info</big> | ! <big>Info</big> | ||
|- | |- | ||
| − | | colspan="2" rowspan="1" | [[File:GMD_infernon_3.png]] | + | | colspan="2" rowspan="1" | [[File:GMD_infernon_3.png|center]] |
| style="text-align: left" | | | style="text-align: left" | | ||
'''Appears in:''' Stage 5. | '''Appears in:''' Stage 5. | ||
| Line 2,307: | Line 2,308: | ||
'''Drops:''' | '''Drops:''' | ||
*'''Left side:''' Treasure, '''Diamond.''' | *'''Left side:''' Treasure, '''Diamond.''' | ||
| + | **'''Secret item requirements: Empty magic meter + 4 or more bombs in stock.''' | ||
*'''Right side:''' Treasure, '''Diamond.''' | *'''Right side:''' Treasure, '''Diamond.''' | ||
| − | *'''Secret item requirements: Empty magic meter + 4 or more bombs in stock.''' | + | **'''Secret item requirements: Empty magic meter + 4 or more bombs in stock.''' |
*'''Cockpit's core:''' Treasure, '''Fairy of Fire.''' | *'''Cockpit's core:''' Treasure, '''Fairy of Fire.''' | ||
| − | *'''Secret item requirement: Level 5 charged shot or higher.''' | + | **'''Secret item requirement: Level 5 charged shot or higher.''' |
'''Note:''' When this phase starts sometimes the Cockpit and right side will be imbued in blue polarity, whether this happens or not is random. | '''Note:''' When this phase starts sometimes the Cockpit and right side will be imbued in blue polarity, whether this happens or not is random. | ||
| Line 2,320: | Line 2,322: | ||
==Stage 6 Enemies== | ==Stage 6 Enemies== | ||
| − | {| class="wikitable" style="background-color:#FFFFFF;" | + | {| class="wikitable" style="background-color:#FFFFFF; width: 100%" |
|- | |- | ||
| − | ! colspan="2" | <big>Enemy</big> | + | ! colspan="2" style="width: 18.4%;" | <big>Enemy</big> |
! <big>Info</big> | ! <big>Info</big> | ||
|- | |- | ||
| − | | colspan="2" rowspan="1" | [[File:GMD_blade_disk.png]] | + | | colspan="2" rowspan="1" | [[File:GMD_blade_disk.png|center]] |
| style="text-align: left" | | | style="text-align: left" | | ||
'''Description:''' Zako enemy. Its bullets can be sealed. | '''Description:''' Zako enemy. Its bullets can be sealed. | ||
| Line 2,337: | Line 2,339: | ||
|} | |} | ||
| − | {| class="wikitable" style="background-color:#FFFFFF;" | + | {| class="wikitable" style="background-color:#FFFFFF; width: 100%" |
|- | |- | ||
| − | ! colspan="2" | <big>Enemy</big> | + | ! colspan="2" style="width: 18.4%;" | <big>Enemy</big> |
! <big>Info</big> | ! <big>Info</big> | ||
|- | |- | ||
| − | | colspan="2" rowspan="1" | [[File:GMD_missile_gobligan.png]] | + | | colspan="2" rowspan="1" | [[File:GMD_missile_gobligan.png|center]] |
| style="text-align: left" | | | style="text-align: left" | | ||
'''Description:''' Fires very slow bullets before releasing a barrage of aimed missiles. | '''Description:''' Fires very slow bullets before releasing a barrage of aimed missiles. | ||
| Line 2,354: | Line 2,356: | ||
|} | |} | ||
| − | {| class="wikitable" style="background-color:#FFFFFF;" | + | {| class="wikitable" style="background-color:#FFFFFF; width: 100%" |
|- | |- | ||
| − | ! colspan="2" | <big>Enemy</big> | + | ! colspan="2" style="width: 18.4%;" | <big>Enemy</big> |
! <big>Info</big> | ! <big>Info</big> | ||
|- | |- | ||
| − | | colspan="2" rowspan="1" | [[File:GMD_arms_gobligan.png]] | + | | colspan="2" rowspan="1" | [[File:GMD_arms_gobligan.png|center]] |
| style="text-align: left" | | | style="text-align: left" | | ||
'''Description:''' Performs a rocket punch. | '''Description:''' Performs a rocket punch. | ||
| Line 2,373: | Line 2,375: | ||
|} | |} | ||
| − | {| class="wikitable" style="background-color:#FFFFFF;" | + | {| class="wikitable" style="background-color:#FFFFFF; width: 100%" |
|- | |- | ||
| − | ! colspan="2" | <big>Enemy</big> | + | ! colspan="2" style="width: 18.4%;" | <big>Enemy</big> |
! <big>Info</big> | ! <big>Info</big> | ||
|- | |- | ||
| − | | colspan="2" rowspan="1" | [[File:GMD_bombs_gobligan.png]] | + | | colspan="2" rowspan="1" | [[File:GMD_bombs_gobligan.png|center]] |
| style="text-align: left" | | | style="text-align: left" | | ||
'''Description:''' Drops several bombs and leaves, the bombs will explode on their own if not destroyed for a while. | '''Description:''' Drops several bombs and leaves, the bombs will explode on their own if not destroyed for a while. | ||
| Line 2,390: | Line 2,392: | ||
|} | |} | ||
| − | {| class="wikitable" style="background-color:#FFFFFF;" | + | {| class="wikitable" style="background-color:#FFFFFF; width: 100%" |
|- | |- | ||
| − | ! colspan="2" | <big>Enemy</big> | + | ! colspan="2" style="width: 18.4%;" | <big>Enemy</big> |
! <big>Info</big> | ! <big>Info</big> | ||
|- | |- | ||
| − | | colspan="2" rowspan="1" | [[File:GMD_homing_bullets_gobligan.png]] | + | | colspan="2" rowspan="1" | [[File:GMD_homing_bullets_gobligan.png|center]] |
| style="text-align: left" | | | style="text-align: left" | | ||
'''Description:''' Fires two homing bullets. | '''Description:''' Fires two homing bullets. | ||
| Line 2,407: | Line 2,409: | ||
|} | |} | ||
| − | {| class="wikitable" style="background-color:#FFFFFF;" | + | {| class="wikitable" style="background-color:#FFFFFF; width: 100%" |
|- | |- | ||
| − | ! colspan="2" | <big>Enemy</big> | + | ! colspan="2" style="width: 18.4%;" | <big>Enemy</big> |
! <big>Info</big> | ! <big>Info</big> | ||
|- | |- | ||
| − | | colspan="2" rowspan="1" | [[File:GMD_flying_gobligan.png]] | + | | colspan="2" rowspan="1" | [[File:GMD_flying_gobligan.png|center]] |
| style="text-align: left" | | | style="text-align: left" | | ||
'''Description:''' Dives down, its horizontal movement is based on the player's position. | '''Description:''' Dives down, its horizontal movement is based on the player's position. | ||
| Line 2,424: | Line 2,426: | ||
|} | |} | ||
| − | {| class="wikitable" style="background-color:#FFFFFF;" | + | {| class="wikitable" style="background-color:#FFFFFF; width: 100%" |
|- | |- | ||
| − | ! colspan="2" | <big>Enemy</big> | + | ! colspan="2" style="width: 18.4%;" | <big>Enemy</big> |
! <big>Info</big> | ! <big>Info</big> | ||
|- | |- | ||
| − | | colspan="2" rowspan="1" | [[File:GMD_gold_ship.png]] | + | | colspan="2" rowspan="1" | [[File:GMD_gold_ship.png|center]] |
| style="text-align: left" | | | style="text-align: left" | | ||
'''Description:''' Fires bullets aimed around and directly at the player. | '''Description:''' Fires bullets aimed around and directly at the player. | ||
| Line 2,443: | Line 2,445: | ||
|} | |} | ||
| − | {| class="wikitable" style="background-color:#FFFFFF;" | + | {| class="wikitable" style="background-color:#FFFFFF; width: 100%" |
|- | |- | ||
| − | ! colspan="2" | <big>Enemy</big> | + | ! colspan="2" style="width: 18.4%;" | <big>Enemy</big> |
! <big>Info</big> | ! <big>Info</big> | ||
|- | |- | ||
| − | | colspan="2" rowspan="1" | [[File:GMD_magic_ship.png]] | + | | colspan="2" rowspan="1" | [[File:GMD_magic_ship.png|center]] |
| style="text-align: left" | | | style="text-align: left" | | ||
'''Description:''' Fires magic bullets in an enclosing pattern followed by a mixture of aimed and static patterns. | '''Description:''' Fires magic bullets in an enclosing pattern followed by a mixture of aimed and static patterns. | ||
| Line 2,460: | Line 2,462: | ||
|} | |} | ||
| − | {| class="wikitable" style="background-color:#FFFFFF;" | + | {| class="wikitable" style="background-color:#FFFFFF; width: 100%" |
|- | |- | ||
| − | ! colspan="2" | <big>Enemy</big> | + | ! colspan="2" style="width: 18.4%;" | <big>Enemy</big> |
! <big>Info</big> | ! <big>Info</big> | ||
|- | |- | ||
| − | | colspan="2" rowspan="1" | [[File:GMD_large_shielded_ship.png]] | + | | colspan="2" rowspan="1" | [[File:GMD_large_shielded_ship.png|center]] |
| style="text-align: left" | | | style="text-align: left" | | ||
'''Description:''' Large ship with a considerable amount of HP. Fires very dense spread, dispose of as soon as possible. | '''Description:''' Large ship with a considerable amount of HP. Fires very dense spread, dispose of as soon as possible. | ||
| Line 2,482: | Line 2,484: | ||
|} | |} | ||
| − | {| class="wikitable" style="background-color:#FFFFFF;" | + | {| class="wikitable" style="background-color:#FFFFFF; width: 100%" |
|- | |- | ||
| − | ! colspan="2" | <big>Enemy</big> | + | ! colspan="2" style="width: 18.4%;" | <big>Enemy</big> |
! <big>Info</big> | ! <big>Info</big> | ||
|- | |- | ||
| − | | colspan="2" rowspan="1" | [[File:GMD_kamikaze_blade_disk.png]] | + | | colspan="2" rowspan="1" | [[File:GMD_kamikaze_blade_disk.png|center]] |
| style="text-align: left" | | | style="text-align: left" | | ||
'''Description:''' Tries to collide with the player, its turret might fire along the way. | '''Description:''' Tries to collide with the player, its turret might fire along the way. | ||
| Line 2,499: | Line 2,501: | ||
|} | |} | ||
| − | {| class="wikitable" style="background-color:#FFFFFF;" | + | {| class="wikitable" style="background-color:#FFFFFF; width: 100%" |
|- | |- | ||
| − | ! colspan="2" | <big>Enemy</big> | + | ! colspan="2" style="width: 18.4%;" | <big>Enemy</big> |
! <big>Info</big> | ! <big>Info</big> | ||
|- | |- | ||
| − | | colspan="2" rowspan="1" | [[File:GMD_jetfighter.png]] | + | | colspan="2" rowspan="1" | [[File:GMD_jetfighter.png|center]] |
| style="text-align: left" | | | style="text-align: left" | | ||
'''Description:''' Zako enemy, depending on the current rank it will fire 2-Way spreads or 3-Way spreads. | '''Description:''' Zako enemy, depending on the current rank it will fire 2-Way spreads or 3-Way spreads. | ||
| Line 2,516: | Line 2,518: | ||
|} | |} | ||
| − | {| class="wikitable" style="background-color:#FFFFFF;" | + | {| class="wikitable" style="background-color:#FFFFFF; width: 100%" |
|- | |- | ||
| − | ! colspan="2" | <big>Enemy</big> | + | ! colspan="2" style="width: 18.4%;" | <big>Enemy</big> |
! <big>Info</big> | ! <big>Info</big> | ||
|- | |- | ||
| − | | colspan="2" rowspan="1" | [[File:GMD_flying_tank4.png]] | + | | colspan="2" rowspan="1" | [[File:GMD_flying_tank4.png|center]] |
| style="text-align: left" | | | style="text-align: left" | | ||
'''Description:''' Aims at the player and fires missiles. | '''Description:''' Aims at the player and fires missiles. | ||
| Line 2,535: | Line 2,537: | ||
|} | |} | ||
| − | {| class="wikitable" style="background-color:#FFFFFF;" | + | {| class="wikitable" style="background-color:#FFFFFF; width: 100%" |
|- | |- | ||
| − | ! colspan="2" | <big>Enemy</big> | + | ! colspan="2" style="width: 18.4%;" | <big>Enemy</big> |
! <big>Info</big> | ! <big>Info</big> | ||
|- | |- | ||
| − | | colspan="2" rowspan="1" | [[File:GMD_flying_tank3.png]] | + | | colspan="2" rowspan="1" | [[File:GMD_flying_tank3.png|center]] |
| style="text-align: left" | | | style="text-align: left" | | ||
'''Description:''' Its spinning turret fires bullets in several angles. | '''Description:''' Its spinning turret fires bullets in several angles. | ||
| Line 2,554: | Line 2,556: | ||
|} | |} | ||
| − | {| class="wikitable" style="background-color:#FFFFFF;" | + | {| class="wikitable" style="background-color:#FFFFFF; width: 100%" |
|- | |- | ||
| − | ! colspan="2" | <big>Enemy</big> | + | ! colspan="2" style="width: 18.4%;" | <big>Enemy</big> |
! <big>Info</big> | ! <big>Info</big> | ||
|- | |- | ||
| − | | colspan="2" rowspan="1" | [[File:GMD_wizard.png]] | + | | colspan="2" rowspan="1" | [[File:GMD_wizard.png|center]] |
| style="text-align: left" | | | style="text-align: left" | | ||
'''Description:''' Fires 3-Way aimed magic bullets, can be sealed. | '''Description:''' Fires 3-Way aimed magic bullets, can be sealed. | ||
| Line 2,571: | Line 2,573: | ||
|} | |} | ||
| − | {| class="wikitable" style="background-color:#FFFFFF;" | + | {| class="wikitable" style="background-color:#FFFFFF; width: 100%" |
|- | |- | ||
| − | ! colspan="2" | <big>Enemy</big> | + | ! colspan="2" style="width: 18.4%;" | <big>Enemy</big> |
! <big>Info</big> | ! <big>Info</big> | ||
|- | |- | ||
| − | | colspan="2" rowspan="1" | [[File:GMD_baby_dragon.png]] | + | | colspan="2" rowspan="1" | [[File:GMD_baby_dragon.png|center]] |
| style="text-align: left" | | | style="text-align: left" | | ||
'''Description:''' Breathes fire. | '''Description:''' Breathes fire. | ||
| Line 2,588: | Line 2,590: | ||
|} | |} | ||
| − | {| class="wikitable" style="background-color:#FFFFFF;" | + | {| class="wikitable" style="background-color:#FFFFFF; width: 100%" |
|- | |- | ||
| − | ! colspan="2" | <big>Enemy</big> | + | ! colspan="2" style="width: 18.4%;" | <big>Enemy</big> |
! <big>Info</big> | ! <big>Info</big> | ||
|- | |- | ||
| − | | colspan="2" rowspan="1" | [[File:GMD_carrier.png]] | + | | colspan="2" rowspan="1" | [[File:GMD_carrier.png|center]] |
| style="text-align: left" | | | style="text-align: left" | | ||
'''Description''': A carrier ship with several destructible parts and enemies on top of it. | '''Description''': A carrier ship with several destructible parts and enemies on top of it. | ||
| Line 2,602: | Line 2,604: | ||
'''Drops:''' | '''Drops:''' | ||
| − | *'''Small | + | *'''Small turrets:''' Food. |
| − | *'''Missile | + | *'''Missile tanks:''' Accessory. |
| − | *'''Twin turret | + | *'''Twin turret tanks:''' Staff. |
| − | *'''Single turret | + | *'''Single turret tanks:''' Food. |
*'''Boosters:''' Staff. | *'''Boosters:''' Staff. | ||
*'''Side rows:''' Food. | *'''Side rows:''' Food. | ||
| Line 2,615: | Line 2,617: | ||
|} | |} | ||
| − | {| class="wikitable" style="background-color:#FFFFFF;" | + | {| class="wikitable" style="background-color:#FFFFFF; width: 100%" |
|- | |- | ||
| − | ! colspan="2" | <big>Enemy</big> | + | ! colspan="2" style="width: 18.4%;" | <big>Enemy</big> |
! <big>Info</big> | ! <big>Info</big> | ||
|- | |- | ||
| − | | colspan="2" rowspan="1" | [[File:GMD_st6_gray_ship.png]] | + | | colspan="2" rowspan="1" | [[File:GMD_st6_gray_ship.png|center]] |
| style="text-align: left" | | | style="text-align: left" | | ||
'''Description:''' Fires several very slow bullets followed by fast spreads. | '''Description:''' Fires several very slow bullets followed by fast spreads. | ||
| Line 2,635: | Line 2,637: | ||
|} | |} | ||
| − | {| class="wikitable" style="background-color:#FFFFFF;" | + | {| class="wikitable" style="background-color:#FFFFFF; width: 100%" |
|- | |- | ||
| − | ! colspan="2" | <big>Enemy</big> | + | ! colspan="2" style="width: 18.4%;" | <big>Enemy</big> |
! <big>Info</big> | ! <big>Info</big> | ||
|- | |- | ||
| − | | colspan="2" rowspan="1" | [[File:GMD_yellow_plane.png]] | + | | colspan="2" rowspan="1" | [[File:GMD_yellow_plane.png|center]] |
| style="text-align: left" | | | style="text-align: left" | | ||
'''Description:''' Frequently used as a "filler" enemy after a big enemy has been taken out, can be lured off-screen by moving upwards while sealing its bullets. | '''Description:''' Frequently used as a "filler" enemy after a big enemy has been taken out, can be lured off-screen by moving upwards while sealing its bullets. | ||
| Line 2,652: | Line 2,654: | ||
|} | |} | ||
| − | {| class="wikitable" style="background-color:#FFFFFF;" | + | {| class="wikitable" style="background-color:#FFFFFF; width: 100%" |
|- | |- | ||
| − | ! colspan="2" | <big>Enemy</big> | + | ! colspan="2" style="width: 18.4%;" | <big>Enemy</big> |
! <big>Info</big> | ! <big>Info</big> | ||
|- | |- | ||
| − | | colspan="2" rowspan="1" | [[File:GMD_flying_tank2.png]] | + | | colspan="2" rowspan="1" | [[File:GMD_flying_tank2.png|center]] |
| style="text-align: left" | | | style="text-align: left" | | ||
'''Description:''' Aims at the player and fires twin bullets. | '''Description:''' Aims at the player and fires twin bullets. | ||
| Line 2,671: | Line 2,673: | ||
|} | |} | ||
| − | {| class="wikitable" style="background-color:#FFFFFF;" | + | {| class="wikitable" style="background-color:#FFFFFF; width: 100%" |
|- | |- | ||
| − | ! colspan="2" | <big>Enemy</big> | + | ! colspan="2" style="width: 18.4%;" | <big>Enemy</big> |
! <big>Info</big> | ! <big>Info</big> | ||
|- | |- | ||
| − | | colspan="2" rowspan="1" | [[File:GMD_drill_bug.png]] | + | | colspan="2" rowspan="1" | [[File:GMD_drill_bug.png|center]] |
| style="text-align: left" | | | style="text-align: left" | | ||
'''Description:''' Flies down and launches its drill along the way, the drill will release a large spread of bullets when destroyed. | '''Description:''' Flies down and launches its drill along the way, the drill will release a large spread of bullets when destroyed. | ||
| Line 2,690: | Line 2,692: | ||
|} | |} | ||
| − | {| class="wikitable" style="background-color:#FFFFFF;" | + | {| class="wikitable" style="background-color:#FFFFFF; width: 100%" |
|- | |- | ||
| − | ! colspan="2" | <big>Enemy</big> | + | ! colspan="2" style="width: 18.4%;" | <big>Enemy</big> |
! <big>Info</big> | ! <big>Info</big> | ||
|- | |- | ||
| − | | colspan="2" rowspan="1" | [[File:GMD_beholder.png]] | + | | colspan="2" rowspan="1" | [[File:GMD_beholder.png|center]] |
| style="text-align: left" | | | style="text-align: left" | | ||
'''Description:''' Fires bullets in an '''[[Help:Dodging_strategy#Aimed_even|enclosing pattern]]''' and creates clones of itself. | '''Description:''' Fires bullets in an '''[[Help:Dodging_strategy#Aimed_even|enclosing pattern]]''' and creates clones of itself. | ||
| Line 2,707: | Line 2,709: | ||
|} | |} | ||
| − | {| class="wikitable" style="background-color:#FFFFFF;" | + | {| class="wikitable" style="background-color:#FFFFFF; width: 100%" |
|- | |- | ||
| − | ! colspan="2" | <big>Enemy</big> | + | ! colspan="2" style="width: 18.4%;" | <big>Enemy</big> |
! <big>Info</big> | ! <big>Info</big> | ||
|- | |- | ||
| − | | colspan="2" rowspan="1" | [[File:GMD_beholder_clone.png]] | + | | colspan="2" rowspan="1" | [[File:GMD_beholder_clone.png|center]] |
| style="text-align: left" | | | style="text-align: left" | | ||
'''Description:''' Unlike the original beholder this one doesn't attack and leaves shortly after, releases magic bullets when destroyed. | '''Description:''' Unlike the original beholder this one doesn't attack and leaves shortly after, releases magic bullets when destroyed. | ||
| Line 2,724: | Line 2,726: | ||
|} | |} | ||
| − | {| class="wikitable" style="background-color:#FFFFFF;" | + | {| class="wikitable" style="background-color:#FFFFFF; width: 100%" |
|- | |- | ||
| − | ! colspan="2" | <big>Enemy</big> | + | ! colspan="2" style="width: 18.4%;" | <big>Enemy</big> |
! <big>Info</big> | ! <big>Info</big> | ||
|- | |- | ||
| − | | colspan="2" rowspan="1" | [[File:GMD_st3-6_dragon.png]] | + | | colspan="2" rowspan="1" | [[File:GMD_st3-6_dragon.png|center]] |
| style="text-align: left" | | | style="text-align: left" | | ||
'''Description:''' Its wings fire aimed and static bullets while the center fires 3-Way magic bullets. | '''Description:''' Its wings fire aimed and static bullets while the center fires 3-Way magic bullets. | ||
| Line 2,743: | Line 2,745: | ||
|} | |} | ||
| − | {| class="wikitable" style="background-color:#FFFFFF;" | + | {| class="wikitable" style="background-color:#FFFFFF; width: 100%" |
|- | |- | ||
| − | ! colspan="2" | <big>Enemy</big> | + | ! colspan="2" style="width: 18.4%;" | <big>Enemy</big> |
! <big>Info</big> | ! <big>Info</big> | ||
|- | |- | ||
| − | | colspan="2" rowspan="1" | [[File: | + | | colspan="2" rowspan="1" | [[File:GMD_st6_midboss.png|center]] |
| style="text-align: left" | | | style="text-align: left" | | ||
| − | '''Description:''' | + | '''Description:''' The stage 6 mid-boss. The spinning turrets will quickly flood the screen with bullets if not destroyed fast enough. The mid-boss itself can be deal with easily by moving from one lane to the other when it fires its aimed bullets. |
| − | '''Appears in:''' Stage | + | '''Appears in:''' Stage 6. |
'''Polarity:''' None. | '''Polarity:''' None. | ||
| − | '''Drops:''' Food. | + | '''Drops:''' |
| − | + | *'''Small turrets:''' Food. | |
| − | + | *'''Large twin turrets:''' Ring. | |
| + | *'''Large spinning turrets:''' Ring. | ||
| + | *'''Main turret: Legend Armor.''' | ||
| − | + | '''Note:''' This is the only enemy in the game that holds a secret item with no requirement needed. It'll always drop the Legend Armor no matter what. | |
| − | |||
| − | |||
| − | |||
| − | |||
| − | |||
| − | |||
| − | ''' | ||
| − | |||
| − | |||
| − | |||
| − | ' | ||
| − | |||
| − | |||
| − | |||
| − | |||
| − | |||
| − | |||
| − | |||
| − | |||
| − | |||
| − | |||
| − | |||
| − | |||
| − | |||
| − | |||
| − | |||
| − | |||
| − | |||
| − | |||
| − | |||
| − | |||
| − | |||
| − | |||
| − | |||
| − | |||
| − | |||
| − | |||
| − | |||
| − | |||
| − | |||
| − | |||
| − | |||
| − | |||
| − | |||
| − | |||
| − | |||
| − | |||
|- | |- | ||
|} | |} | ||
| Line 2,815: | Line 2,772: | ||
Phase 1= | Phase 1= | ||
| − | {| class="wikitable" style="background-color:#FFFFFF;" | + | {| class="wikitable" style="background-color:#FFFFFF; width: 100%" |
|- | |- | ||
| − | ! colspan="2" | <big>Enemy</big> | + | ! colspan="2" style="width: 18.4%;" | <big>Enemy</big> |
! <big>Info</big> | ! <big>Info</big> | ||
|- | |- | ||
| − | | colspan="2" rowspan="1" | [[File:GMD_boss_rush_busturtle_1.png]] | + | | colspan="2" rowspan="1" | [[File:GMD_boss_rush_busturtle_1.png|center]] |
| style="text-align: left" | | | style="text-align: left" | | ||
'''Appears in:''' Stage 6. | '''Appears in:''' Stage 6. | ||
| Line 2,830: | Line 2,787: | ||
*'''Small red guns:''' Food. | *'''Small red guns:''' Food. | ||
*'''Small turrets:''' Food. | *'''Small turrets:''' Food. | ||
| − | *'''Missile | + | *'''Missile launchers:''' Accessory. |
*'''Large magic turret:''' Treasure, '''Legend Helmet.''' | *'''Large magic turret:''' Treasure, '''Legend Helmet.''' | ||
| − | *'''Secret item requirements: 4 or more bombs in stock.''' | + | **'''Secret item requirements: 4 or more bombs in stock.''' |
*'''Drill on back:''' Ring, '''Fairy of Woods.''' | *'''Drill on back:''' Ring, '''Fairy of Woods.''' | ||
| − | *'''Secret item requirement: Level 5 charged shot or higher.''' | + | **'''Secret item requirement: Level 5 charged shot or higher.''' |
*'''Head:''' Treasure, '''Ruby.''' | *'''Head:''' Treasure, '''Ruby.''' | ||
| − | *'''Secret item requirements: Level 3 | + | **'''Secret item requirements: Level 3 shot and magic or higher + Level 5 charged shot or higher.''' |
| − | |||
|- | |- | ||
|} | |} | ||
| Line 2,845: | Line 2,801: | ||
Phase 2= | Phase 2= | ||
| − | {| class="wikitable" style="background-color:#FFFFFF;" | + | {| class="wikitable" style="background-color:#FFFFFF; width: 100%" |
|- | |- | ||
| − | ! colspan="2" | <big>Enemy</big> | + | ! colspan="2" style="width: 18.4%;" | <big>Enemy</big> |
! <big>Info</big> | ! <big>Info</big> | ||
|- | |- | ||
| − | | colspan="2" rowspan="1" | [[File:GMD_boss_rush_busturtle_2.png]] | + | | colspan="2" rowspan="1" | [[File:GMD_boss_rush_busturtle_2.png|center]] |
| style="text-align: left" | | | style="text-align: left" | | ||
'''Appears in:''' Stage 6. | '''Appears in:''' Stage 6. | ||
| Line 2,859: | Line 2,815: | ||
*'''Large magic turret:''' Treasure, '''Legend Helmet.''' | *'''Large magic turret:''' Treasure, '''Legend Helmet.''' | ||
| − | *'''Secret item requirements: 4 or more bombs in stock.''' | + | **'''Secret item requirements: 4 or more bombs in stock.''' |
*'''Slow bullets guns:''' Staff. | *'''Slow bullets guns:''' Staff. | ||
*'''Head:''' Treasure, '''Ruby.''' | *'''Head:''' Treasure, '''Ruby.''' | ||
| − | *'''Secret item requirements: Level 3 | + | **'''Secret item requirements: Level 3 shot and magic or higher + Level 5 charged shot or higher.''' |
|- | |- | ||
|} | |} | ||
| Line 2,870: | Line 2,826: | ||
Phase 3= | Phase 3= | ||
| − | {| class="wikitable" style="background-color:#FFFFFF;" | + | {| class="wikitable" style="background-color:#FFFFFF; width: 100%" |
|- | |- | ||
| − | ! colspan="2" | <big>Enemy</big> | + | ! colspan="2" style="width: 18.4%;" | <big>Enemy</big> |
! <big>Info</big> | ! <big>Info</big> | ||
|- | |- | ||
| − | | colspan="2" rowspan="1" | [[File:GMD_boss_rush_busturtle_3.png]] | + | | colspan="2" rowspan="1" | [[File:GMD_boss_rush_busturtle_3.png|center]] |
| style="text-align: left" | | | style="text-align: left" | | ||
'''Appears in:''' Stage 6. | '''Appears in:''' Stage 6. | ||
| Line 2,887: | Line 2,843: | ||
*'''Yellow turrets:''' Accessory. | *'''Yellow turrets:''' Accessory. | ||
*'''Head:''' Treasure, '''Ruby.''' | *'''Head:''' Treasure, '''Ruby.''' | ||
| − | *'''Secret item requirements: Level 3 | + | **'''Secret item requirements: Level 3 shot and magic or higher + Level 5 charged shot or higher.''' |
|- | |- | ||
|} | |} | ||
| Line 2,899: | Line 2,855: | ||
Phase 1= | Phase 1= | ||
| − | {| class="wikitable" style="background-color:#FFFFFF;" | + | {| class="wikitable" style="background-color:#FFFFFF; width: 100%" |
|- | |- | ||
| − | ! colspan="2" | <big>Enemy</big> | + | ! colspan="2" style="width: 18.4%;" | <big>Enemy</big> |
! <big>Info</big> | ! <big>Info</big> | ||
|- | |- | ||
| − | | colspan="2" rowspan="1" | [[File:GMD_boss_rush_dribling_1.png]] | + | | colspan="2" rowspan="1" | [[File:GMD_boss_rush_dribling_1.png|center]] |
| style="text-align: left" | | | style="text-align: left" | | ||
'''Appears in:''' Stage 6. | '''Appears in:''' Stage 6. | ||
| Line 2,915: | Line 2,871: | ||
*'''Red guns in chest:''' Food. | *'''Red guns in chest:''' Food. | ||
*'''Chest turret:''' Accessory, '''Fairy of Earth.''' | *'''Chest turret:''' Accessory, '''Fairy of Earth.''' | ||
| − | *'''Secret item requirement:''' Level 5 charged shot or higher.''' | + | **'''Secret item requirement:''' Level 5 charged shot or higher.''' |
*'''Head:''' Treasure, '''Crystal.''' | *'''Head:''' Treasure, '''Crystal.''' | ||
| − | *'''Secret item requirements: Level 5 charged shot or higher + 4 or more bombs in stock''' | + | **'''Secret item requirements: Level 5 charged shot or higher + 4 or more bombs in stock''' |
|- | |- | ||
|} | |} | ||
| Line 2,925: | Line 2,881: | ||
Phase 2= | Phase 2= | ||
| − | {| class="wikitable" style="background-color:#FFFFFF;" | + | {| class="wikitable" style="background-color:#FFFFFF; width: 100%" |
|- | |- | ||
| − | ! colspan="2" | <big>Enemy</big> | + | ! colspan="2" style="width: 18.4%;" | <big>Enemy</big> |
! <big>Info</big> | ! <big>Info</big> | ||
|- | |- | ||
| − | | colspan="2" rowspan="1" | [[File:GMD_boss_rush_dribling_2.png]] | + | | colspan="2" rowspan="1" | [[File:GMD_boss_rush_dribling_2.png|center]] |
| style="text-align: left" | | | style="text-align: left" | | ||
'''Appears in:''' Stage 6. | '''Appears in:''' Stage 6. | ||
| Line 2,939: | Line 2,895: | ||
*'''Rear magic guns:''' Food. | *'''Rear magic guns:''' Food. | ||
*'''Head:''' Treasure, '''Crystal.''' | *'''Head:''' Treasure, '''Crystal.''' | ||
| − | *'''Secret item requirements: Level 5 charged shot or higher + 4 or more bombs in stock''' | + | **'''Secret item requirements: Level 5 charged shot or higher + 4 or more bombs in stock''' |
|- | |- | ||
|} | |} | ||
| Line 2,949: | Line 2,905: | ||
Phase 1= | Phase 1= | ||
| − | {| class="wikitable" style="background-color:#FFFFFF;" | + | {| class="wikitable" style="background-color:#FFFFFF; width: 100%" |
|- | |- | ||
| − | ! colspan="2" | <big>Enemy</big> | + | ! colspan="2" style="width: 18.4%;" | <big>Enemy</big> |
! <big>Info</big> | ! <big>Info</big> | ||
|- | |- | ||
| − | | colspan="2" rowspan="1" | [[File:GMD_ninja_1.png]] | + | | colspan="2" rowspan="1" | [[File:GMD_ninja_1.png|center|150px]] |
| style="text-align: left" | | | style="text-align: left" | | ||
'''Appears in:''' Stage 6. | '''Appears in:''' Stage 6. | ||
| Line 2,970: | Line 2,926: | ||
Phase 2= | Phase 2= | ||
| − | {| class="wikitable" style="background-color:#FFFFFF;" | + | {| class="wikitable" style="background-color:#FFFFFF; width: 100%" |
|- | |- | ||
| − | ! colspan="2" | <big>Enemy</big> | + | ! colspan="2" style="width: 18.4%;" | <big>Enemy</big> |
! <big>Info</big> | ! <big>Info</big> | ||
|- | |- | ||
| − | | colspan="2" rowspan="1" | [[File:GMD_ninja_2.png]] | + | | colspan="2" rowspan="1" | [[File:GMD_ninja_2.png|center|150px]] |
| style="text-align: left" | | | style="text-align: left" | | ||
'''Appears in:''' Stage 6. | '''Appears in:''' Stage 6. | ||
| Line 2,989: | Line 2,945: | ||
</tabber> | </tabber> | ||
| − | {| class="wikitable" style="background-color:#FFFFFF;" | + | {| class="wikitable" style="background-color:#FFFFFF; width: 100%" |
|- | |- | ||
| − | ! colspan="2" | <big>Enemy</big> | + | ! colspan="2" style="width: 18.4%;" | <big>Enemy</big> |
! <big>Info</big> | ! <big>Info</big> | ||
|- | |- | ||
| − | | colspan="2" rowspan="1" | [[File:GMD_st6_garden.png]] | + | | colspan="2" rowspan="1" | [[File:GMD_st6_garden.png|center]] |
| style="text-align: left" | | | style="text-align: left" | | ||
| − | '''Description:''' A second mid-boss of sorts. The timer before it self- | + | '''Description:''' A second mid-boss of sorts. The timer before it self-destructs is quite lengthy, you can stall this section for power up drops if your shot or magic are underleveled. |
'''Appears in:''' Stage 6. | '''Appears in:''' Stage 6. | ||
| Line 3,019: | Line 2,975: | ||
Phase 1= | Phase 1= | ||
| − | {| class="wikitable" style="background-color:#FFFFFF;" | + | {| class="wikitable" style="background-color:#FFFFFF; width: 100%" |
|- | |- | ||
| − | ! colspan="2" | <big>Enemy</big> | + | ! colspan="2" style="width: 18.4%;" | <big>Enemy</big> |
! <big>Info</big> | ! <big>Info</big> | ||
|- | |- | ||
| − | | colspan="2" rowspan="1" | [[File:GMD_gigafacer_1.png]] | + | | colspan="2" rowspan="1" | [[File:GMD_gigafacer_1.png|center]] |
| style="text-align: left" | | | style="text-align: left" | | ||
'''Appears in:''' Stage 6. | '''Appears in:''' Stage 6. | ||
| Line 3,040: | Line 2,996: | ||
Phase 2= | Phase 2= | ||
| − | {| class="wikitable" style="background-color:#FFFFFF;" | + | {| class="wikitable" style="background-color:#FFFFFF; width: 100%" |
|- | |- | ||
| − | ! colspan="2" | <big>Enemy</big> | + | ! colspan="2" style="width: 18.4%;" | <big>Enemy</big> |
! <big>Info</big> | ! <big>Info</big> | ||
|- | |- | ||
| − | | colspan="2" rowspan="1" | [[File:GMD_gigafacer_2.png]] | + | | colspan="2" rowspan="1" | [[File:GMD_gigafacer_2.png|center]] |
| style="text-align: left" | | | style="text-align: left" | | ||
'''Appears in:''' Stage 6. | '''Appears in:''' Stage 6. | ||
| Line 3,061: | Line 3,017: | ||
Phase 3= | Phase 3= | ||
| − | {| class="wikitable" style="background-color:#FFFFFF;" | + | {| class="wikitable" style="background-color:#FFFFFF; width: 100%" |
|- | |- | ||
| − | ! colspan="2" | <big>Enemy</big> | + | ! colspan="2" style="width: 18.4%;" | <big>Enemy</big> |
! <big>Info</big> | ! <big>Info</big> | ||
|- | |- | ||
| − | | colspan="2" rowspan="1" | [[File:GMD_gigafacer_3.png]] | + | | colspan="2" rowspan="1" | [[File:GMD_gigafacer_3.png|center]] |
| style="text-align: left" | | | style="text-align: left" | | ||
'''Appears in:''' Stage 6. | '''Appears in:''' Stage 6. | ||
| Line 3,082: | Line 3,038: | ||
Phase 4= | Phase 4= | ||
| − | {| class="wikitable" style="background-color:#FFFFFF;" | + | {| class="wikitable" style="background-color:#FFFFFF; width: 100%" |
|- | |- | ||
| − | ! colspan="2" | <big>Enemy</big> | + | ! colspan="2" style="width: 18.4%;" | <big>Enemy</big> |
! <big>Info</big> | ! <big>Info</big> | ||
|- | |- | ||
| − | | colspan="2" rowspan="1" | [[File:GMD_gigafacer_4.png]] | + | | colspan="2" rowspan="1" | [[File:GMD_gigafacer_4.png|center]] |
| style="text-align: left" | | | style="text-align: left" | | ||
'''Appears in:''' Stage 6. | '''Appears in:''' Stage 6. | ||
| Line 3,099: | Line 3,055: | ||
|} | |} | ||
| − | {| class="wikitable" style="background-color:#FFFFFF;" | + | {| class="wikitable" style="background-color:#FFFFFF; width: 100%" |
|- | |- | ||
| − | ! colspan="2" | <big>Enemy</big> | + | ! colspan="2" style="width: 18.4%;" | <big>Enemy</big> |
! <big>Info</big> | ! <big>Info</big> | ||
|- | |- | ||
| − | | colspan="2" rowspan="1" | [[File:GMD_gigafacer_hands.png]] | + | | colspan="2" rowspan="1" | [[File:GMD_gigafacer_hands.png|center]] |
| style="text-align: left" | | | style="text-align: left" | | ||
'''Appears in:''' Stage 6. | '''Appears in:''' Stage 6. | ||
Revision as of 19:11, 16 March 2023
This page lists all of the enemies in Great Mahou Daisakusen and the items they drop once destroyed, knowing what items each enemy has and where to find them is essential for scoring.
Every enemy is listed in order of appearance, only present once per stage to avoid repeats, with a few exceptions.
Contents
Stage 1 Enemies
| Enemy | Info | |
|---|---|---|
|
Description: Zako enemy. Its bullets can be sealed. Appears in: Every stage. Polarity: None. Drops: Accessory. | ||
| Enemy | Info | |
|---|---|---|
|
Description: Fires 3-Way aimed magic bullets, can be sealed. Appears in: Every stage. Polarity: Red or Blue. Drops: Staff. | ||
| Enemy | Info | |
|---|---|---|
|
Description: Aims at the player and fires single bullets. Appears in: Stage 1, 3, 4, and 5. Polarity: None. Drops:
| ||
| Enemy | Info | |
|---|---|---|
|
Description: Frequently used as a "filler" enemy after a big enemy has been taken out, can be lured off-screen by moving upwards while sealing its bullets. Appears in: Stage 1, 2, 3, 4 and 6. Polarity: None. Drops: Food. | ||
| Enemy | Info | |
|---|---|---|
|
Description: Its wings fire aimed twin bullets while the center fires magic bullets forward. Appears in: Stage 1 and 2. Polarity: Red or Blue. Drops:
| ||
| Enemy | Info | |
|---|---|---|
|
Description: Completely harmless to the player. Appears in: Stage 1, 4 and 5. Polarity: None. Drops: Food, Pinwheel. Secret item requirement: Empty bomb gauge. Note: While there are multiple versions of this enemy with different behavior (e.g. fighting a civilian, running away) and they all drop the Food item, the Pinwheel can only be obtained from the one coming out of the woods at the beginning of stage 1. | ||
| Enemy | Info | |
|---|---|---|
|
Description: Appears from the ground, fires once if the player is far away enough. Appears in: Stage 1. Polarity: None. Drops: Axe. | ||
| Enemy | Info | |
|---|---|---|
|
Description: A large tank with several turrets to destroy. Appears in: Stage 1, 3, 4 and 5. Polarity: None. Drops:
| ||
| Enemy | Info | |
|---|---|---|
|
Description: Its spinning turret fires bullets in several angles. Appears in: Stage 1, 4 and 5. Polarity: None. Drops:
| ||
| Enemy | Info | |
|---|---|---|
|
Description: Fires very slow bullets before releasing a barrage of aimed missiles. Appears in: Stage 1, 2 and 6. Polarity: None. Drops: Accessory. | ||
| Enemy | Info | |
|---|---|---|
|
Description: Aims at the player and fires twin bullets. Appears in: Stage 1, 3, 4 and 5. Polarity: None. Drops:
| ||
| Enemy | Info | |
|---|---|---|
|
Description: Performs a rocket punch. Appears in: Stage 1, 2 and 6. Polarity: None. Drops:
| ||
Stage 1 Boss
| Enemy | Info | |
|---|---|---|
|
Appears in: Stage 1. Polarity: Red, none (everything but the head, the large turret and small red guns). Drops:
| ||
| Enemy | Info | |
|---|---|---|
|
Appears in: Stage 1. Polarity: Red, none (everything but the head and the large turret). Drops:
| ||
Stage 2 Enemies
| Enemy | Info | |
|---|---|---|
|
Description: Zako enemy, depending on the current rank it will fire 2-Way spreads or 3-Way spreads. Appears in: Stage 2 and 6. Polarity: None. Drops: Axe. | ||
| Enemy | Info | |
|---|---|---|
|
Description: Aims at the player and fires single bullets. Appears in: Stage 2. Polarity: None. Drops:
| ||
| Enemy | Info | |
|---|---|---|
|
Description: Fires bullets aimed around and directly at the player. Appears in: Stage 2, 5 and 6. Polarity: None. Drops:
| ||
| Enemy | Info | |
|---|---|---|
|
Description: Tries to collide with the player, its turret might fire along the way. Appears in: Stage 2 and 6. Polarity: None. Drops: Sword. | ||
| Enemy | Info | |
|---|---|---|
|
Description: Zako enemy. Its bullets can be sealed. Appears in: Every stage. Polarity: None. Drops: Accessory. | ||
| Enemy | Info | |
|---|---|---|
|
Description: Fires 3-Way aimed magic bullets, can be sealed. Appears in: Every stage. Polarity: Red or Blue. Drops: Staff. | ||
| Enemy | Info | |
|---|---|---|
|
Description: Frequently used as a "filler" enemy after a big enemy has been taken out, can be lured off-screen by moving upwards while sealing its bullets. Appears in: Stage 1, 2, 3, 4 and 6. Polarity: None. Drops: Food. | ||
| Enemy | Info | |
|---|---|---|
|
Description: Its wings fire aimed twin bullets while the center fires magic bullets forward. Appears in: Stage 1 and 2. Polarity: Red or Blue. Drops:
| ||
| Enemy | Info | |
|---|---|---|
|
Description: Fires several spreads. Appears in: Stage 2 and 4. Polarity: None. Drops:
| ||
| Enemy | Info | |
|---|---|---|
|
Description: A carrier ship with several destructible parts and enemies on top of it. Appears in: Stage 2 and 6. Polarity: Red, none (small turrets and tanks). Drops:
| ||
| Enemy | Info | |
|---|---|---|
|
Description: The mid-boss of Stage 2. The timer before it escapes is very short so try to destroy it as soon as possible. Appears in: Stage 2. Polarity: Red or Blue. Drops:
| ||
| Enemy | Info | |
|---|---|---|
|
Description: Aims at the player and fires twin bullets. Appears in: Stage 2 and 6. Polarity: None. Drops:
| ||
| Enemy | Info | |
|---|---|---|
|
Description: Its spinning turret fires bullets in several angles. Appears in: Stage 2 and 6. Polarity: None. Drops:
| ||
| Enemy | Info | |
|---|---|---|
|
Description: Dives down, its horizontal movement is based on the player's position. Appears in: Stage 2, 3, 5 and 6. Polarity: None. Drops: Helmet. | ||
| Enemy | Info | |
|---|---|---|
|
Description: Fires very slow bullets before releasing a barrage of aimed missiles. Appears in: Stage 1, 2 and 6. Polarity: None. Drops: Accessory. | ||
| Enemy | Info | |
|---|---|---|
|
Description: Performs a rocket punch. Appears in: Stage 1, 2 and 6. Polarity: None. Drops:
| ||
| Enemy | Info | |
|---|---|---|
|
Description: Fires two homing bullets. Appears in: Stage 2, 4, 5 and 6. Polarity: None. Drops: Ring. | ||
Stage 2 Boss
| Enemy | Info | |
|---|---|---|
|
Appears in: Stage 2. Polarity: Blue. Drops:
| ||
| Enemy | Info | |
|---|---|---|
|
Appears in: Stage 2. Polarity: Blue. Drops:
| ||
Stage 3 Enemies
| Enemy | Info | |
|---|---|---|
|
Description: Zako enemy. Its bullets can be sealed. Appears in: Every stage. Polarity: None. Drops: Accessory. | ||
| Enemy | Info | |
|---|---|---|
|
Description: Dives down, its horizontal movement is based on the player's position. Appears in: Stage 2, 3, 5 and 6. Polarity: None. Drops: Helmet. | ||
| Enemy | Info | |
|---|---|---|
|
Description: Its turrets fire overlapping bullets while the cannon fires small spreads. Appears in: Stage 3 and 4. Polarity: None. Drops:
| ||
| Enemy | Info | |
|---|---|---|
|
Description: Fires 3-Way aimed magic bullets, can be sealed. Appears in: Every stage. Polarity: Red or Blue. Drops: Staff. | ||
| Enemy | Info | |
|---|---|---|
|
Description: Frequently used as a "filler" enemy after a big enemy has been taken out, can be lured off-screen by moving upwards while sealing its bullets. Appears in: Stage 1, 2, 3, 4 and 6. Polarity: None. Drops: Food. | ||
| Enemy | Info | |
|---|---|---|
|
Description: Its wings fire aimed and static bullets while the center fires 3-Way magic bullets. Appears in: Stage 3 and 6. Polarity: Red or Blue. Drops:
| ||
| Enemy | Info | |
|---|---|---|
|
Description: Starts firing fast spreads when low enough on the screen. This enemy is extremely resilient if you try to take it down with its own polarity, always use blue. Appears in: Stage 3. Polarity: Red. Drops: Sword, Mobichan. Secret item requirement: Empty bomb gauge. | ||
| Enemy | Info | |
|---|---|---|
|
Description: Aims at the player and fires twin bullets. Appears in: Stage 1, 3, 4 and 5. Polarity: None. Drops:
| ||
| Enemy | Info | |
|---|---|---|
|
Description: A very small turret that aims at the player and fires single bullets. Appears in: Stage 3, 5 and 6. Polarity: None. Drops: Food. | ||
| Enemy | Info | |
|---|---|---|
|
Description: Aims at the player and fires single bullets. Appears in: Stage 1, 3, 4, and 5. Polarity: None. Drops:
| ||
| Enemy | Info | |
|---|---|---|
|
Description: Locks-on to the player's position and fires a large laser. Appears in: Stage 3 and 5. Polarity: Red or Blue. Drops: Sword. | ||
| Enemy | Info | |
|---|---|---|
|
Description: Fires magic bullets in an enclosing pattern followed by a mixture of aimed and static patterns. Appears in: Stage 3, 4 and 6. Polarity: Red or Blue. Drops: Staff. | ||
| Enemy | Info | |
|---|---|---|
|
Description: A dragon chilling amongst all the havoc, non-threatening. Appears in: Stage 3. Polarity: Red. Drops: Armor. | ||
| Enemy | Info | |
|---|---|---|
|
Description: A large tank with several turrets to destroy. Appears in: Stage 1, 3, 4 and 5. Polarity: None. Drops:
| ||
| Enemy | Info | |
|---|---|---|
|
Description: A large turret that aims at the player and fires single bullets. Appears in: Stage 3 and 5. Polarity: None. Drops: Sword. | ||
| Enemy | Info | |
|---|---|---|
|
Description: A large turret that aims at the player and fires twin bullets. Appears in: Stage 3, 5 and 6. Polarity: None. Drops: Ring. | ||
| Enemy | Info | |
|---|---|---|
|
Description: The mid-boss of Stage 3. Has quite a lot of destructible parts but none of them are particularly threatening. Most importantly, this serves as the last opportunity to finish item sets such as the Staff, Accessory, Armor and Helmet. Appears in: Stage 3. Polarity: Red, none (everything but the cockpit and its core). Drops:
| ||
Stage 3 Boss
| Enemy | Info | |
|---|---|---|
|
Appears in: Stage 3. Polarity: None. Drops:
| ||
Stage 4 Enemies
| Enemy | Info | |
|---|---|---|
|
Description: Zako enemy. Its bullets can be sealed. Appears in: Every stage. Polarity: None. Drops: Accessory. | ||
| Enemy | Info | |
|---|---|---|
|
Description: Flies down and launches its drill along the way, the drill will release a large spread of bullets when destroyed. Appears in: Stage 4 and 6. Polarity: None. Drops:
| ||
| Enemy | Info | |
|---|---|---|
|
Description: Drops a large coin power up when destroyed normally. Non-threatening enemy, but essential for scoring. Appears in: Stage 4. Polarity: None. Drops: Uncollected items from regular sets, items from the Jewel and Capcom sets. Secret item requirement: Have a x12 multiplier (all regular sets completed). | ||
| Enemy | Info | |
|---|---|---|
|
Description: Living creature inside a treasure chest, remains dormant until being attacked, The sealing range is fairly generous and it can't shoot upwards, use that to your advantage. Appears in: Stage 4. Polarity: None. Drops: Axe, Legend Shield. Secret item requirements: Have any of the "armor" item sets (Shield, Armor or Helmet) completed + 4 or more bombs in stock. | ||
| Enemy | Info | |
|---|---|---|
|
Description: Aims at the player and fires single bullets. Appears in: Stage 1, 3, 4, and 5. Polarity: None. Drops:
| ||
| Enemy | Info | |
|---|---|---|
|
Description: Aims at the player and fires twin bullets. Appears in: Stage 1, 3, 4 and 5. Polarity: None. Drops:
| ||
| Enemy | Info | |
|---|---|---|
|
Description: Large ship with a considerable amount of HP. Fires very dense spread, dispose of as soon as possible. Appears in: Stage 4 and 6. Polarity: None. Drops:
Note: The left shield can be destroyed and will drop its corresponding item but the right one does not, possibly a bug. | ||
| Enemy | Info | |
|---|---|---|
|
Description: Fires 3-Way aimed magic bullets, can be sealed. Appears in: Every stage. Polarity: Red or Blue. Drops: Staff. | ||
| Enemy | Info | |
|---|---|---|
|
Description: Its spinning turret fires bullets in several angles. Appears in: Stage 1, 4 and 5. Polarity: None. Drops:
| ||
| Enemy | Info | |
|---|---|---|
|
Description: Its turrets fire overlapping bullets while the cannon fires a very fast line of bullets. Appears in: Stage 4 and 5. Polarity: None. Drops:
| ||
| Enemy | Info | |
|---|---|---|
|
Description: Frequently used as a "filler" enemy after a big enemy has been taken out, can be lured off-screen by moving upwards while sealing its bullets. Appears in: Stage 1, 2, 3, 4 and 6. Polarity: None. Drops: Food. | ||
| Enemy | Info | |
|---|---|---|
|
Description: A truck with a lot of turrets blocking the path, despite the looks it has low HP. Appears in: Stage 4. Polarity: None. Drops:
| ||
| Enemy | Info | |
|---|---|---|
|
Description: Fires magic bullets in an enclosing pattern followed by a mixture of aimed and static patterns. Appears in: Stage 3, 4 and 6. Polarity: Red or Blue. Drops: Staff. | ||
| Enemy | Info | |
|---|---|---|
|
Description: A large tank with several turrets to destroy. Appears in: Stage 1, 3, 4 and 5. Polarity: None. Drops:
| ||
| Enemy | Info | |
|---|---|---|
|
Description: Aims at the player and fires missiles. Appears in: Stage 4 and 5. Polarity: None. Drops:
| ||
| Enemy | Info | |
|---|---|---|
|
Description: Fires bullets in an enclosing pattern and creates clones of itself. Appears in: Stage 4 and 6. Polarity: Red or Blue. Drops: Armor. | ||
| Enemy | Info | |
|---|---|---|
|
Description: Unlike the original beholder this one doesn't attack and leaves shortly after, releases magic bullets when destroyed. Appears in: Stage 4 and 6. Polarity: Red or Blue. Drops: Axe. | ||
| Enemy | Info | |
|---|---|---|
|
Description: Fires several spreads. Appears in: Stage 2 and 4. Polarity: None. Drops:
| ||
| Enemy | Info | |
|---|---|---|
|
Description: Aims at the player and fires single bullets. Appears in: Stage 4. Polarity: None. Drops:
| ||
| Enemy | Info | |
|---|---|---|
|
Description: Fires a laser. Appears in: Stage 4. Polarity: Blue. Drops: Staff, Holstein. Secret item requirement: Empty bomb gauge. | ||
| Enemy | Info | |
|---|---|---|
|
Description: Its spinning turret fires bullets in several angles. Appears in: Stage 4. Polarity: None. Drops:
| ||
| Enemy | Info | |
|---|---|---|
|
Description: Aims at the player and fires twin bullets. Appears in: Stage 4. Polarity: None. Drops:
| ||
| Enemy | Info | |
|---|---|---|
|
Description: Drops several bombs and leaves, the bombs will explode on their own if not destroyed for a while. Appears in: Stage 4, 5 and 6. Polarity: None. Drops: Shield. | ||
| Enemy | Info | |
|---|---|---|
|
Description: Fires two homing bullets. Appears in: Stage 2, 4, 5 and 6. Polarity: None. Drops: Ring. | ||
| Enemy | Info | |
|---|---|---|
|
Description: Aims at the player and fires missiles. Appears in: Stage 4. Polarity: None. Drops:
| ||
| Enemy | Info | |
|---|---|---|
|
Description: Its turrets fire overlapping bullets while the cannon fires small spreads. Appears in: Stage 3 and 4. Polarity: None. Drops:
| ||
| Enemy | Info | |
|---|---|---|
|
Description: Completely harmless to the player. Appears in: Stage 1, 4 and 5. Polarity: None. Drops: Food. | ||
Stage 4 Boss
| Enemy | Info | |
|---|---|---|
|
Appears in: Stage 4. Polarity: Blue, none (guns and small spiders). Drops:
| ||
| Enemy | Info | |
|---|---|---|
|
Appears in: Stage 4. Polarity: Blue, none (guns and small spiders). Drops:
| ||
Stage 5 Enemies
| Enemy | Info | |
|---|---|---|
|
Description: Train carrying a wagon with many turrets and tanks listed below. Appears in: Stage 5. Polarity: None. Drops: Sword. | ||
| Enemy | Info | |
|---|---|---|
|
Description: Zako enemy. Its bullets can be sealed. Appears in: Every stage. Polarity: None. Drops: Accessory. | ||
| Enemy | Info | |
|---|---|---|
|
Description: Aims at the player and fires single bullets. Appears in: Stage 1, 3, 4, and 5. Polarity: None. Drops:
| ||
| Enemy | Info | |
|---|---|---|
|
Description: Aims at the player and fires twin bullets. Appears in: Stage 1, 3, 4 and 5. Polarity: None. Drops:
| ||
| Enemy | Info | |
|---|---|---|
|
Description: Its spinning turret fires bullets in several angles. Appears in: Stage 1, 4 and 5. Polarity: None. Drops:
| ||
| Enemy | Info | |
|---|---|---|
|
Description: Aims at the player and fires missiles. Appears in: Stage 4 and 5. Polarity: None. Drops:
| ||
| Enemy | Info | |
|---|---|---|
|
Description: A large turret that aims at the player and fires twin bullets. Appears in: Stage 3, 5 and 6. Polarity: None. Drops: Ring. | ||
| Enemy | Info | |
|---|---|---|
|
Description: Dives down, its horizontal movement is based on the player's position. Appears in: Stage 2, 3, 5 and 6. Polarity: None. Drops: Helmet. | ||
| Enemy | Info | |
|---|---|---|
|
Description: Fires 3-Way aimed magic bullets, can be sealed. Appears in: Every stage. Polarity: Red or Blue. Drops: Staff. | ||
| Enemy | Info | |
|---|---|---|
|
Description: A small turrets that aims at the player. Despite the weak appearance, it fires a fast 5-way shot. Appears in: Stage 5. Polarity: None. Drops: Food. | ||
| Enemy | Info | |
|---|---|---|
|
Description: A very small turret that aims at the player and fires single bullets. Appears in: Stage 3, 5 and 6. Polarity: None. Drops: Food. | ||
| Enemy | Info | |
|---|---|---|
|
Description: A large turret that aims at the player and fires single bullets. Appears in: Stage 3 and 5. Polarity: None. Drops: Sword. | ||
| Enemy | Info | |
|---|---|---|
|
Description: A large tank with several turrets to destroy. Appears in: Stage 1, 2, 3, 4 and 5. Polarity: None. Drops:
| ||
| Enemy | Info | |
|---|---|---|
|
Description: Fires bullets aimed around and directly at the player. Appears in: Stage 2, 5 and 6. Polarity: None. Drops:
| ||
| Enemy | Info | |
|---|---|---|
|
Description: Locks-on to the player's position and fires a large laser. Appears in: Stage 3 and 5. Polarity: Red or Blue. Drops: Sword. | ||
| Enemy | Info | |
|---|---|---|
|
Description: Stage decoration. Appears in: Stage 5. Polarity: None. Drops: Food. | ||
| Enemy | Info | |
|---|---|---|
|
Description Slow-moving but fires several fast aimed bullets. Appears in: Stage 5. Polarity: None. Drops:
| ||
| Enemy | Info | |
|---|---|---|
|
Description: Its turrets fire overlapping bullets while the cannon fires a very fast line of bullets. Appears in: Stage 4 and 5. Polarity: None. Drops:
| ||
| Enemy | Info | |
|---|---|---|
|
Description: Stage decoration. Appears in: Stage 5. Polarity: None. Drops: Food. | ||
| Enemy | Info | |
|---|---|---|
|
Description: An inactive version of Busturtle, only the twin turrets can attack. Appears in: Stage 5. Polarity: None. Drops:
| ||
| Enemy | Info | |
|---|---|---|
|
Description: A large tank with several turrets to destroy. Appears in: Stage 1, 3, 4 and 5. Polarity: None. Drops:
| ||
| Enemy | Info | |
|---|---|---|
|
Description: Stationary ship. The last 4 ones will shoot very fast bullets when you're nearby, destroy as quick as you can. Appears in: Stage 5. Polarity: None. Drops: Sword. Note: Different from the one in stage 6. | ||
| Enemy | Info | |
|---|---|---|
|
Description: Completely harmless to the player. Appears in: Stage 1, 4 and 5. Polarity: None. Drops: Food. | ||
| Enemy | Info | |
|---|---|---|
|
Description: A large tank with several turrets to destroy. Appears in: Stage 1, 2, 3, 4 and 5. Polarity: None. Drops:
| ||
| Enemy | Info | |
|---|---|---|
|
Description: A large tank with several turrets to destroy. Appears in: Stage 1, 2, 3, 4 and 5. Polarity: None. Drops:
| ||
| Enemy | Info | |
|---|---|---|
|
Description: A large tank with several turrets to destroy. Appears in: Stage 1, 2, 3, 4 and 5. Polarity: None. Drops:
| ||
| Enemy | Info | |
|---|---|---|
|
Description: Stage decoration. Breaking it will let all the baby dragons inside free. Appears in: Stage 5. Polarity: None. Drops: Shield. | ||
| Enemy | Info | |
|---|---|---|
|
Description: Breathes fire. Appears in: Stage 5 and 6. Polarity: Red or Blue. Drops: Accessory. | ||
| Enemy | Info | |
|---|---|---|
|
Description: Drops several bombs and leaves, the bombs will explode on their own if not destroyed for a while. Appears in: Stage 4, 5 and 6. Polarity: None. Drops: Shield. | ||
| Enemy | Info | |
|---|---|---|
|
Description: Fires two homing bullets. Appears in: Stage 2, 4, 5 and 6. Polarity: None. Drops: Ring. | ||
| Enemy | Info | |
|---|---|---|
|
Description: A different version of the stage 2 mid-boss. Has higher HP and more dangerous attacks. Appears in: Stage 5. Polarity: Red. Drops:
| ||
| Enemy | Info | |
|---|---|---|
|
Description: A different version of the stage 2 mid-boss. Has higher HP and more dangerous attacks. Appears in: Stage 5. Polarity: Blue. Drops:
| ||
Stage 5 Boss
| Enemy | Info | |
|---|---|---|
|
Appears in: Stage 5. Polarity: Red and Blue. Drops:
| ||
| Enemy | Info | |
|---|---|---|
|
Appears in: Stage 5. Polarity: Red and Blue. Drops:
Note: When this phase starts sometimes the Cockpit and right side will be imbued in blue polarity, whether this happens or not is random. | ||
| Enemy | Info | |
|---|---|---|
|
Appears in: Stage 5. Polarity: Red and Blue. Drops:
Note: When this phase starts sometimes the Cockpit and right side will be imbued in blue polarity, whether this happens or not is random. | ||
Stage 6 Enemies
| Enemy | Info | |
|---|---|---|
|
Description: Zako enemy. Its bullets can be sealed. Appears in: Every stage. Polarity: None. Drops: Accessory. | ||
| Enemy | Info | |
|---|---|---|
|
Description: Fires very slow bullets before releasing a barrage of aimed missiles. Appears in: Stage 1, 2 and 6. Polarity: None. Drops: Accessory. | ||
| Enemy | Info | |
|---|---|---|
|
Description: Performs a rocket punch. Appears in: Stage 1, 2 and 6. Polarity: None. Drops:
| ||
| Enemy | Info | |
|---|---|---|
|
Description: Drops several bombs and leaves, the bombs will explode on their own if not destroyed for a while. Appears in: Stage 4, 5 and 6. Polarity: None. Drops: Shield. | ||
| Enemy | Info | |
|---|---|---|
|
Description: Fires two homing bullets. Appears in: Stage 2, 4, 5 and 6. Polarity: None. Drops: Ring. | ||
| Enemy | Info | |
|---|---|---|
|
Description: Dives down, its horizontal movement is based on the player's position. Appears in: Stage 2, 3, 5 and 6. Polarity: None. Drops: Helmet. | ||
| Enemy | Info | |
|---|---|---|
|
Description: Fires bullets aimed around and directly at the player. Appears in: Stage 2, 5 and 6. Polarity: None. Drops:
| ||
| Enemy | Info | |
|---|---|---|
|
Description: Fires magic bullets in an enclosing pattern followed by a mixture of aimed and static patterns. Appears in: Stage 3, 4 and 6. Polarity: Red or Blue. Drops: Staff. | ||
| Enemy | Info | |
|---|---|---|
|
Description: Large ship with a considerable amount of HP. Fires very dense spread, dispose of as soon as possible. Appears in: Stage 4 and 6. Polarity: None. Drops:
Note: The left shield can be destroyed and will drop its corresponding item but the right one does not, possibly a bug. | ||
| Enemy | Info | |
|---|---|---|
|
Description: Tries to collide with the player, its turret might fire along the way. Appears in: Stage 2 and 6. Polarity: None. Drops: Sword. | ||
| Enemy | Info | |
|---|---|---|
|
Description: Zako enemy, depending on the current rank it will fire 2-Way spreads or 3-Way spreads. Appears in: Stage 2 and 6. Polarity: None. Drops: Axe. | ||
| Enemy | Info | |
|---|---|---|
|
Description: Aims at the player and fires missiles. Appears in: Stage 6. Polarity: None. Drops:
| ||
| Enemy | Info | |
|---|---|---|
|
Description: Its spinning turret fires bullets in several angles. Appears in: Stage 2 and 6. Polarity: None. Drops:
| ||
| Enemy | Info | |
|---|---|---|
|
Description: Fires 3-Way aimed magic bullets, can be sealed. Appears in: Every stage. Polarity: Red or Blue. Drops: Staff. | ||
| Enemy | Info | |
|---|---|---|
|
Description: Breathes fire. Appears in: Stage 5 and 6. Polarity: Red or Blue. Drops: Accessory. | ||
| Enemy | Info | |
|---|---|---|
|
Description: A carrier ship with several destructible parts and enemies on top of it. Appears in: Stage 2 and 6. Polarity: Red, none (small turrets and tanks). Drops:
| ||
| Enemy | Info | |
|---|---|---|
|
Description: Fires several very slow bullets followed by fast spreads. Appears in: Stage 6. Polarity: None. Drops:
| ||
| Enemy | Info | |
|---|---|---|
|
Description: Frequently used as a "filler" enemy after a big enemy has been taken out, can be lured off-screen by moving upwards while sealing its bullets. Appears in: Stage 1, 2, 3, 4 and 6. Polarity: None. Drops: Food. | ||
| Enemy | Info | |
|---|---|---|
|
Description: Aims at the player and fires twin bullets. Appears in: Stage 2 and 6. Polarity: None. Drops:
| ||
| Enemy | Info | |
|---|---|---|
|
Description: Flies down and launches its drill along the way, the drill will release a large spread of bullets when destroyed. Appears in: Stage 4 and 6. Polarity: None. Drops:
| ||
| Enemy | Info | |
|---|---|---|
|
Description: Fires bullets in an enclosing pattern and creates clones of itself. Appears in: Stage 4 and 6. Polarity: Red or Blue. Drops: Armor. | ||
| Enemy | Info | |
|---|---|---|
|
Description: Unlike the original beholder this one doesn't attack and leaves shortly after, releases magic bullets when destroyed. Appears in: Stage 4 and 6. Polarity: Red or Blue. Drops: Axe. | ||
| Enemy | Info | |
|---|---|---|
|
Description: Its wings fire aimed and static bullets while the center fires 3-Way magic bullets. Appears in: Stage 3 and 6. Polarity: Red or Blue. Drops:
| ||
| Enemy | Info | |
|---|---|---|
|
Description: The stage 6 mid-boss. The spinning turrets will quickly flood the screen with bullets if not destroyed fast enough. The mid-boss itself can be deal with easily by moving from one lane to the other when it fires its aimed bullets. Appears in: Stage 6. Polarity: None. Drops:
Note: This is the only enemy in the game that holds a secret item with no requirement needed. It'll always drop the Legend Armor no matter what. | ||
| Enemy | Info | |
|---|---|---|
|
Appears in: Stage 6. Polarity: Red, none (everything but the head, the large turret and small red guns). Drops:
| ||
| Enemy | Info | |
|---|---|---|
|
Appears in: Stage 6. Polarity: Red, none (everything but the head and the large turret). Drops:
| ||
| Enemy | Info | |
|---|---|---|
|
Appears in: Stage 6. Polarity: None. Drops:
| ||
| Enemy | Info | |
|---|---|---|
|
Appears in: Stage 6. Polarity: None. Drops: Sword, Fairy of Fire. Secret item requirement: Level 5 charged shot or higher. | ||
| Enemy | Info | |
|---|---|---|
|
Description: A second mid-boss of sorts. The timer before it self-destructs is quite lengthy, you can stall this section for power up drops if your shot or magic are underleveled. Appears in: Stage 6. Polarity: None. Drops:
| ||
Stage 6 Boss
| Enemy | Info | |
|---|---|---|
|
Appears in: Stage 6. Polarity: None. Drops: Treasure, Fairy of Water. Secret item requirement: Level 5 charged shot or higher. | ||
| Enemy | Info | |
|---|---|---|
|
Appears in: Stage 6. Polarity: None. Drops: Ring, Fairy of Wind. Secret item requirement: Level 5 charged shot or higher. | ||
| Enemy | Info | |
|---|---|---|
|
Appears in: Stage 6. Polarity: None. Drops: Sword, Pearl. Secret item requirement: 4 or more bombs in stock. | ||
